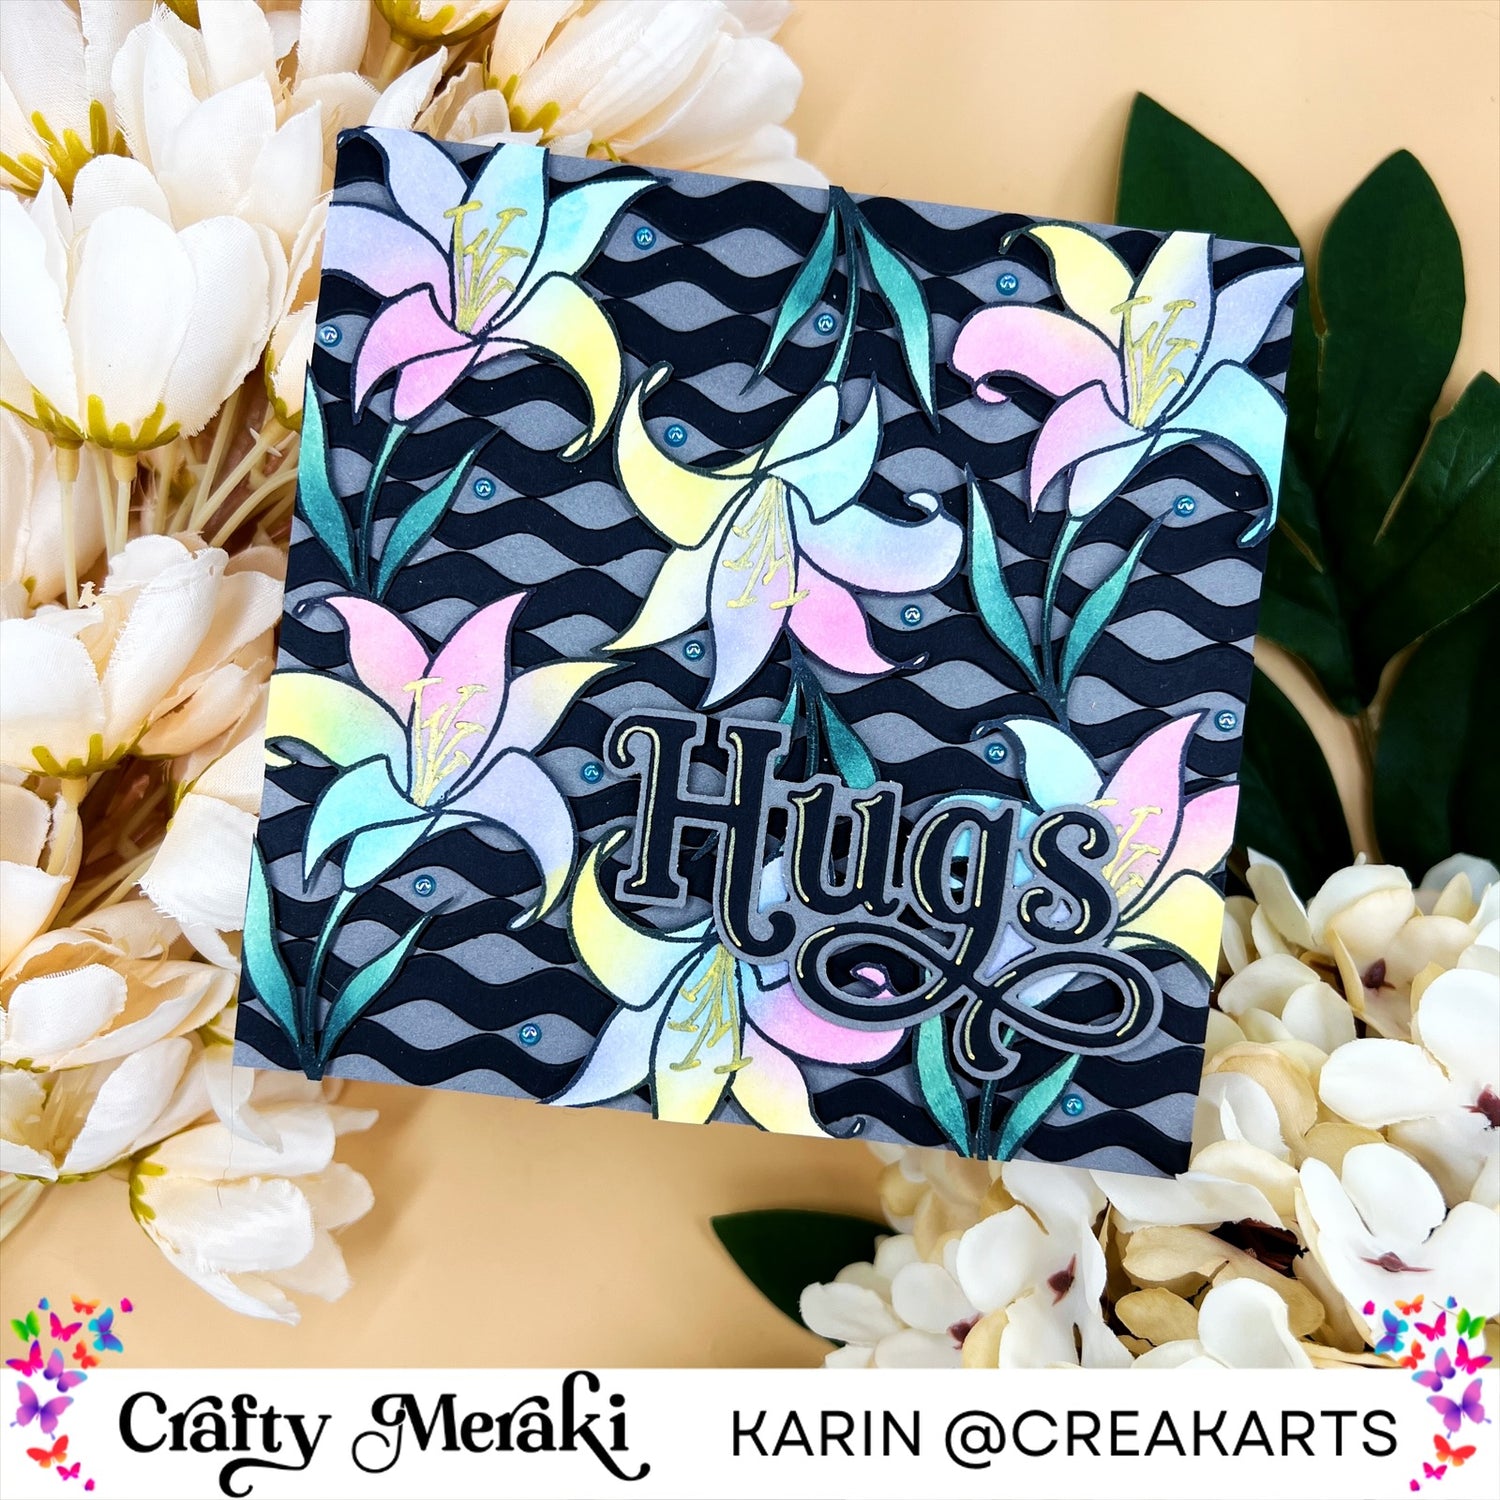
Hi crafty friends! It’s time for me (Karin) again to share a card on the blog. This time I chose for patterns on a card and I’m going to show you how I created these patterns.
I start by stamping one of the lilies of the luxe lilies stamp set 6 times onto heavy white cardstock using memento ink in black. After stamping I’m going to fussycut them because I don’t want a white border around the stamped image. Once cut I place them in the pattern I want to have on my card, on my sticky mat. Now it’s time to colour the lilies, I’m going to use small blending brushes and the following colours:
From pinkfresh studio - Lemon whip, sheer fresia, wisteria, waterfall, sparkling rose.
From concord&9th - eucalyptus, rainforest.
I’m adding the colours one at a time and I place them random on the flowers. Only the green hues aren’t random because I use these for the leaves. I blend the edges of the colours together to get a nice flow between the colours. I give the stems of the lilies a golden touch with a gold gel pen.


The next step is making the background. I’m going to use a mid grey tone as the background. I’m cutting a piece of grey paper in the same size as my card base 13x13cm. And glue it onto the card base using double sided tape. To make a cool pattern on the background I use the biggest and middle die of the strip suit wavy wonder para-dies. I need 8 strips of the middle size and 16 strips of the biggest size. I’m cutting them out of black cardstock. I want to add dimension to the background so I’m going to glue two of the biggest sizes on top of eachother, I do this with every big strips. So eventually I have 8 of the biggest wave strips and 8 of the middle wave strips. I start by glueing a big strip on top of the card. The smaller one is next and as you can see on the picture I’m going to place it contra of the bigger strip. I’m repeating these steps until the whole background is filled. If you use the same parameters you’ll notice there’s a little grey edge now, I just cut it off. So at the end the length of the card is a little less than 13cm.

Now it’s time to add the lilies. I place them on the card in the pattern I want. Now I take a piece of press’nseal and place it on the lilies so the pattern will stay in place for the double sided foam tape and it makes it so easy to place it back on the card base this way. I’m using 1mm thick foam tape for the lilies.

I already like the way the card looks but there’s missing a thing, a sentiment of course. I’m using the meraki moments hugs para-dies for this card. There are three layers to this die but I’m only using two of them. I cut the smallest die out of black cardstock and the middle die out of the same grey cardstock as the background. I’m cutting the middle die twice for sturdiness so it’ll be much easier to glue the sentiment to the background. With a gold gel pen I add some details to the letters. I place the sentiment with tacky glue on the card.

And now I feel there’s still missing something so I get my meraki azure opal gems and place a bunch of the smallest embellishments onto the background of the card. And that’s it! Now we have patterns and layers, colour and shine on one card.

Thanks for stopping by. Hope I could inspire you in a way with this card. Have a lovely Tuesday! Hope to see you next week again.
~ Karin


Leave a comment
This site is protected by hCaptcha and the hCaptcha Privacy Policy and Terms of Service apply.