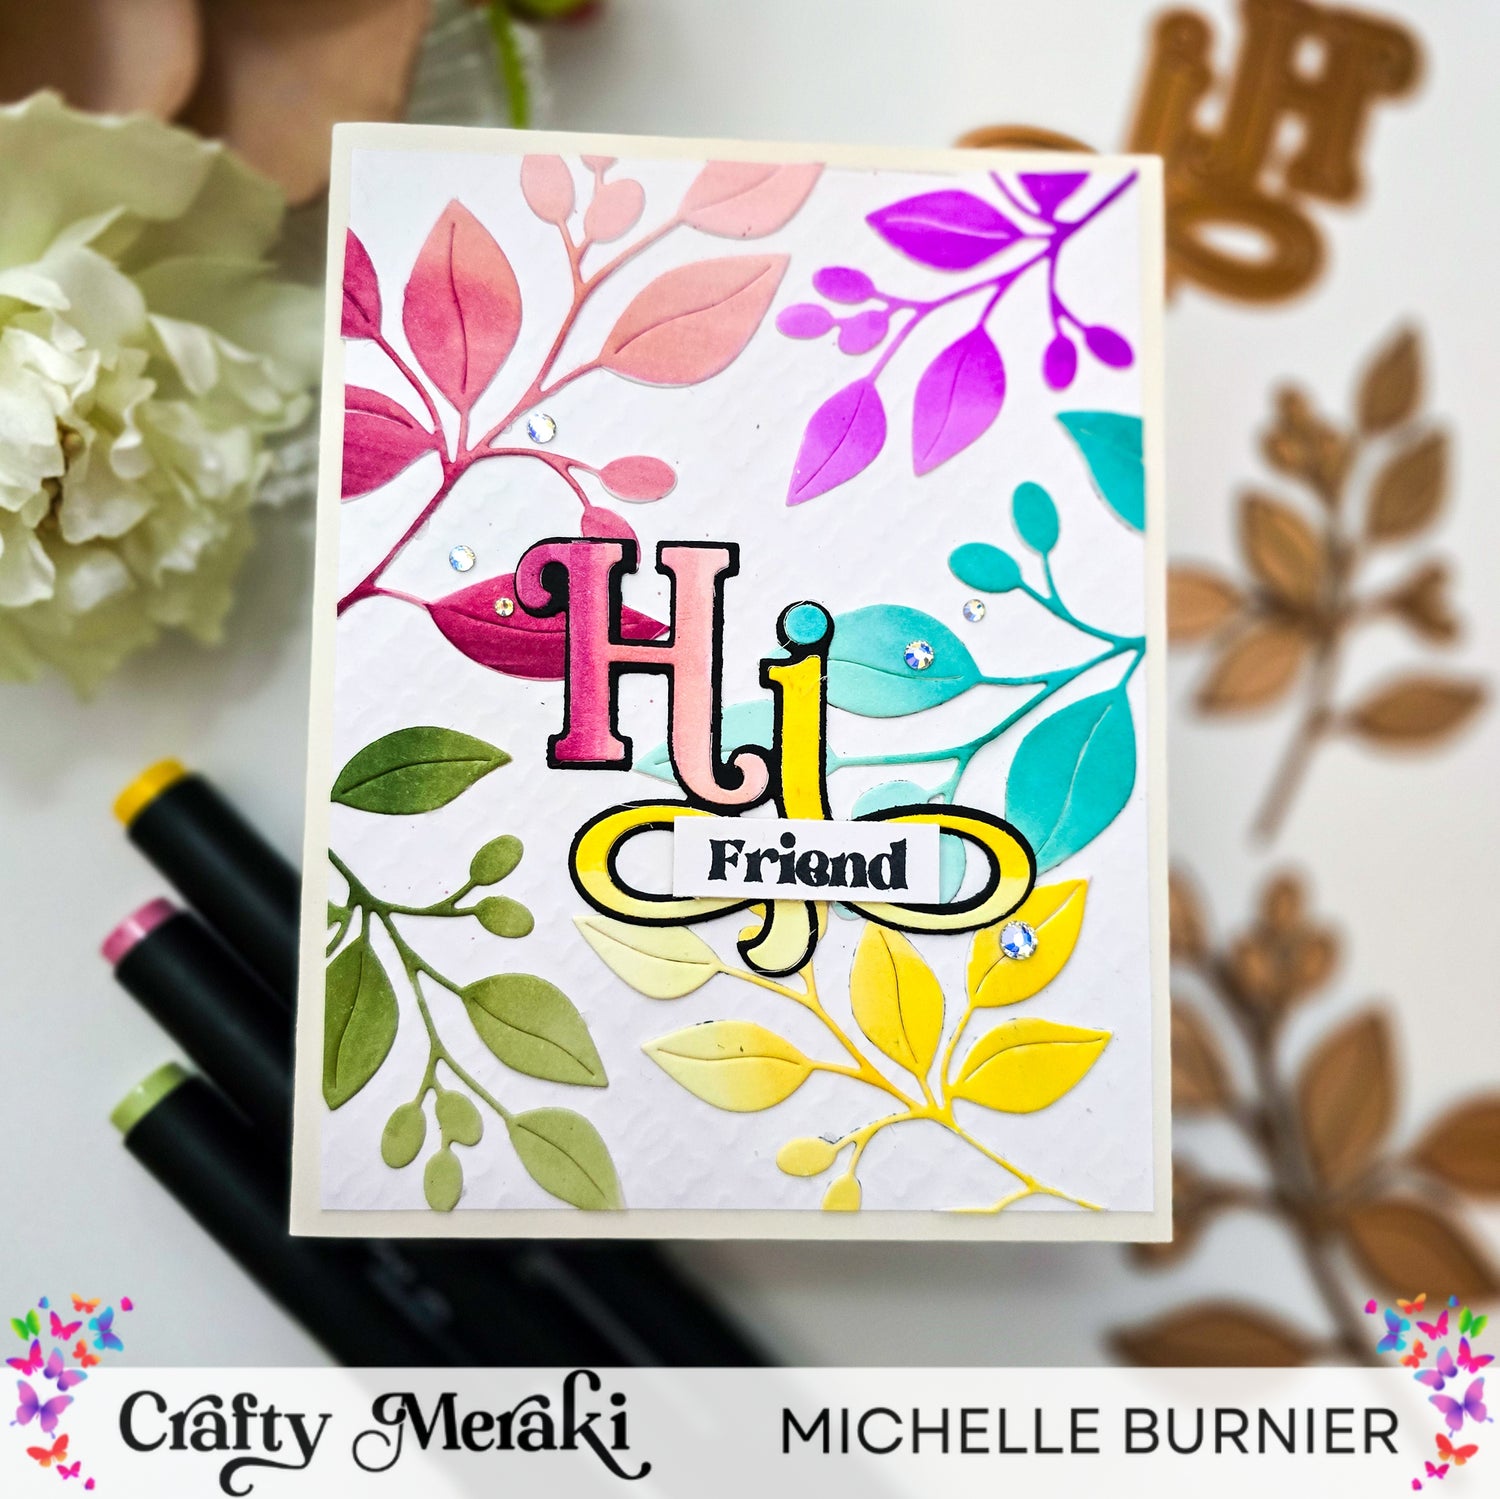
Hi crafty friends.....it's Michelle back with you sharing a very colourful project. What does summer mean to you? To me it's all about colour....all the colours and rainbows! This week it is all about summer with the design team and I've got a simple project that brings all the colours. Let's get started, shall we!

Cut the Canopy Leaf die 5 times.....2 of the larger and 3 smaller from white cardstock. An easy way to add colour to your delicate diecuts after they are cut, is to keep them in place after cutting and add some low tack tape to the back of them to keep them in place as you colour them.

Colour each of the diecut leaves using alcohol markers, in several different shades of each. This will help to keep them from looking flat and will add interest and add shading to them. The tape on the back will help to keep them in place will colouring, especially the more delicate areas.
Cut a piece of white cardstock to 4x5.25". Add the coloured leaves to the cardstock where you want them and place a piece of Press N Seal over them and pick them up. The sticky side of the press n seal will help to keep them exactly where you want, so there is no guessing as to where to place them after the adhesive is added.

At this point I wanted to add a little interest to the background, so I embossed the background using the Crafty Plaid Background A2 die. Replace the bottom plate in your diecutting sandwich with a silicone pad to emboss the pattern, rather than a hard plastic plate which will cut the pattern in your paper.

With the leaves still on the press n seal, add adhesive to each of the leaves and them press the entire piece to the embossed background. Press all of the leaves down well and then carefully remove the press n seal.
Diecut the sentiment using the Meraki Moments Hi Para-Dies from white cardstock using the first detailed layer and the second layer of the 3 layer die from back cardstock. Using 3 of the alcohol markers used to colour the leaves, colour the Hi based on the leaves it will be touching. Add this to the black shadow layer and adhere over the leaves. Stamp the smaller sub-sentiment in black using the Thanks Bunches Stamp Set and diecut. and adhere using foam adhesive. Add a final scattering of a few of the Meraki Sparkle Fairy Garden Gems

So get all of the colours and add some summer to your cards! Thank you so much for stopping by today and I hope that I have helped to inspire you in some way. Have yourself a wonderful and crafty day and until next time, Michelle :)


Leave a comment
This site is protected by hCaptcha and the hCaptcha Privacy Policy and Terms of Service apply.