Hello crafty friends! Karin @creakarts again with a new blogpost, this week is all about shapes. I really love to make shaped cards, it gives such a different look than a normal square or rectangle card. For this week I chose to make an oval shaped card.


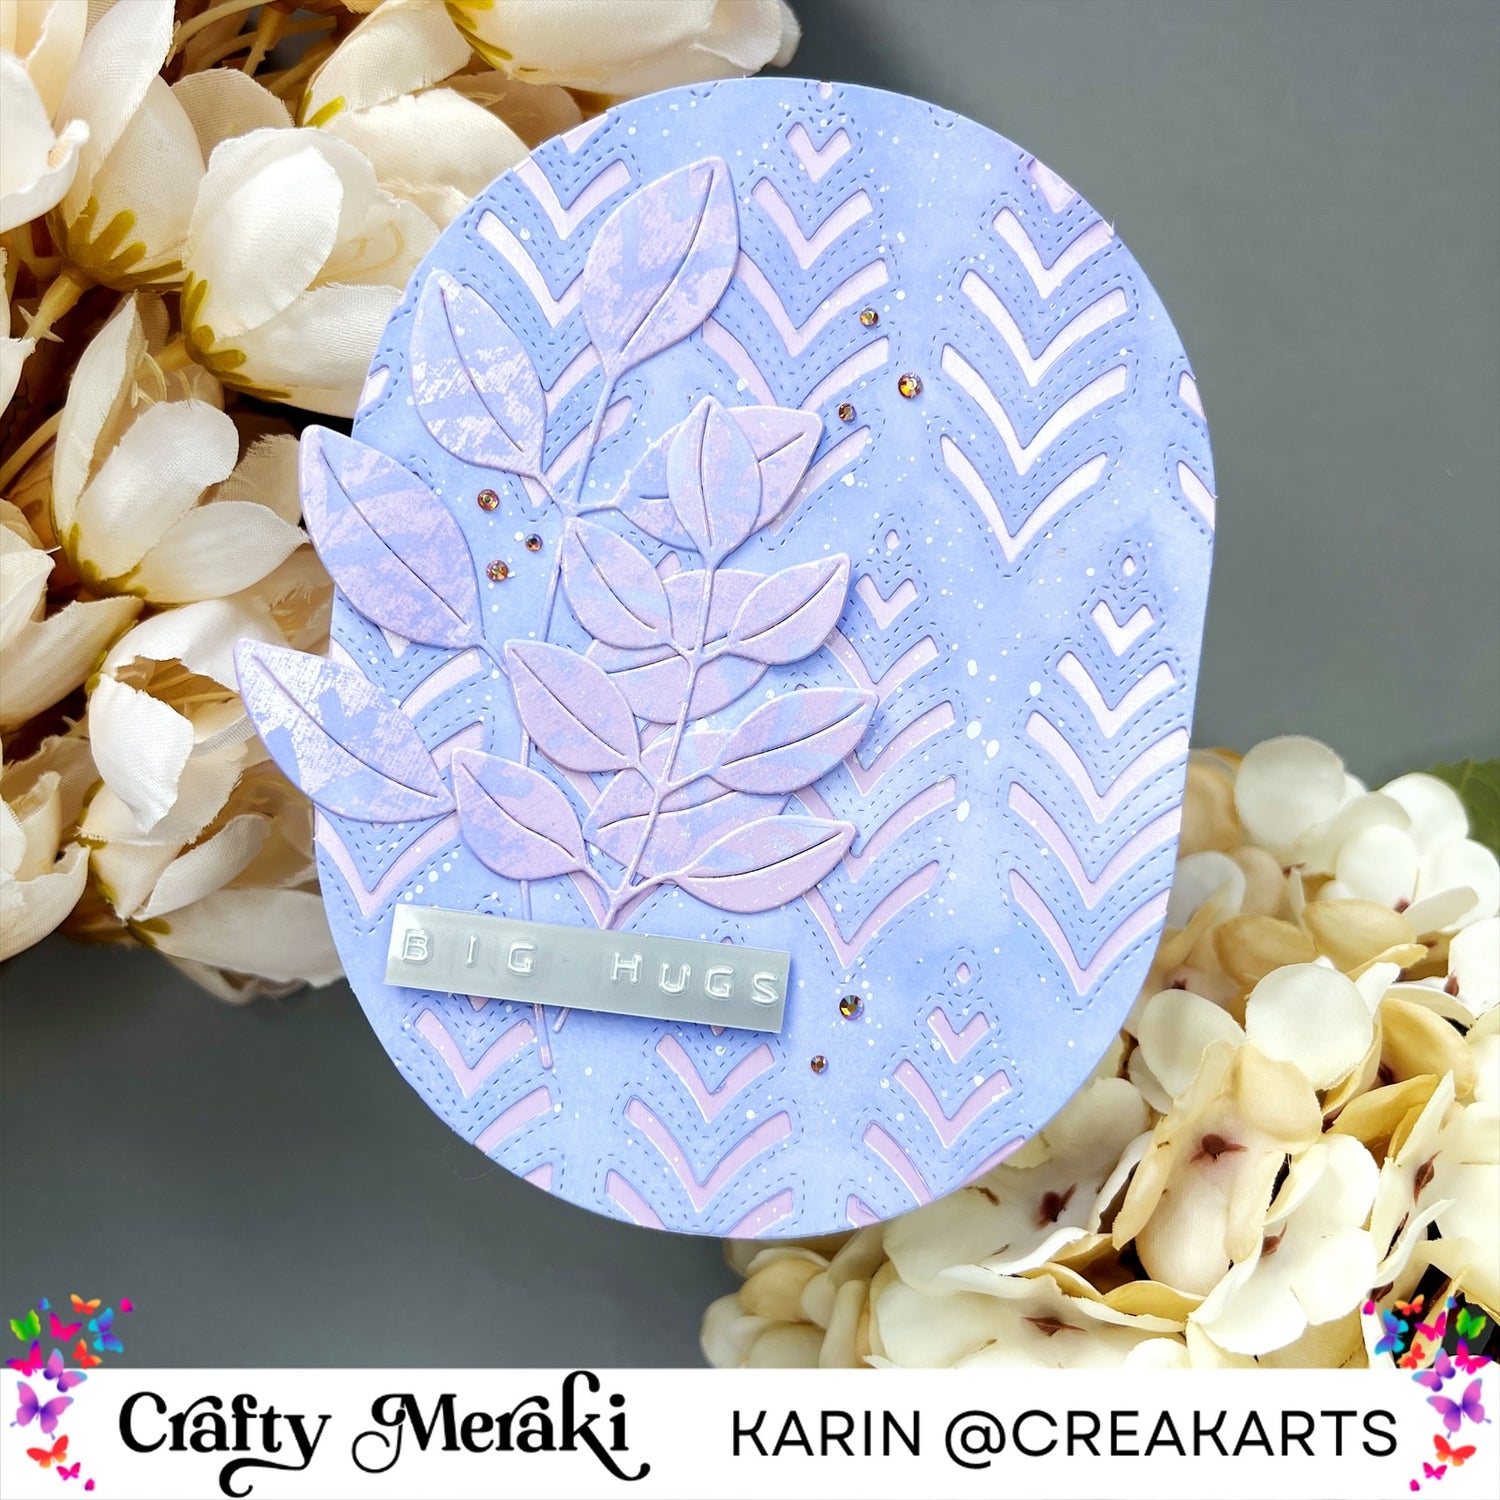
First I started with a white cardstock panel and used the beautiful Sahara Symphony background die to cut the panel with my cutting die machine. After cutting it I took my oval shaped die from spellbinders to cut the panel in the right shape. I love to make colourful cards so I coloured this panel with distress oxide ink in shaded lilac with an ink blending brush. Now this panel is done we can go on to the next.

The Sahara Symphony background die has a matching hot foil plate that I also used for this card. I used spellbinders glimmer hotfoil satin pastel lavender and my hotfoil machine to print the pattern onto a white cardstock base. You can use any colour of cardstock for this because at the end you only see the hotfoiled pattern and not the paper itself. Now comes the part that I have to place the earlier made cut panel onto the hotfoiled panel, it can be a bit difficult to place it exactly the right way so take your time to do it. Now it’s glued I’m taking my scissors out to cut around the edges of the top panel so we get the oval shape back. I wanted to add a little more dimension to the background so I splattered some white ink onto the background. I used splatters white from spellbinders. The more water you use the lighter the splatter will be. I hold the brush in one hand and tap lightly with my other hand onto the brush to let the paint fall down, if you do this with too much force you’ll get more elongated splatters.

Now we have a solid base to create something to put on top of it. We have the piece of hotfoil left that we used for the background. If you have a solid hotfoil plate like I do you can use this negative hotfoil piece to make another background. It didn’t perfectly foiled my paper but that’s ok because i’m going to colour the white pieces with the same colour as my background, shaded lilac. After this piece is all coloured up I took out the Laurel Leaf Para-Dies to cut them out of this piece of cardstock. I placed these leaves onto the left side of my card with glue.

All it needs now is a sentiment and some embellishments. I couldn’t find a sentiment that I liked so I made one myself with my retro dymo labelwriter. I added a few Meraki Sparkle Twilight Treasure Ilusion embellishment to top it off. You can choose if you want to glue the card onto a double sided card or just let it be like this. If you’re going to glue it down on double sided card you first cut the same oval out of the card with the cutting die and after this you can easily glue the card down on the double sided base.

This was my last blog for Crafty Meraki as a guest designer, it was fun and I hope I could inspire you with everything I made this past month. But there’s some good news, I’m a new design team member for Crafty Meraki and will keep sharing my cards, you’ll find my blogs every Tuesday from now on! Have a great weekend! ~ Karin


Leave a comment
This site is protected by hCaptcha and the hCaptcha Privacy Policy and Terms of Service apply.