Hello crafty friends!
Today I'm back on the blog with not one project but two.
Both projects are slimline cards featuring two of the new #merakicheer stencils released last week: Funny bunny and Egg hunt
For these projects, I also used a bunch of other products!

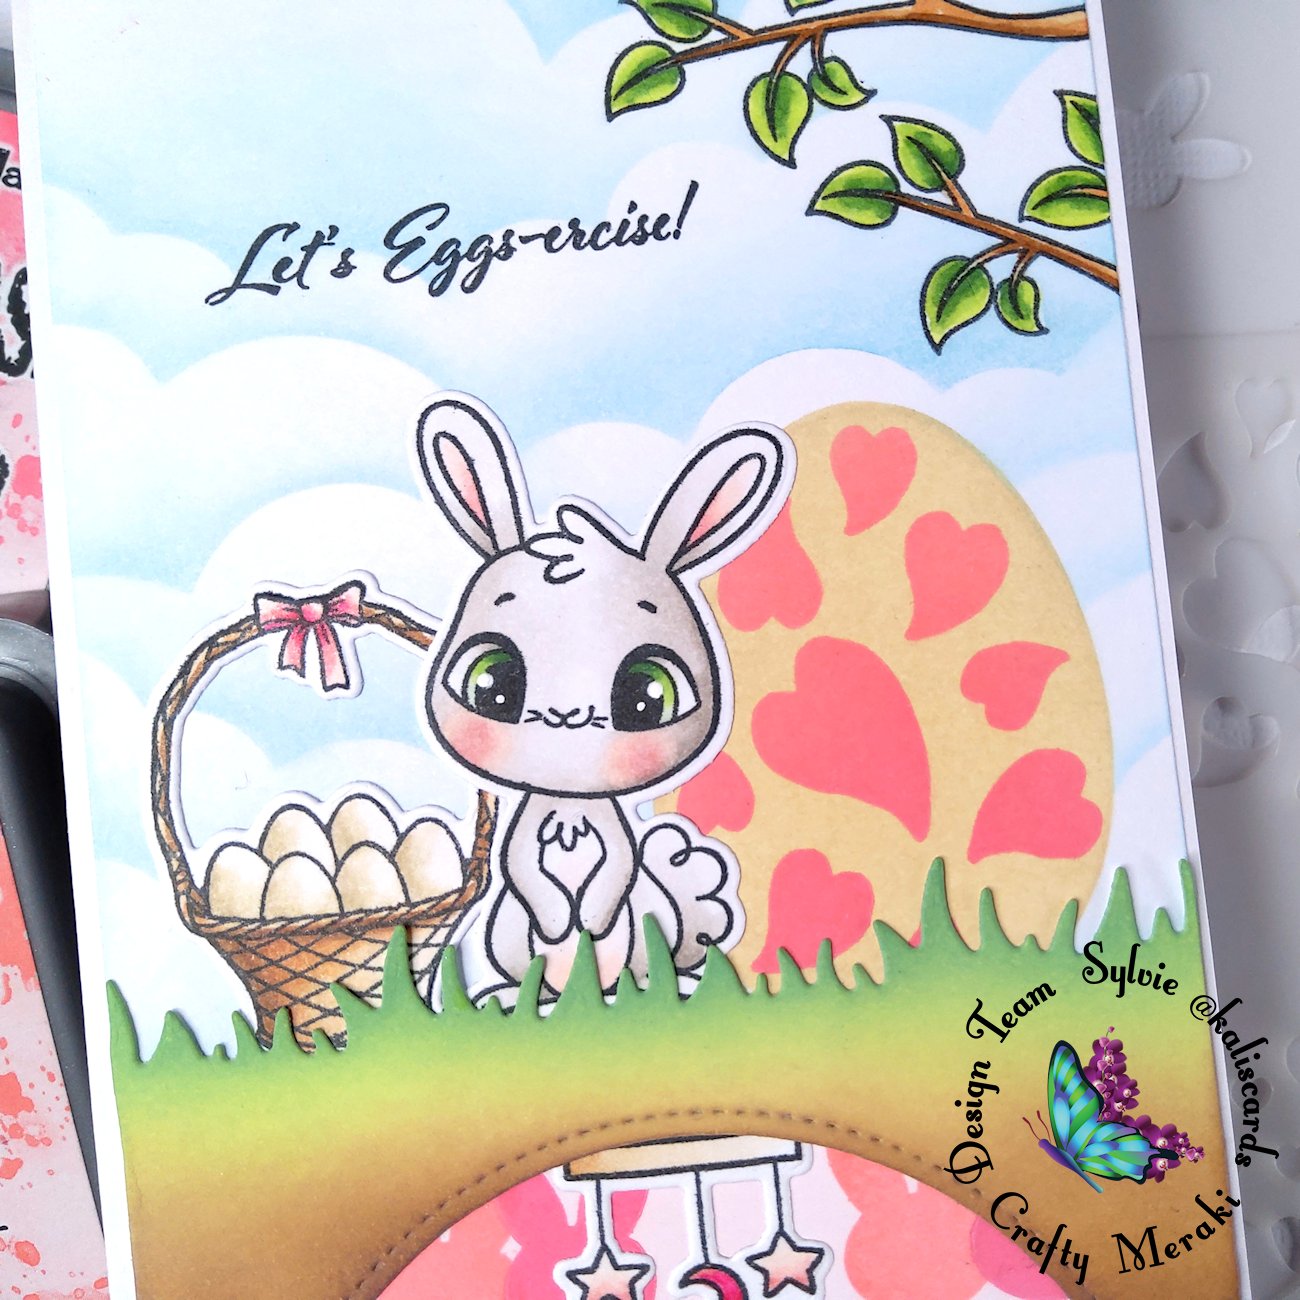
To start the first card, I die cut the Crafty Meraki View from my window slimline die from white cardstock. I actually did partial die-cutting, just cutting the bottom window and leaving a bit of space above the window. The window will be the rabbit den. I then used the My Favorite Things Outside the box grass die to create a grass line above the den.
I then blended some Distress oxide Twisted citron and Rustic wilderness on the grass edge and then from top to bottom, I blended some Vintage photo, Ground espresso and Black soot

Next, I stamped the rabbits, the egg basket and the baby toys, from the Crafty Meraki Don't worry be hoppy and Oh baby stamp sets, on a piece of cardstock, colored the images with copic markers and die cut them with the coordinating dies (Don't worry be hoppy and Oh baby)
I then created the back panel and cut a piece of cardstock, the same size of the View from my window slimline die. At the bottom, right behind the den, I blended some Distress oxide Spun sugar. Then, I came with the Funny bunny stencil and blended first some Worn lipstick. I offset the stencil to create another set of rabbits, next to the first ones, using Picked raspberry this time.

On that same back panel, I then applied the Egg hunt stencil, slightly below where the grass will be and blended Distress oxide Antique linen. I then applied one of the heart patterns on top of the egg and blended some Worn lipstick and Picked raspberry
Above the big egg, I stamped the branch from the new Born to sparkle set 3 times and then on masking paper which I fussy cut and placed on my panel. I then used the My Favorite Things Cloud stencil to blend Distress oxide Tumbled glass in the sky
I removed the masks on the branches and stamped the sentiment with black ink, above where the rabbit and egg basket will be placed. The sentiment is actually a combination of two sentiments from the Don't worry be hoppy stamp set. This is the perfect way to stretch the use of your stamps and sentiments in particular. If you've never dared to cut your sentiments, I really encourage you to do so. It might sound scary, but sometimes masking part of the text is not that easy and could result in a mess. But if you cut the stamp, this allows you to combine different pieces and when you want to use the full original sentiment again, it is very easy to put them back together because of their tacky properties. (Now, only do it with phrases that remain big enough so you can still handle the stamps easily!)
All pieces are ready. Time to assemble the card! To finish the den, I cut two strips from brown and white cardstock to create the floor. I even embossed the floor with a wood pattern, totally optional. I adhered the two strips at the back of the den panel and then glued the toys and little rabbit. I then adhered the den on the back panel, avoiding to put too much glue on the grass edge. I then glued the rabbit and the egg basket behind the grass
For the second card, I used the Egg hunt stencil the same way, but also used an egg die to cut the eggs. I also stamped 3 of the rabbits from the Don't worry be hoppy stamp set, colored them with Copic markers and die cut them with the coordinating dies.

I also used a grass edge and colored the grass border with Copic markers. For the background, I blended some Distress oxide Tumbled glass on the top.

I then assembled the card by starting with the grass border and 3D foam at the bottom of the front panel. I then tucked the eggs behind the grass and added the rabbits. And voila!

Hope you liked these projects and they inspire you to combine one layer and die cut elements, and do some stenciling, all on a single card.
Thank you for stopping by!


Leave a comment
This site is protected by hCaptcha and the hCaptcha Privacy Policy and Terms of Service apply.