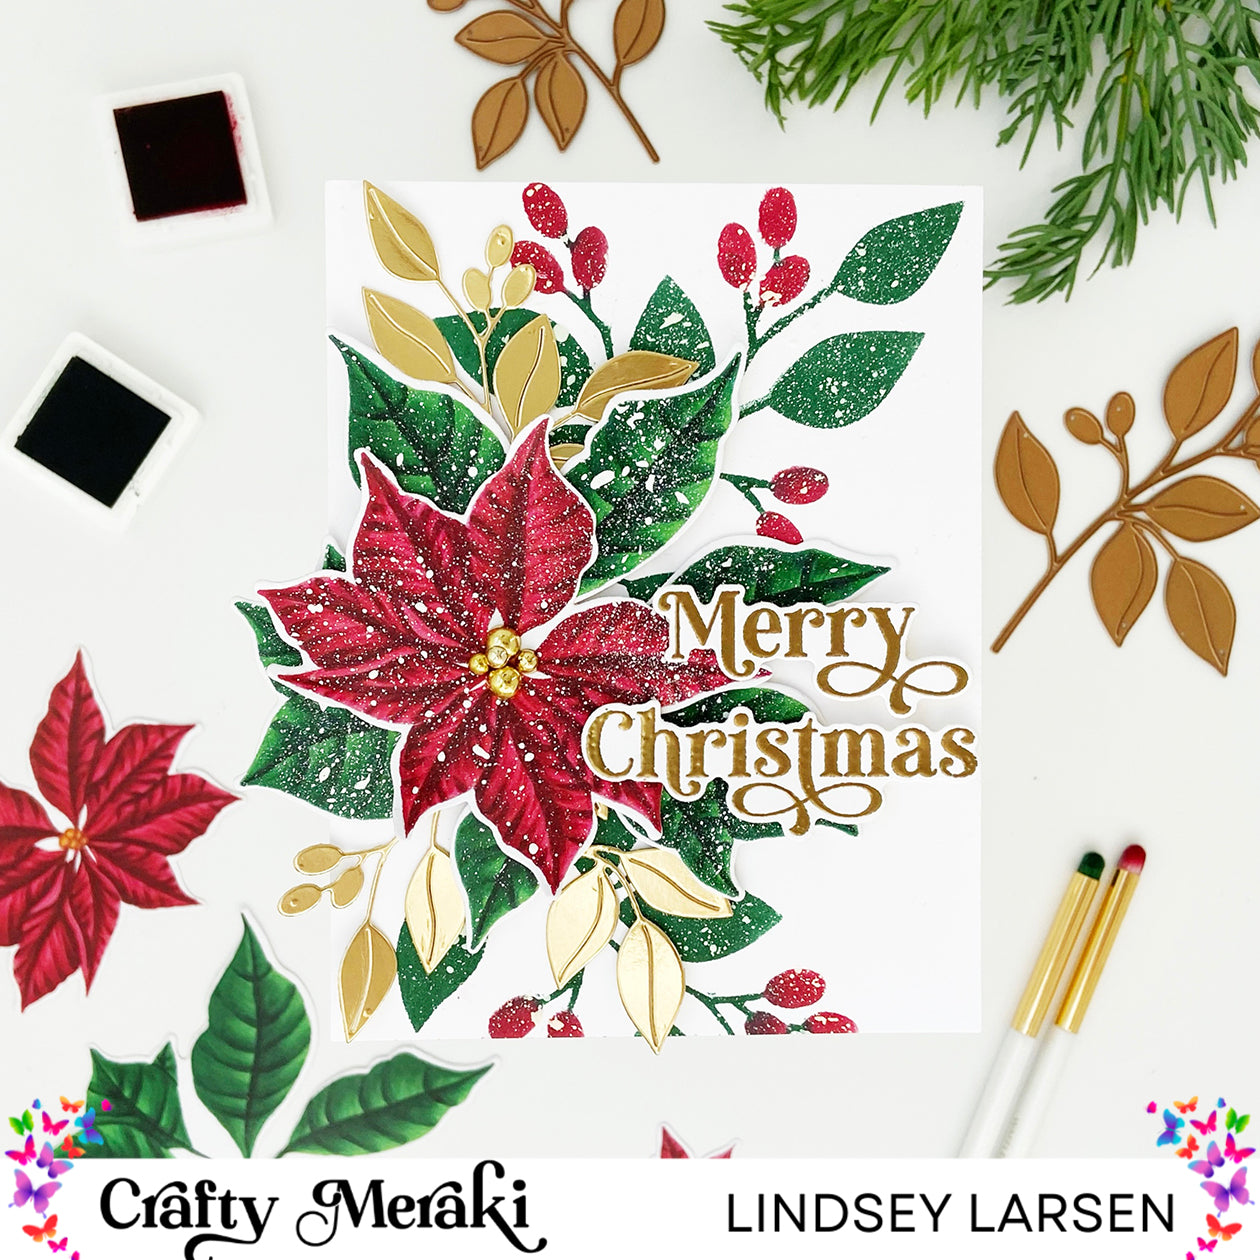
Good morning! It's Lindsey here, and I'm excited to be guest designing this month. This week is full of inspiration using stencils. Today I'm taking a creative approach to that and using a stencil I made with the Canopy Leaf Dies.

First, I pulled out a sheet of acetate and cut the largest Canopy Leaf Die out of the center. I wanted to make sure I had plenty of space on the sides of the negative cut, so I could easily blend ink without worrying that it would bleed onto unwanted parts of my card base.

Then I used a foam ink blender to blend green ink on the leaves and smaller ink blending brushes to blend the red berries and green stems. In the delicate areas (like the stems) it's important to dab or tap on the ink instead of using a circular blending motion, so you don't lift or bend the stencil.

I repeated the stencil design twice, adding an additional berry stem to the top leaf sprig to fill in the space a little more. While the stencil was still in place, I generously flicked on snow using white acrylic paint and a clean toothbrush. (Yes, you read that correctly. A paintbrush works as well, but a toothbrush does a great job at making lots of itty bitty flecks of paint). Set it aside to dry.

To create the poinsettia floral spray, I cut one of the Blooming Noel Effortless Artistry Papers with the coordinating Blooming Noel Dies. Then I generously covered it with snowy white paint flecks. After the paint dried, I piled gold pearls in various sizes in the flower center, gluing some on top of each other for dimension. The stenciled base layer anchors the floral arrangement, and I adhered the poinsettia with foam tape where the two stenciled leaf sprigs meet.

Next I die-cut two of the smaller Canopy Leaf Die out of gold cardstock. I tucked one full stem under the top of the poinsettia, and trimmed the other leaf sprig into smaller pieces, so I could tuck them into two places at the bottom of my poinsettia.

By stenciling the first layer and adding die cuts on top, it allows you to create extra depth without as much bulk (which is helpful for mailing). 
Finally, I chose a sentiment from the Festive Flora Wreath Stamp Set. I stamped and embossed it using gold embossing powder and die cut it with the coordinating Festive Floral Wreath Dies. Don't you just love the font in this set?!

I stacked two pieces of foam tape on top of each other to create added height, and used them to pop up the sentiment onto my card.

This card is full of rich colors and layers and I can't help but smile every time I look at it. Thanks so much for joining me today! I hope you leave feeling inspired to create.


3 comments
MRS DEJANA IVICA
TANGIBLE INFORMATION ABOUT LOAN PLANNING… THIS HAPPY NEW YEAR..
This is not a normal post that you see every day on the internet where people give fake reviews and false information about excellent financial assistance. I am aware that many of you have been scammed and that fake agents have taken advantage of those seeking loans. I will not call these normal reviews, I will call this situation where I live a witness to how you can get your loan when you meet the company’s requirements. It really does not matter if you have a good credit rating or government approval, all you need is a proper ID card and a valid IBAN number to be able to apply for a loan with an interest rate of 3%. The minimum amount is 1000 euros and the maximum amount that can be borrowed is 100,000,000 euros. I give you a 100% guarantee that you can get your loan through this reliable and honest company, we operate 24 hours online and provide loans to all citizens of Europe and outside Europe. They sent me a document that was checked and tested before I got the loan, so I invite anyone who needs a loan to visit them or contact them via email: michaelgardloanoffice@gmail.com
WhatsApp for Europe: +38591560870
WhatsApp for USA: +1 (717) 826-3251
After you contact them, let them know that Mrs. Dejana Ivica from Zagreb gave you the information. Seeing is believing and you will thank me later when you get a loan from them. I made a promise that after I get a loan from them, I will post the good news to everyone online. If you have friends or relatives, including colleagues, you can tell them about this offer and that it is happening.
Barbara Ignazio
GETTING BACK LOST, HACKED OR STOLEN CRYPTOCURRENCY // RESCUE TEAM RECOVERY COMPANY. Recovery of Lost Crypto; Binary options scam, Investment scams, Loans scam Etc. What happens after losing Bitcoin or a bank transfer to Fraudsters? You can choose to accept the loss and give the con artists your hard-earned money, or you can choose the second choice. As a result of your failure to stop the scammers, additional people will become victims, many of whom will most likely be your friends or relatives. You can watch testimonies of successful recoveries by this company both on youtube and other platformshttps://youtube.com/shorts/VCE7mcnb48I?si=3Ms34Ww1TuFzMBV1 https://youtube.com/shorts/VCE7mcnb48I?si=WguNgW8p8mJVLI2RImmidiately, you can contact bitcoin recovery professionals like Rescue Team Recovery Company at Email add (Rescueteamrecovery @ cyberservices. com) That will assist you in tracking and recovering your lost, scammed or hacked crypto currencies and band funds. The Rescue Team Recovery Company collaborates with law enforcement to help catch these con artists. You can proceed as long as you know the wallet address of the con artist or the receipts of the bank transactions. I wish you success. WhatsApp; +14706372676 Learn More; Eml: Rescueteamrecovery@cyberservices.com
https://youtube.com/shorts/VCE7mcnb48I?si=3Ms34Ww1TuFzMBV1
Bram Orrie
HOW I RECOVER $850 FROM FAKE INVESTMENT BROKER ONLINE
I’m grateful to THE HACK ANGELS RECOVERY EXPERT for helping me recover my stolen Bitcoin. After losing funds to a fake platform, I felt hopeless. I am deeply grateful for their support. If you have fallen victim to a Bitcoin scam or any other form of cryptocurrency fraud, don’t give up. Reach out to THE HACK ANGELS RECOVERY EXPERT Contact:
WhatsApp (+1(520)200-2320
Email at support@thehackangels.com
Website at www.thehackangels.com
If you’re in London, you can even visit them in person at their office located at 45-46 Red Lion Street, London WC1R 4PF, UK.
Leave a comment
This site is protected by hCaptcha and the hCaptcha Privacy Policy and Terms of Service apply.