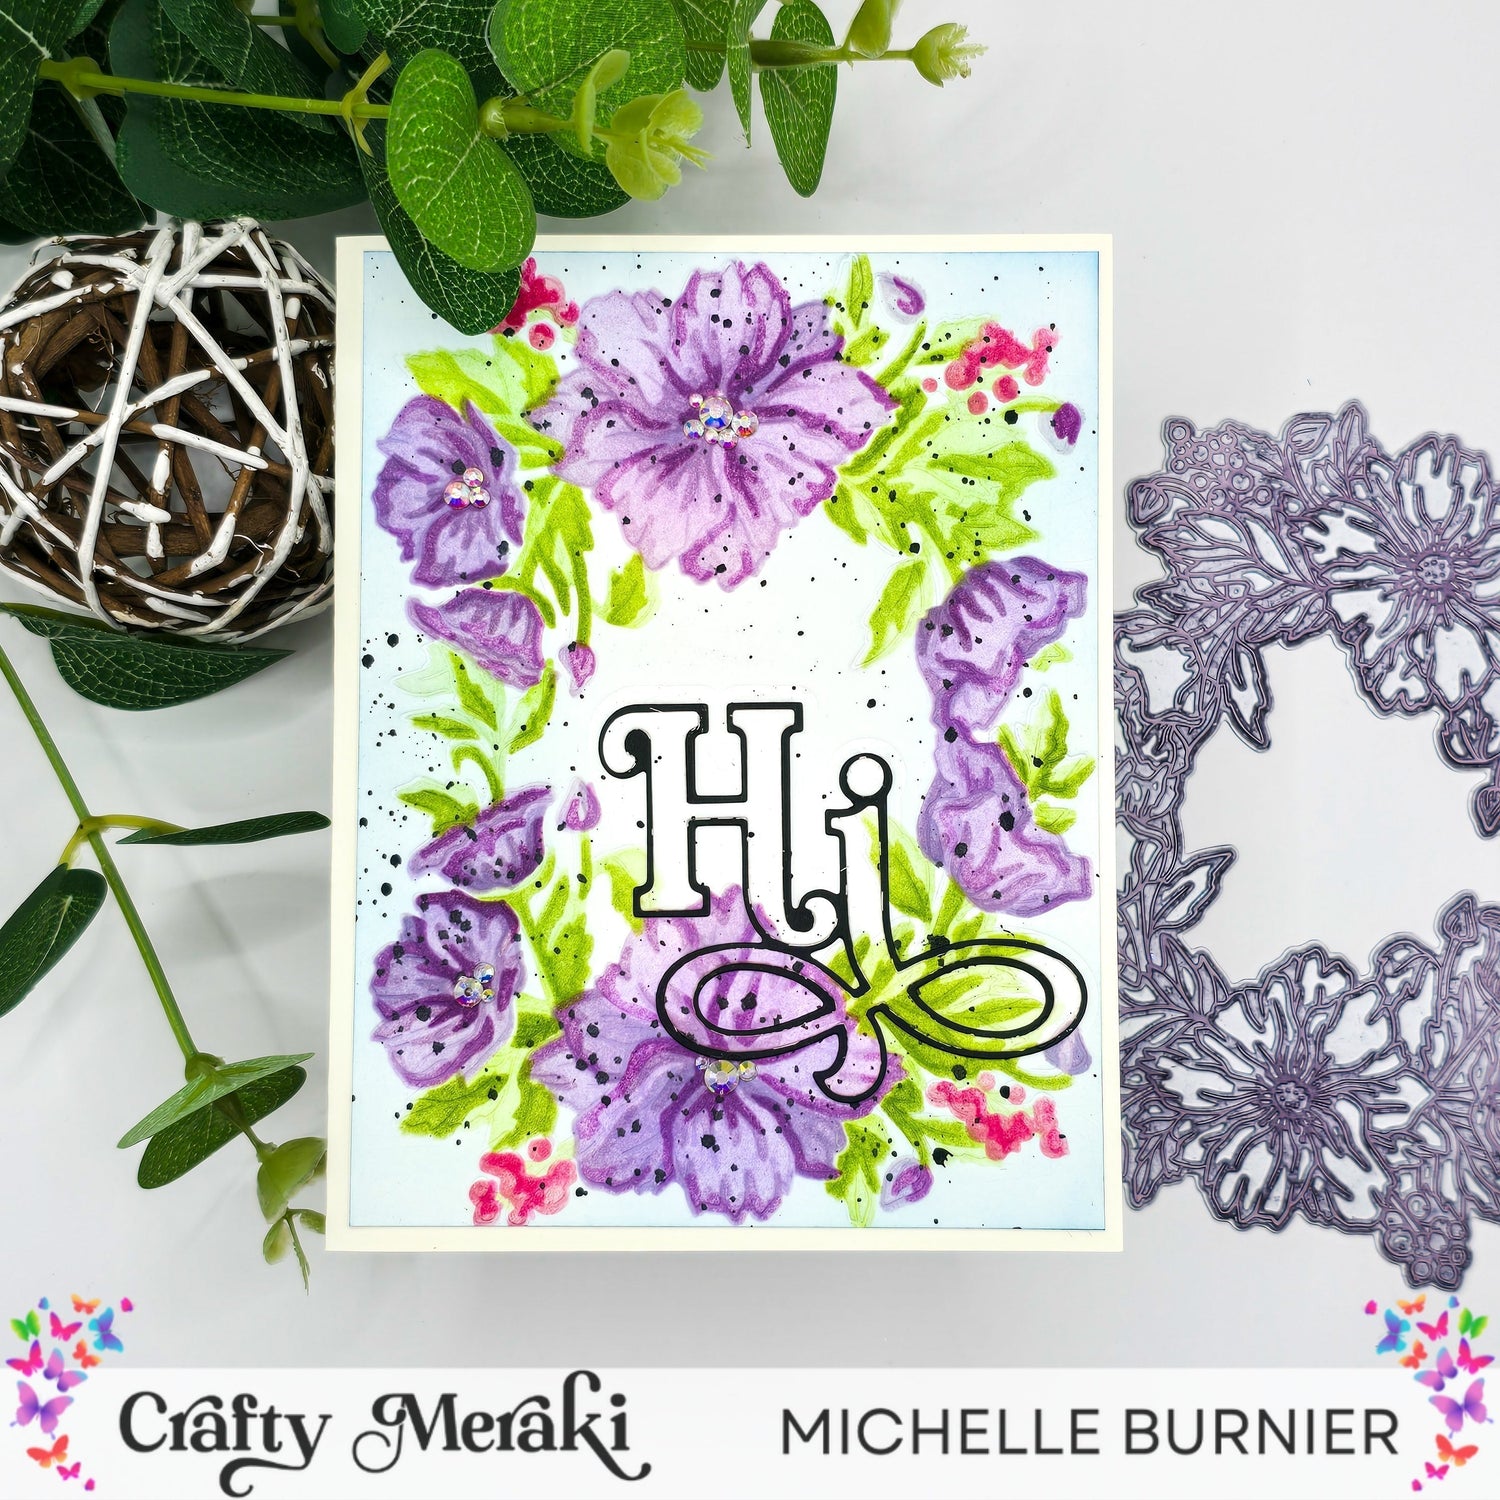
Hey friends....it's Michelle back with a new project featuring the latest release from Crafty Meraki. We've all seen no line colouring techniques, using regular stamped images, but I thought why not translate that to using the letterpress plates with the BetterPress machine. Let's get started shall we and I'll show you how I created a no line letterpress effect.

Place the Floral Fantasy Press-Tacular Plate in your Betterpress machine and add a piece of watercolour paper. You can use any type of paper, but a thicker watercolour paper or even the paper made specifically for the Betterpress works best, as you get a thicker and more impressive impression. You could really just use this clean pressed image and call it a day, to make a very simple, quick and clean card. This brings all of the focus on the pressed image, but we are adding some colour to the image today.

Be sure to line up the stencils well with the pressed image. It may be a bit hard to see with the first one, as there are no outlines, but I find that if you hold the paper up in front of you, it's easier to see. Start adding colour to the image using the coordinating stencils, in order starting with the first one. You want to make you are remembering to go light to dark with the ink colours. The ink colour will settle into the lines of the image, so it'll be easier to see. Repeat with all of the stencils, going darker as you go.

I added some black splatters using a black gouache concentrating it over the floral image. For the sentiment, I turned to a technique that I love using when I don't want to cover up my background (or very minimal coverage). I diecut the sentiment from the coloured image using the Hi Standalone die and cut the second shadow layrer using black cardstock. The black layer gives it a very small border and lets the sentiment really standout, since it could get lost, seeing as it is part of the background.

Once the splatters were dry, I felt that it needed a bit more, so I did some light ink blending using any residue blue ink that was on my blending brush. I kept this to the outisde of the cardstock and left the inside untouched. The sentiment was added and it was all added to an A2 cardbase. To add some sparkle to it, I added small clusters to the center of the flowers using the Meraki Sparkle Magic Crystal Gems.

I've always been a bit intimidated by no-line colouring using Copic or alcohol markers, as my skills aren't quite up there with others, but I love how this can be applied to projects using Press Plates and stencils. I love the softness that the no-line colouring technique lends to it!

Thank you so much for joining me today on the blog! I hope that I have helped to inspire you in some small way and I wish you all the most wonderful and crafty day! Until next time, Michelle :)


4 comments
Jessi canaya
BTC expropriation began with hopes of financial growth and prosperity, only to end in devastation when I realized I had fallen victim to a scam, losing a staggering $47,000. The enticing promises of high returns and effortless profits turned out to be nothing more than a cruel deception, leaving me feeling betrayed and distraught. In my darkest hour, I came across Mrs. Lisette Zamora and her recovery firm, who became my guiding light. From our very first interaction, their team demonstrated unmatched professionalism, empathy, and determination to seek justice. With unwavering commitment, they took charge of my case, skillfully navigating the complex legal landscape to recover my stolen funds.
You can contact her via…
Email: zamora~lisette~4~@~gmail~com
WhatsApp: +1—-(826)—-218——0536
MRS DEJANA IVICA
TANGIBLE INFORMATION ABOUT LOAN PLANNING… THIS HAPPY NEW YEAR..
This is not a normal post that you see every day on the internet where people give fake reviews and false information about excellent financial assistance. I am aware that many of you have been scammed and that fake agents have taken advantage of those seeking loans. I will not call these normal reviews, I will call this situation where I live a witness to how you can get your loan when you meet the company’s requirements. It really does not matter if you have a good credit rating or government approval, all you need is a proper ID card and a valid IBAN number to be able to apply for a loan with an interest rate of 3%. The minimum amount is 1000 euros and the maximum amount that can be borrowed is 100,000,000 euros. I give you a 100% guarantee that you can get your loan through this reliable and honest company, we operate 24 hours online and provide loans to all citizens of Europe and outside Europe. They sent me a document that was checked and tested before I got the loan, so I invite anyone who needs a loan to visit them or contact them via email: michaelgardloanoffice@gmail.com
WhatsApp for Europe: +38591560870
WhatsApp for USA: +1 (717) 826-3251
After you contact them, let them know that Mrs. Dejana Ivica from Zagreb gave you the information. Seeing is believing and you will thank me later when you get a loan from them. I made a promise that after I get a loan from them, I will post the good news to everyone online. If you have friends or relatives, including colleagues, you can tell them about this offer and that it is happening.
MOOLIE JONES
We can help you solve all HACKING RELATED PROBLEMS
●Hacking of all social media accounts
●Spying on cheating partner
●Retrieving of lost Cryptocurrency
●Data alteration
●Finding of lost phone
●Clearing/paying off of mortgage/loan
●Increasing of credit score
●Bitcoin mining
●Tracking of location
●Hacking of cell phone/other devices
●Block out or track down hackers
Secure yourself now!!!
Contact: cyberhelpdesk88@gmail.com
WhatsApp: +1 (209) 809-0176
Telegram: +1 (209) 809-0176
Sheila Donnell
My purpose out here today is to share this article to the world about how Doctor Odunga helped me in getting back my EX-boyfriend who broke up with me 4 months ago. I tried all I could to make him see reasons with me so that we can continue our relationship but he denied me. Thank God for giving me the thought of going into the internet for help, I searched properly and I saw different reviews of Doctor Odunga and I insisted on giving it a try by contacting him via what’s app on (+2348167159012). He gave me reason to live again and he prepared a spell and told me that my Ex-boyfriend will come back to me within 28 hours. Can you believe it, my EX-boyfriend came back to me and our wedding will be held Soon. Contact him now!!! if you need any help. Email: odungaspelltemple@gmail.com and he does a lot of spells. Once again i want to say am very grateful for your help
Leave a comment
This site is protected by hCaptcha and the hCaptcha Privacy Policy and Terms of Service apply.