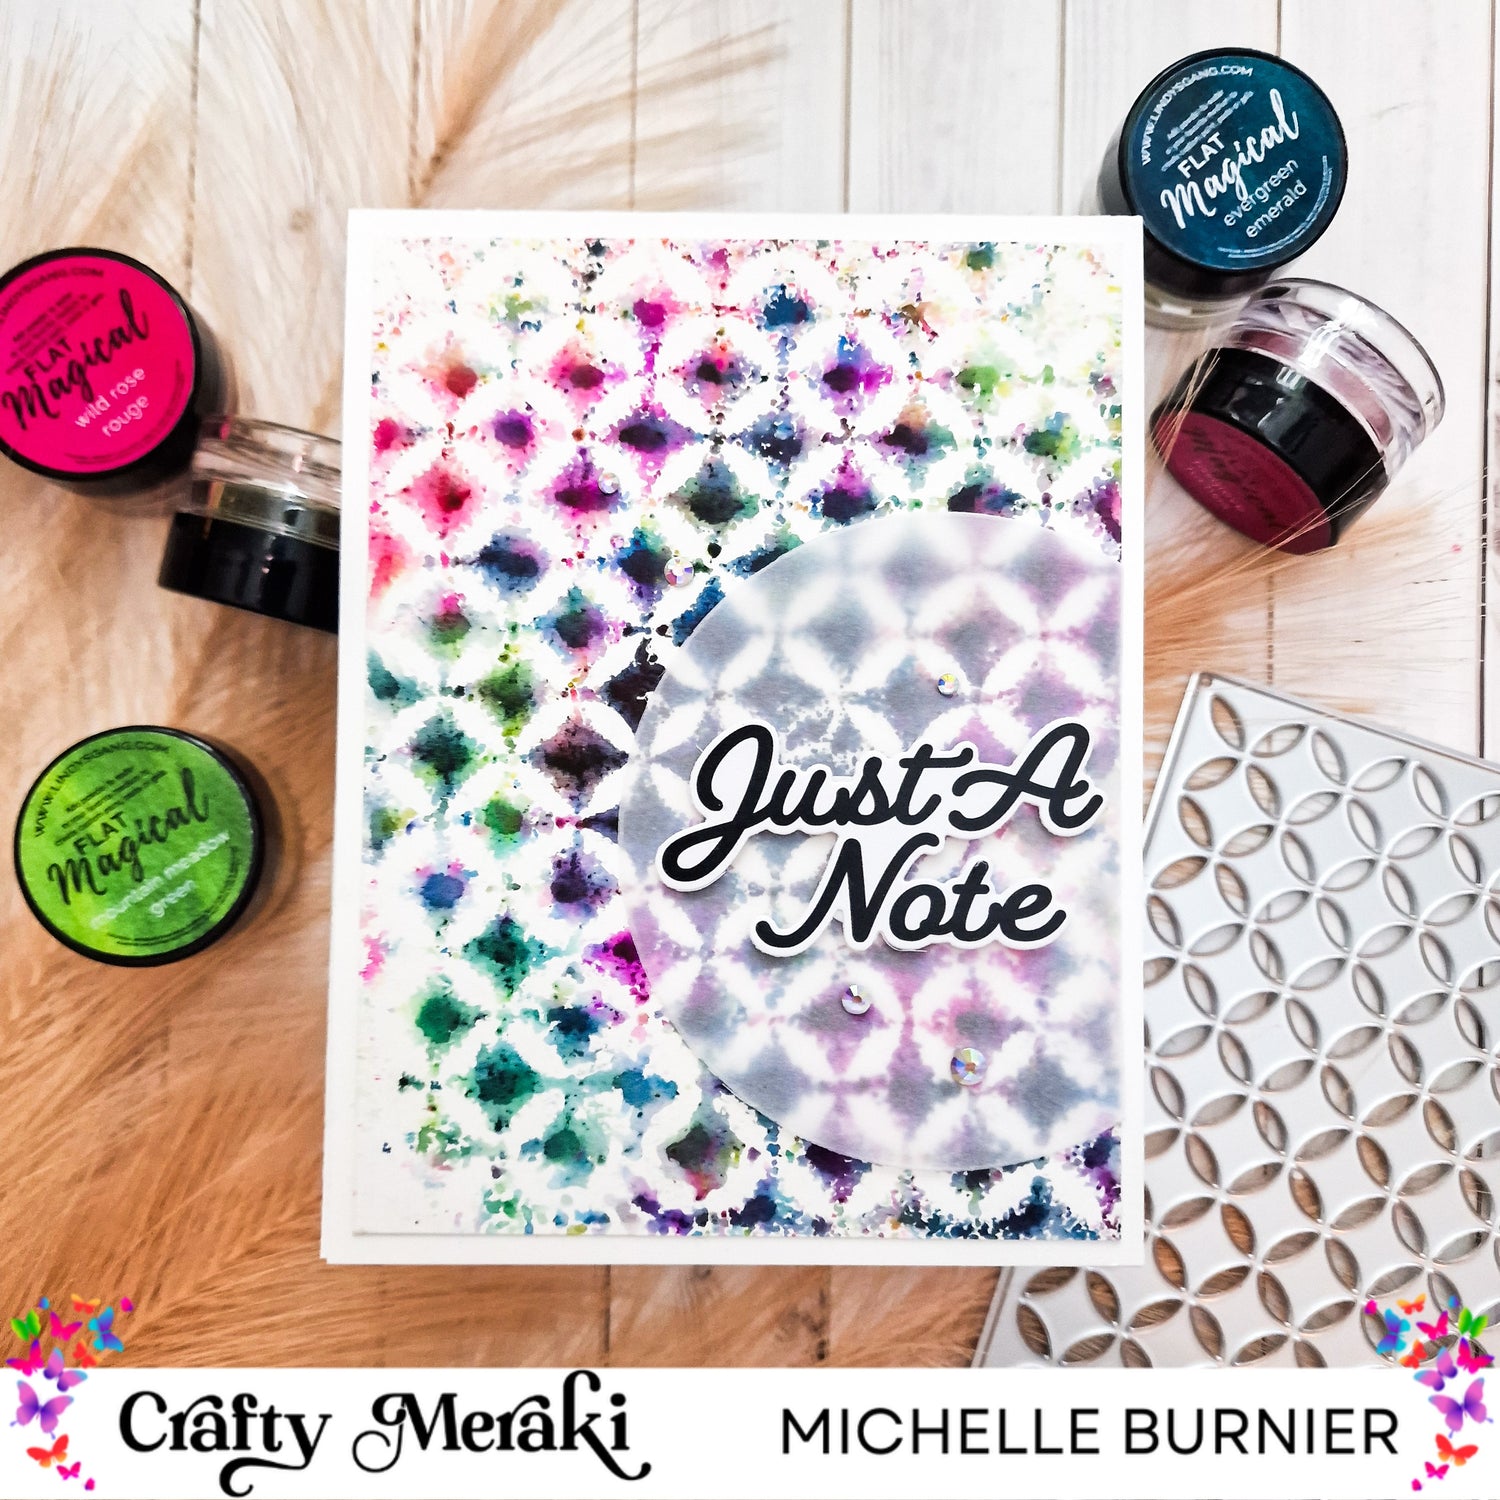
Hey Crafty Meraki friends....it's Michelle back with you today showing an easy and unexpected way to use your cover dies. Have you ever stamped using a cover die? If not, follow along and I'll show you just how easy it is!

This is very similar to a technique I love doing with stencils, so I decided to adapt it to a cover die. It is so easy and fun to do! Let's get started!
To begin I used the Craft-A-Round A2 Background Die and cut it out using a piece of vellum. You need to make sure that you do not use a regular cardstock or watercolour paper to cut this out, as we will be using water and you do not want it to absorb the water. Vellum works perfect for this, as it is not water absorbent at all. Next grab a selection of pigment powders. I used a set of 5 flat magicals called Mountain Meadows from Lindy's Gang. These are beautiful and vibrant powders that worked perfectly for this!

Next sprinkle on your powders over the diecut vellum that is on the paper towel. Make sure you have that paper towel underneath it or you may have a big mess on your desk lol. Don't go too crazy with the powders, as a little goes a long way. Grab a water bottle and once you've added all your powders, spritz the vellum just enough to activate the powders but not too much so that you have puddles of water sitting on the vellum. Remember that because vellum will not absorb any water at all, all the water you have spritzed on it will sit on top of it.
Next take a piece of watercolour paper cut a bit larger than A2 (4.25x5.5") and place it over the vellum. You do not want to pick up the vellum and place it on the cardstock, as the water will run and drip and you'll have a mess. Press it onto the vellum and make sure you get even pressure and then remove after about 8-10 secs or so....give or take lol. Allow it to dry for 10-15 mins and then trim down around the edges. Cut out a vellum circle and add the sentiment from the Gilded Greetings EAP to the vellum using foam squares. Vellum can be tricky to adhere as it is transparent, so I added the glue under where the sentiment is. Trim the excess hangover of the vellum circle and add it to the A2 cardbase and finish with a few final touches of sparkle using the Meraki Sparkle Magic Crystal gems.

And that's it! A fun and easy technique to bring new life to your cover dies! The colour combinations are endless with this and even if you don't have pigment powders, I am sure this can be easily adapted to using watercolours.
I hope that you have enjoyed my post for today and that I help to inspire you some way. I wish you all the most wonderful and crafty day and until next time,
Michelle :)


1 comment
caroline james
HOW I RECOVER MY LOST CRYPTO’S FROM FAKE BROKER ONLINE 2023
I was scammed over ( $345,000 ) by someone I met online on a fake investment project. I started searching for help legally to recover my money and I came across a lot of Testimonies about ETHICREFINANCE Recovery Expects. I contacted them providing the necessary information’s and it took the experts about 27hours to locate and help recover my stolen funds. I am so relieved and the best part was, the scammer was located and arrested by local authorities in his region. I hope this help as many out there who are victims and have lost to these fake online investment scammers. I strongly recommend their professional services for assistance with swift and efficient recovery. They can reached through the link below.
Email Address: ethicsrefinance @gmail com
TELEGRAM: @ethicsrefinance
You can also contact them for the service below
Western Union Transfer Blank atm card Bank Transfer PayPal / Skrill Transfer Crypto Mining CashApp Transfer Bitcoin Loans Recover Stolen/Missing Crypto/Funds/AssetsLeave a comment
This site is protected by hCaptcha and the hCaptcha Privacy Policy and Terms of Service apply.