
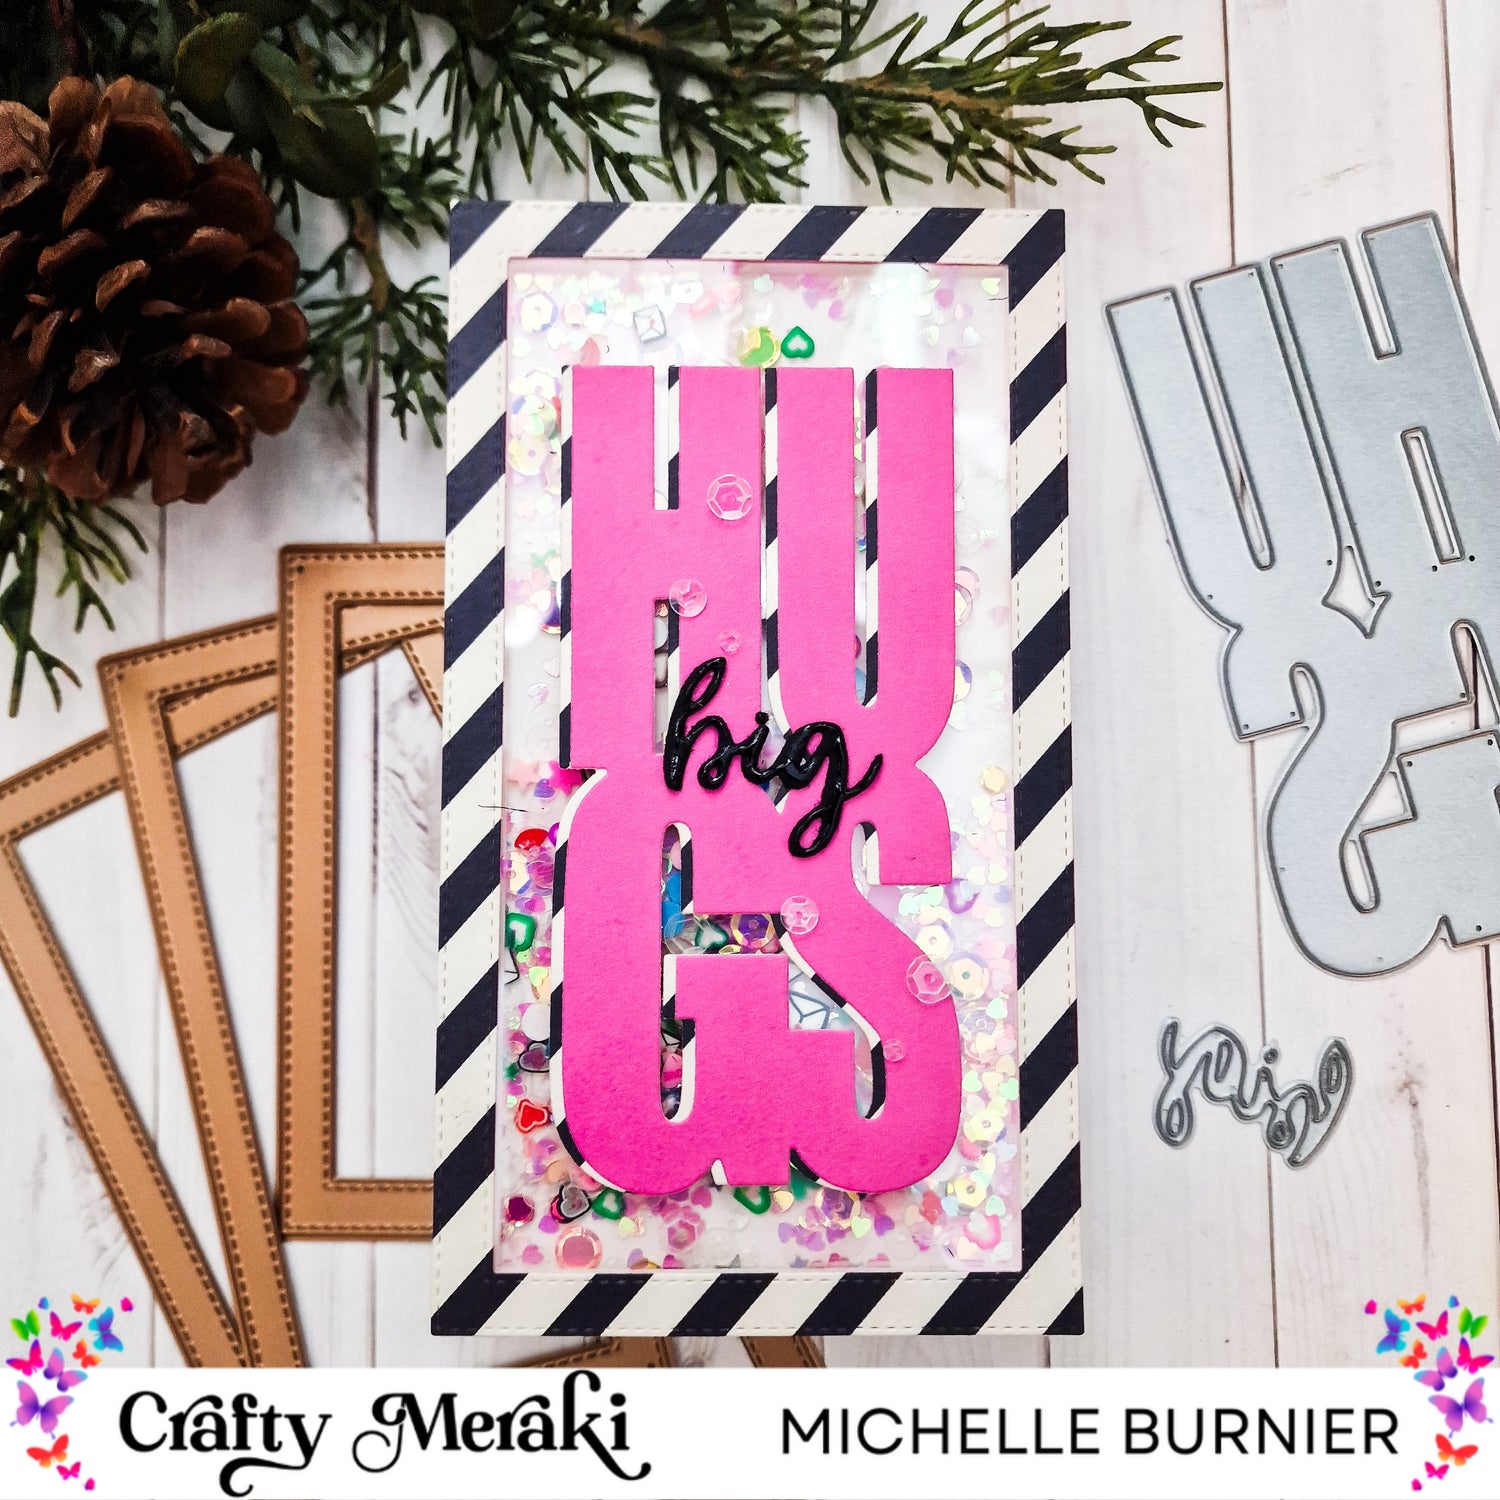
Hello crafty friends....Michelle here with a fun shaker card! This week the design team was tasked with a fun theme....shaker cards! Some people shy away from shakers as they can seem a bit intimidating, but they are really quite easy to make. Crafty Meraki has lots of products that help to make them pretty easy too! Let's see how I made this...shall we.

For my frame for the shaker I used the Frame-Worthy Slimline die. This has 3 different sizes and I used the largest one for my project. For a shaker to be successful and give the sequins and shaker bits enough room to move around, you want to make sure that you have enough height in your shaker window to allow them to move freely.
For the frame I cut out about 9 layers. The top layer I raided my stash of scrapbooking patterned paper and found 2 coordinating ones. I cut out the top layer from a diagonal stripe paper and then rest from white cardstock. I cut the large hugs from the same patterned paper as well as a pink using the Hugs Slimline Tag Para-Dies.

I adhered all of the layers together except for the top striped layer. I made sure to add the glue along the outer edge of the frames (and not too much of it), so as to try and avoid any glue that may seep out to get on the sequins that may come in contact with it. I hand cut a clear acetate window slightly smaller than the outer edge of the frame and added it to the top layer and then added the striped layer on top of it.

I randomly started adding sequins and shaker bits to my cardbase, keeping them centered in the middle of it and then added my shaker window over top of it and adhered it with liquid adhesive. I adhered the large Hugs diecuts together, positioning the pink slightly off center on top of the diagonal patterned one. This was then added to the acetate window. The smaller subsentiment big was cut out of black 2x, adhered together, added to the large sentiment and some Glossy Accents was added to it to give it a bit of shine. To finish it, a few of the sequins from the inside was added to the outside.

And that's it....it's just that easy! There are so many possibilities when it comes to shaker cards and so many ways to make them too. I hope that you give them a try too, if you haven't yet.
I hope that you have enjoyed my post for today and that I help to inspire you some way. I wish you all the most wonderful and crafty day and until next time,
Michelle :)
Leave a comment
This site is protected by hCaptcha and the hCaptcha Privacy Policy and Terms of Service apply.