

Hello and welcome!
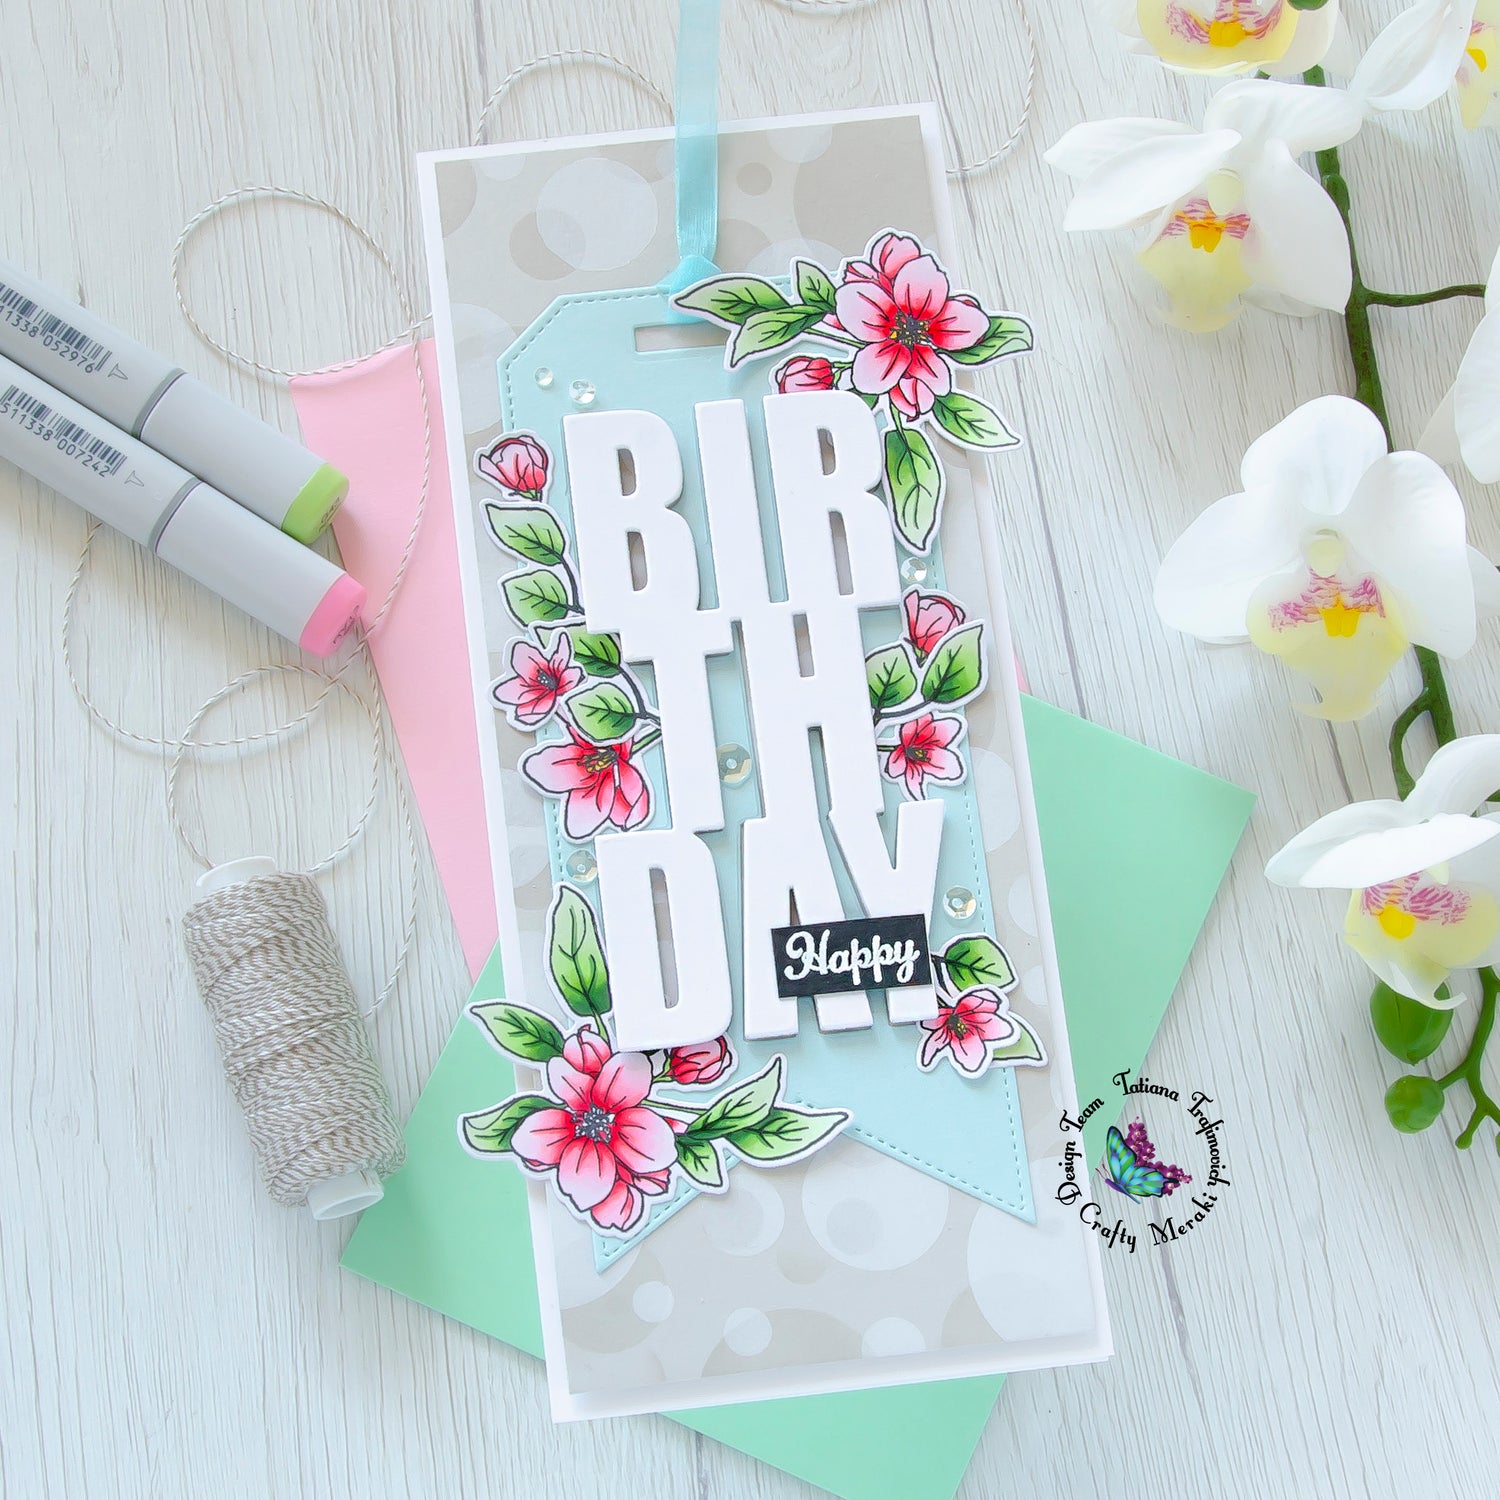
Thanks so much for joining me! Tatiana is here! I’m so excited to be featured on Crafty Meraki blog today and to jump in the celebration of their first anniversary! I came out with a floral birthday card featuring beautiful You Inspire Me Stamp Set paired with fabulous big Birthday Slimline Tag Die. I decided to stretch small flowers and leaves included in the stamp set and arrange them in a creative way around the birthday word die.
Key Ingredients:
- You Inspire Me Stamp Set
- You Inspire Me Die Set
- Birthday Slimline Tag Die
- The Legend Stamp Set
- Newton's Nook Designs Bokeh Stencil Set
Step By Step Instructions:
- Die cut from Copic X-Press paper flowers and leaves, using the coordinating You Inspire Me Die Set. Save the negative parts of the dies.
- Stamp the outline illustrations from You Inspire Me Stamp Set with Memento Tuxedo Black ink. Use the negative parts of the dies as a guide for a perfect alignment inside the stamping positioning tool.
- Color the stamps with COPIC MARKERS. I used on this card:
- pink RV0000-RV00-RV10-Rv13-RV14
- green G40-G43-G94
- Trim and score a slimline card base (8 1/2″ x 3 1/2″) from Neenah Solar White paper.
- Trim a slightly smaller rectangle from a light grey cardstock.
- Tape well the layer #1 from Newton's Nook Designs Bokeh Stencil Set with a removable tape to the light grey piece to prevent any movement and ink it with a matching light grey ink. Shift the stencil to cover the whole panel.
- Align the layer #2 from Newton's Nook Designs Bokeh Stencil Set, using the guide lines marked on the stencil, tape it well to the cardstock and add a white pigment ink through the circles. Shift the stencil to cover the whole panel.
- Die cut Birthday Slimline Tag Die including the word "BIRTHDAY" as it comes in the set from a light blue cardstock and from Neenah Solar White paper.
- OPTIONAL: die cut the word "BIRTHDAY" again a couple of times and stack all three layers together with Distress Collage Medium Matte.
- Heat emboss in white onto black the word “Happy” from The Legend Stamp Set. Use an antistatic powder and VersaMark clear sticky ink to achieve perfect lines.
- Arrange and glue in place all the elements by popping some of them on a foam tape for a fun dimensional look.
- Finish with some clear sparkling sequins.
That's all for today!!! As always thanks so much for stopping by and have a great day!!!
Hugs,
Tatiana
Hugs,
Tatiana
Leave a comment
This site is protected by hCaptcha and the hCaptcha Privacy Policy and Terms of Service apply.