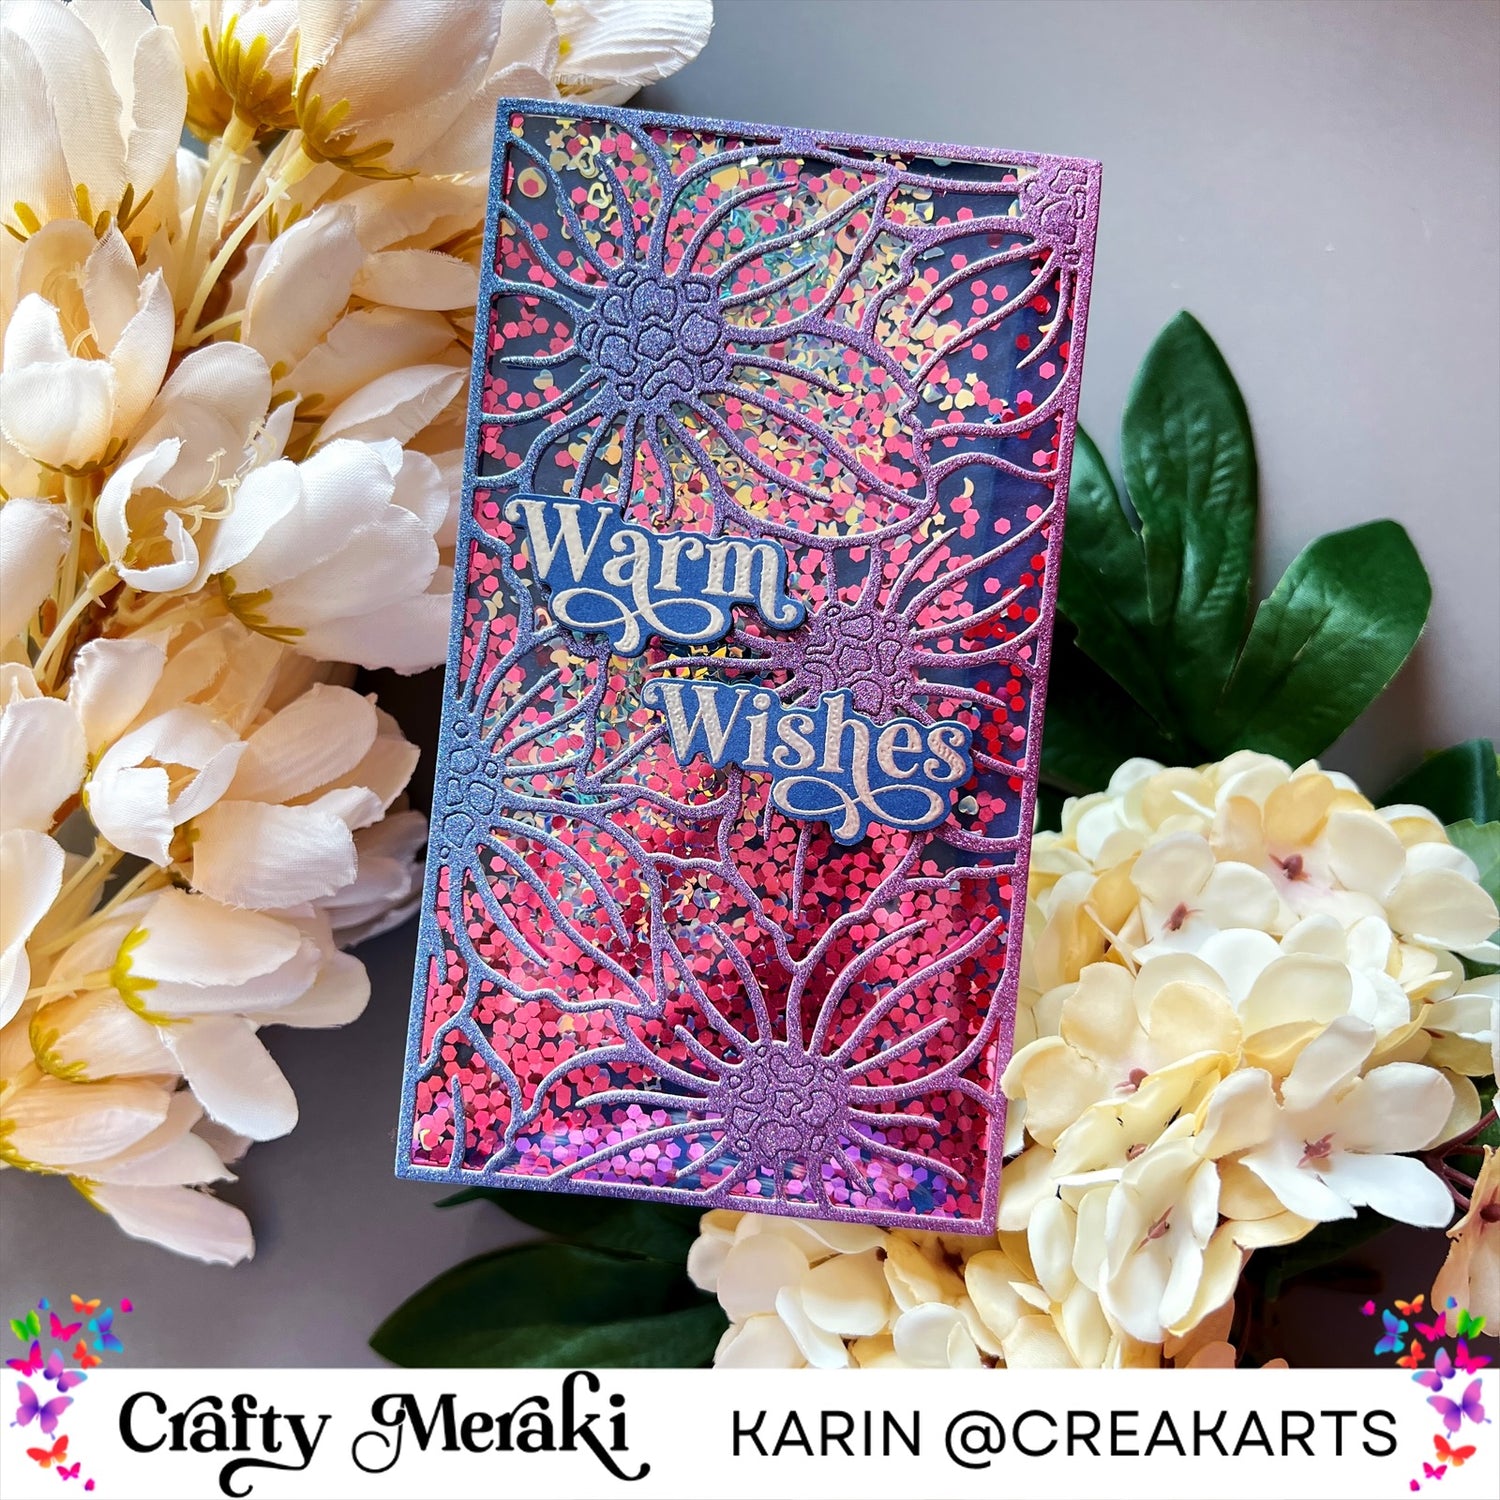
Hello crafty friends! Happy Tuesday! I (Karin) am so happy to be back again on the blog today. Today I’m sharing an easy shaker card with you.
First I begin with cutting a piece of dark blue paper. I’m making a mini slimline shaker card with the shaker pockets. I cut the piece of paper that’s going to be the background of the shaker card in the size of the shaker pocket minus a few millimeters, so it’ll fit perfectly when the shaker is attached to it. When cut in the right size I’m going to tape down the shaker pocket on three sides. I leave one side open to add the shaker embellishments to it. I’m throwing in some twinkle treats azure and some pink shaker bits that I had laying around for years. When added enough shaker bits I’m closing the one side that was still open too.


For even more sparkle I’m using meraki glitter ombré cardstock, the pink/blue one to coördinate with the shaker bits and the dark blue background. I’m going to cut out the Lenten rose mini slimline die out of the middle of the glitter cardstock , half of it blue and half of it purple/pink. I’m taking out all the leaves but let the pieces of the pistil of the flowers in the design. I’m using tacky glue to add this piece onto the shaker card. I only add glue on the side parts and on the pistil parts.


Because of the colder days I wanted to add a sentiment that suits these days so I went for ‘warm wishes’. This sentiment stamp is from the festive flora wreath stampset. I stamped it onto the same colour cardstock as the background of the card. I’m going to heat emboss this sentiment, I used versamark watermark ink and silver embossing powder. First I treat the piece of cardstock with some anti-static powder then I’m stamping the sentiment onto the cardstock, throw some embossing powder over it and heat emboss it with my heatgun. After it’s cooled off I cut the sentiment with the coördinating festive flora wreath die. I cut the sentiment 2 times more out of black cardstock and glue the three pieces together. I’m doing this so I get more dimension to it. Glueing the sentiments to my card with tacky glue and let it dry. Now the card is finished. I already said it was an easy one and it can be done quick, great for these days where we all need to make loads of Christmas cards, right?!


1 comment
MRS DEJANA IVICA
TANGIBLE INFORMATION ABOUT LOAN PLANNING… THIS HAPPY NEW YEAR..
This is not a normal post that you see every day on the internet where people give fake reviews and false information about excellent financial assistance. I am aware that many of you have been scammed and that fake agents have taken advantage of those seeking loans. I will not call these normal reviews, I will call this situation where I live a witness to how you can get your loan when you meet the company’s requirements. It really does not matter if you have a good credit rating or government approval, all you need is a proper ID card and a valid IBAN number to be able to apply for a loan with an interest rate of 3%. The minimum amount is 1000 euros and the maximum amount that can be borrowed is 100,000,000 euros. I give you a 100% guarantee that you can get your loan through this reliable and honest company, we operate 24 hours online and provide loans to all citizens of Europe and outside Europe. They sent me a document that was checked and tested before I got the loan, so I invite anyone who needs a loan to visit them or contact them via email: michaelgardloanoffice@gmail.com
WhatsApp for Europe: +38591560870
WhatsApp for USA: +1 (717) 826-3251
After you contact them, let them know that Mrs. Dejana Ivica from Zagreb gave you the information. Seeing is believing and you will thank me later when you get a loan from them. I made a promise that after I get a loan from them, I will post the good news to everyone online. If you have friends or relatives, including colleagues, you can tell them about this offer and that it is happening.
Leave a comment
This site is protected by hCaptcha and the hCaptcha Privacy Policy and Terms of Service apply.