

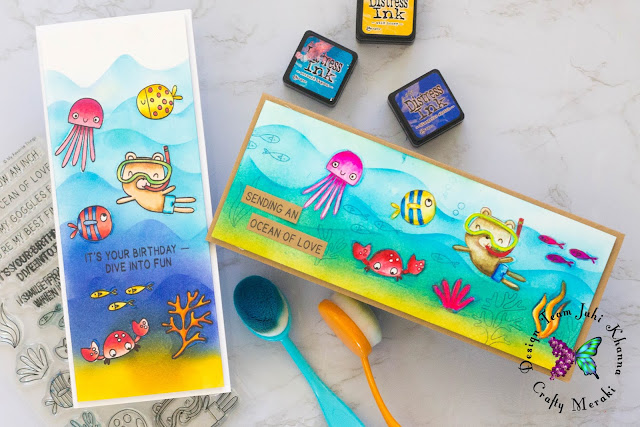
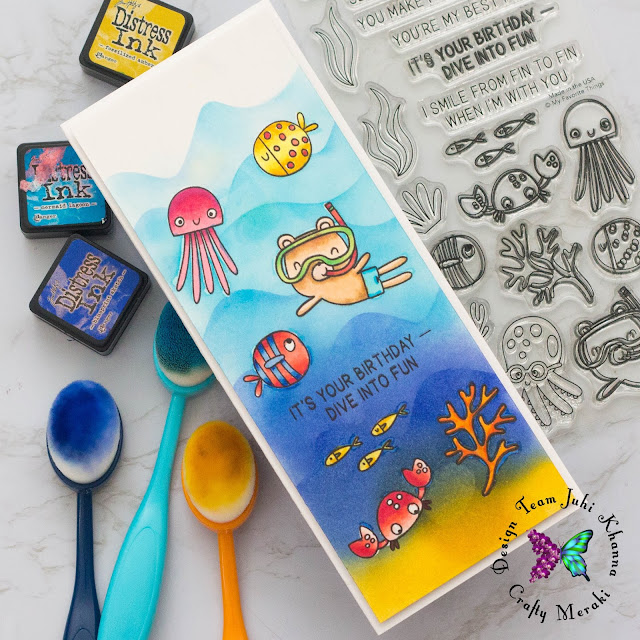
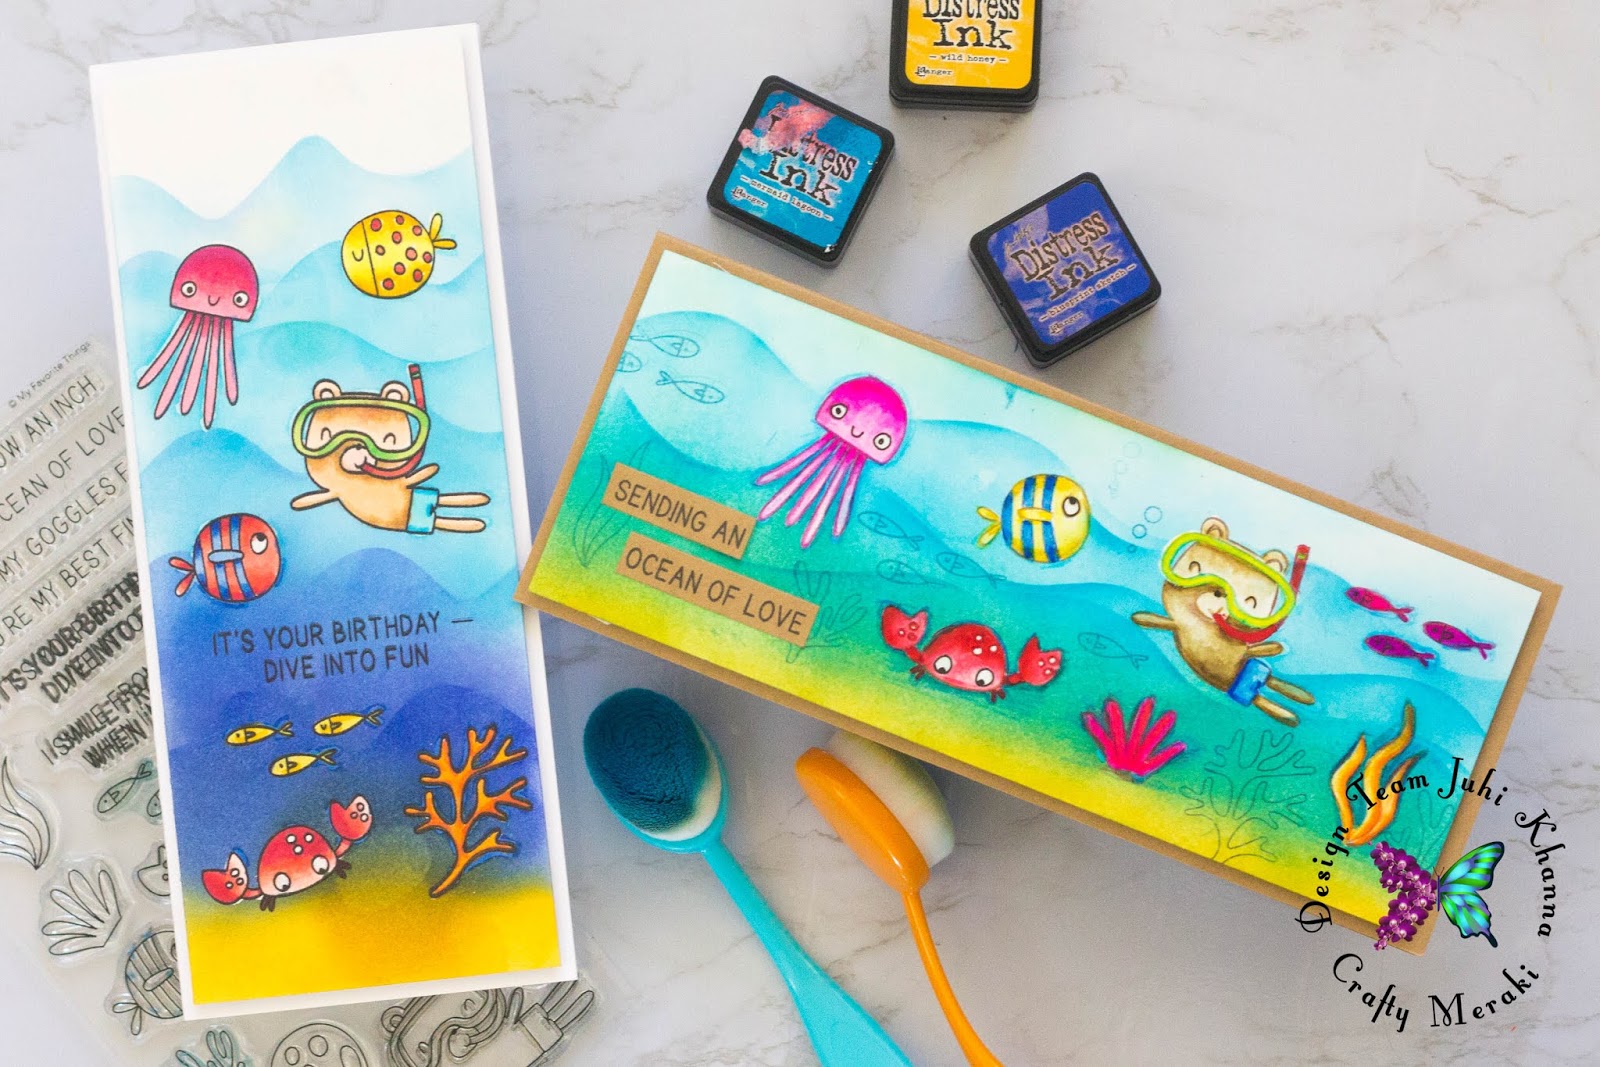
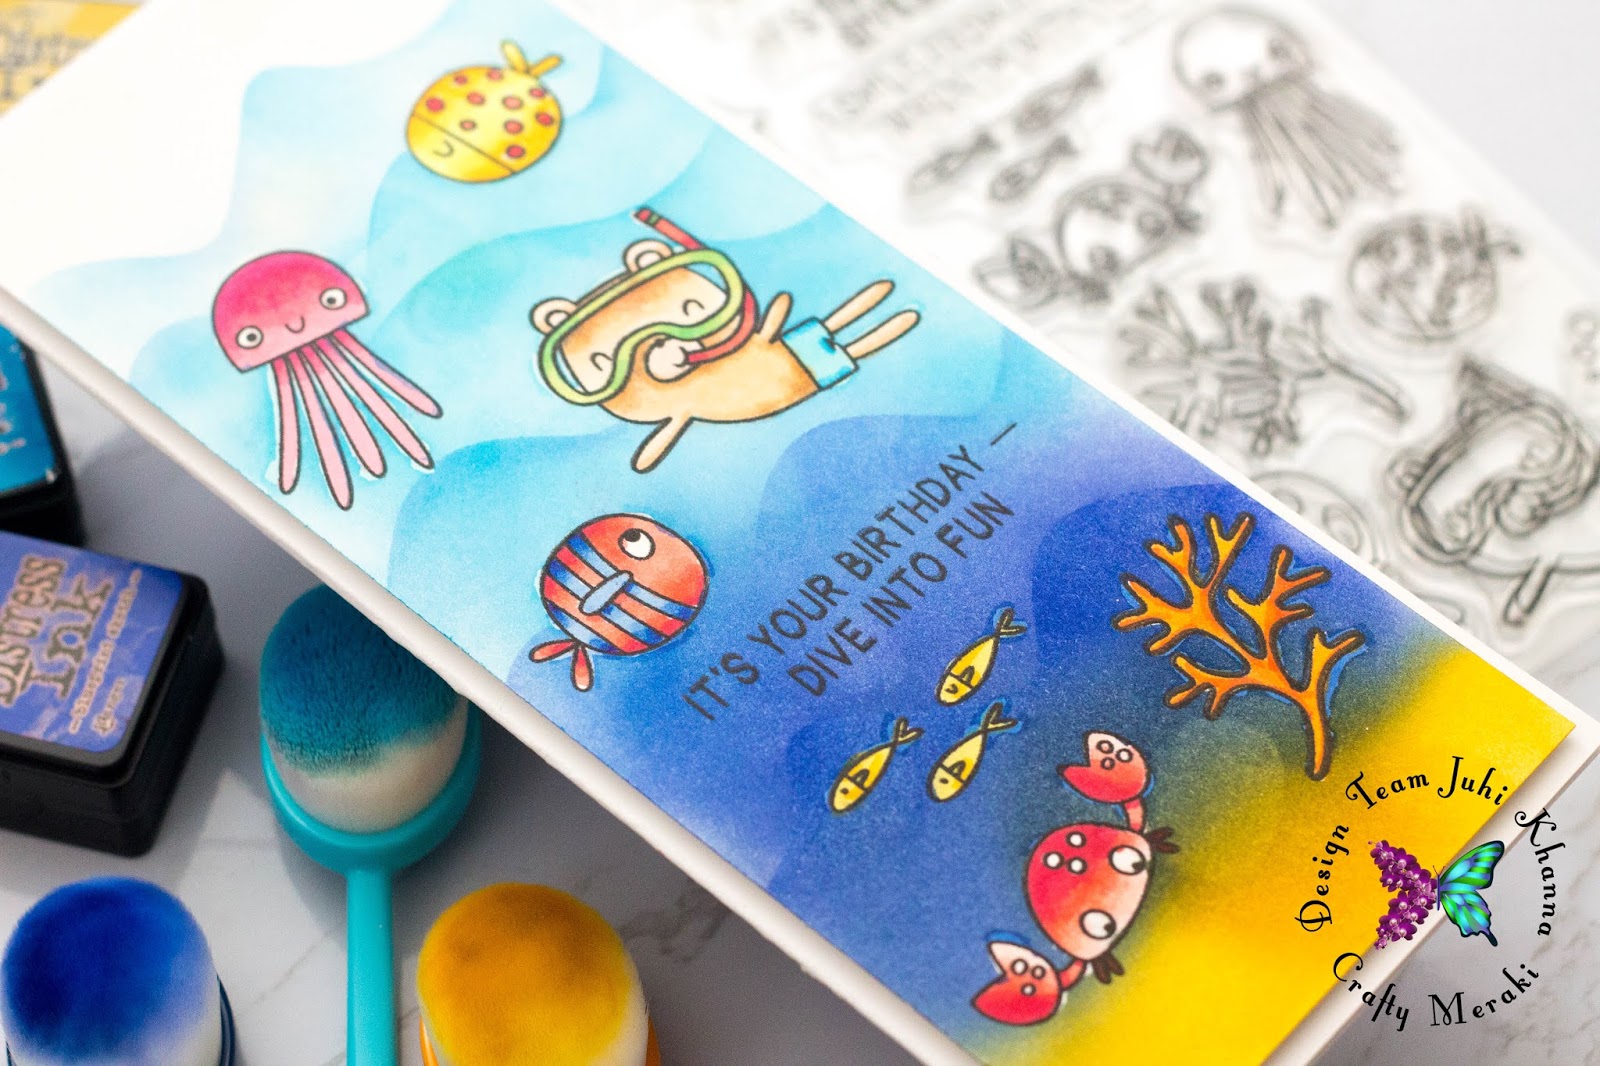
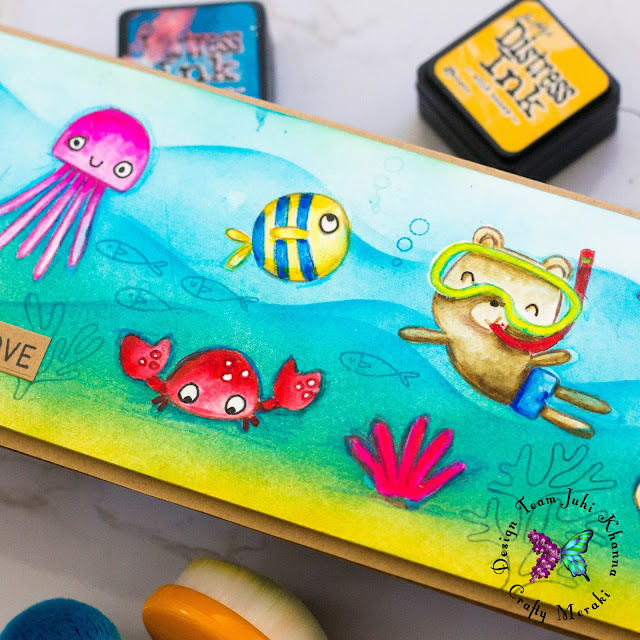
Hello everyone, it's Juhi, today I'm sharing 2 fun one layer cards featuring the Best Fins Stampset from My Favorite Things. I used some masking, ink blending and copic coloring to create these super cute and fun cards.
Strathmore Bristol Smooth Card Stock
Distress Inks - Blueprint Sketch, Mermaid Lagoon, Wild Honey
Misti Stamping platform
Inkon3 Fadeout ink
Ink Blending Brushes
Masking Fluid


Supplies Needed:
My Favorite Things Best Fins Stamp SetStrathmore Bristol Smooth Card Stock
Distress Inks - Blueprint Sketch, Mermaid Lagoon, Wild Honey
Misti Stamping platform
Inkon3 Fadeout ink
Ink Blending Brushes
Masking Fluid

Tutorial
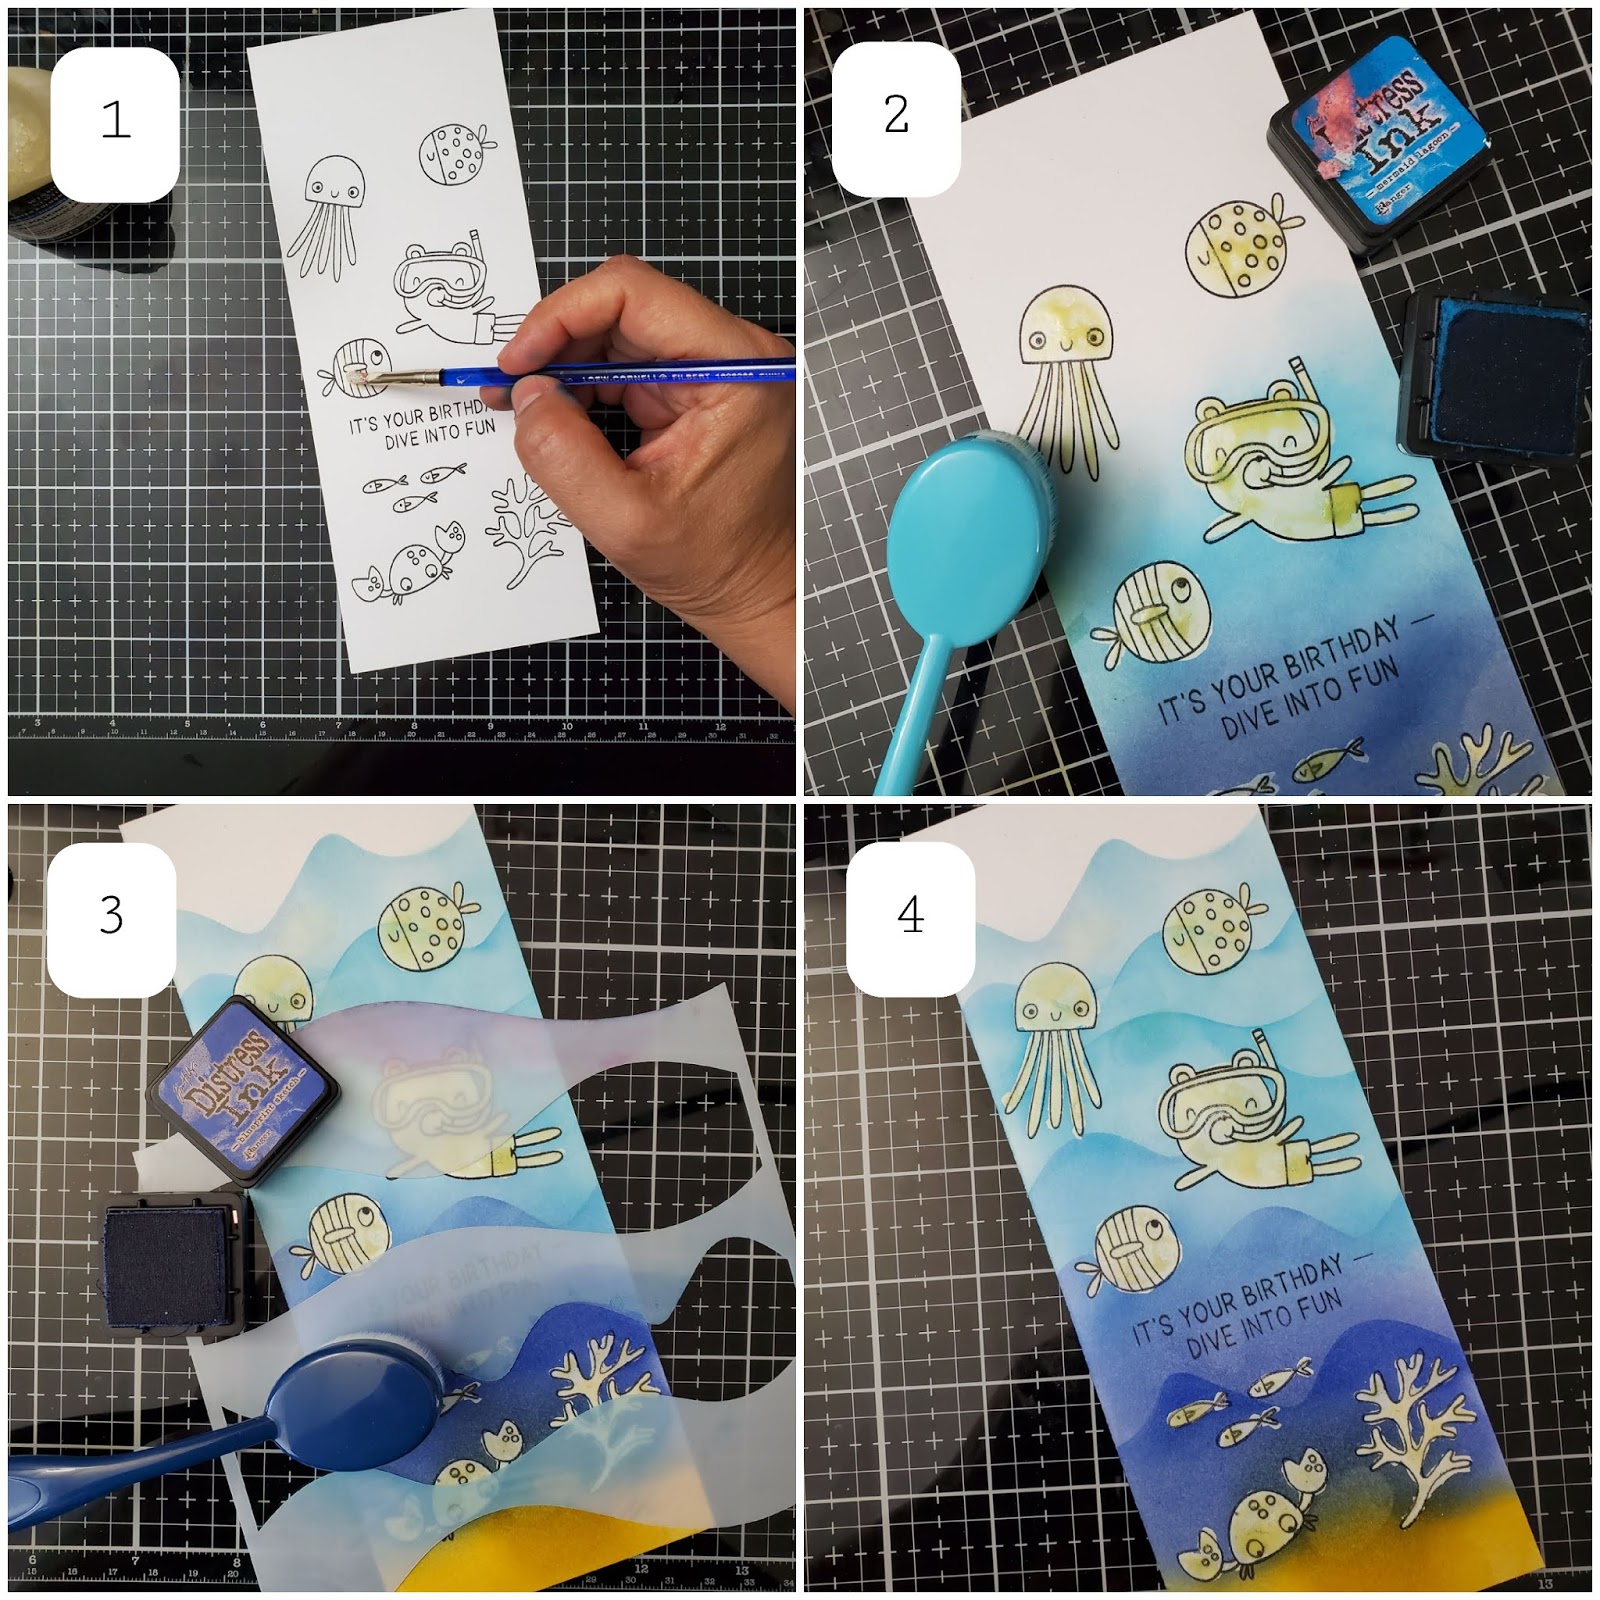
Step 1:
I placed a piece of 3 1/4" x 8 1/4" of Strathmore Bristol Smooth cardstock into my Misti stamping tool and arranged the stamps as I would like on the final card. I then stamped the images with a Copic Marker friendly black ink. Take care to not remove the stamps from the misti, we will stamp over the colored piece in the end. Following this I covered all the stamped images with a thin layer of masking fluid using a paint brush.
Step 2:
Once the masking fluid had completely dried I added an ink blended background with distress inks using blender brushes. The distress ink colors I used are - Blueprint Sketch, Mermaid Lagoon and Wild Honey. The layer of masking fluid ensured that no color went onto the stamped images.
Step 3:
I then added some waves with a stencil for added interest.
Step 4:
Image 4 shows how the cardstock panel looked when I was done creating the ink blended background.
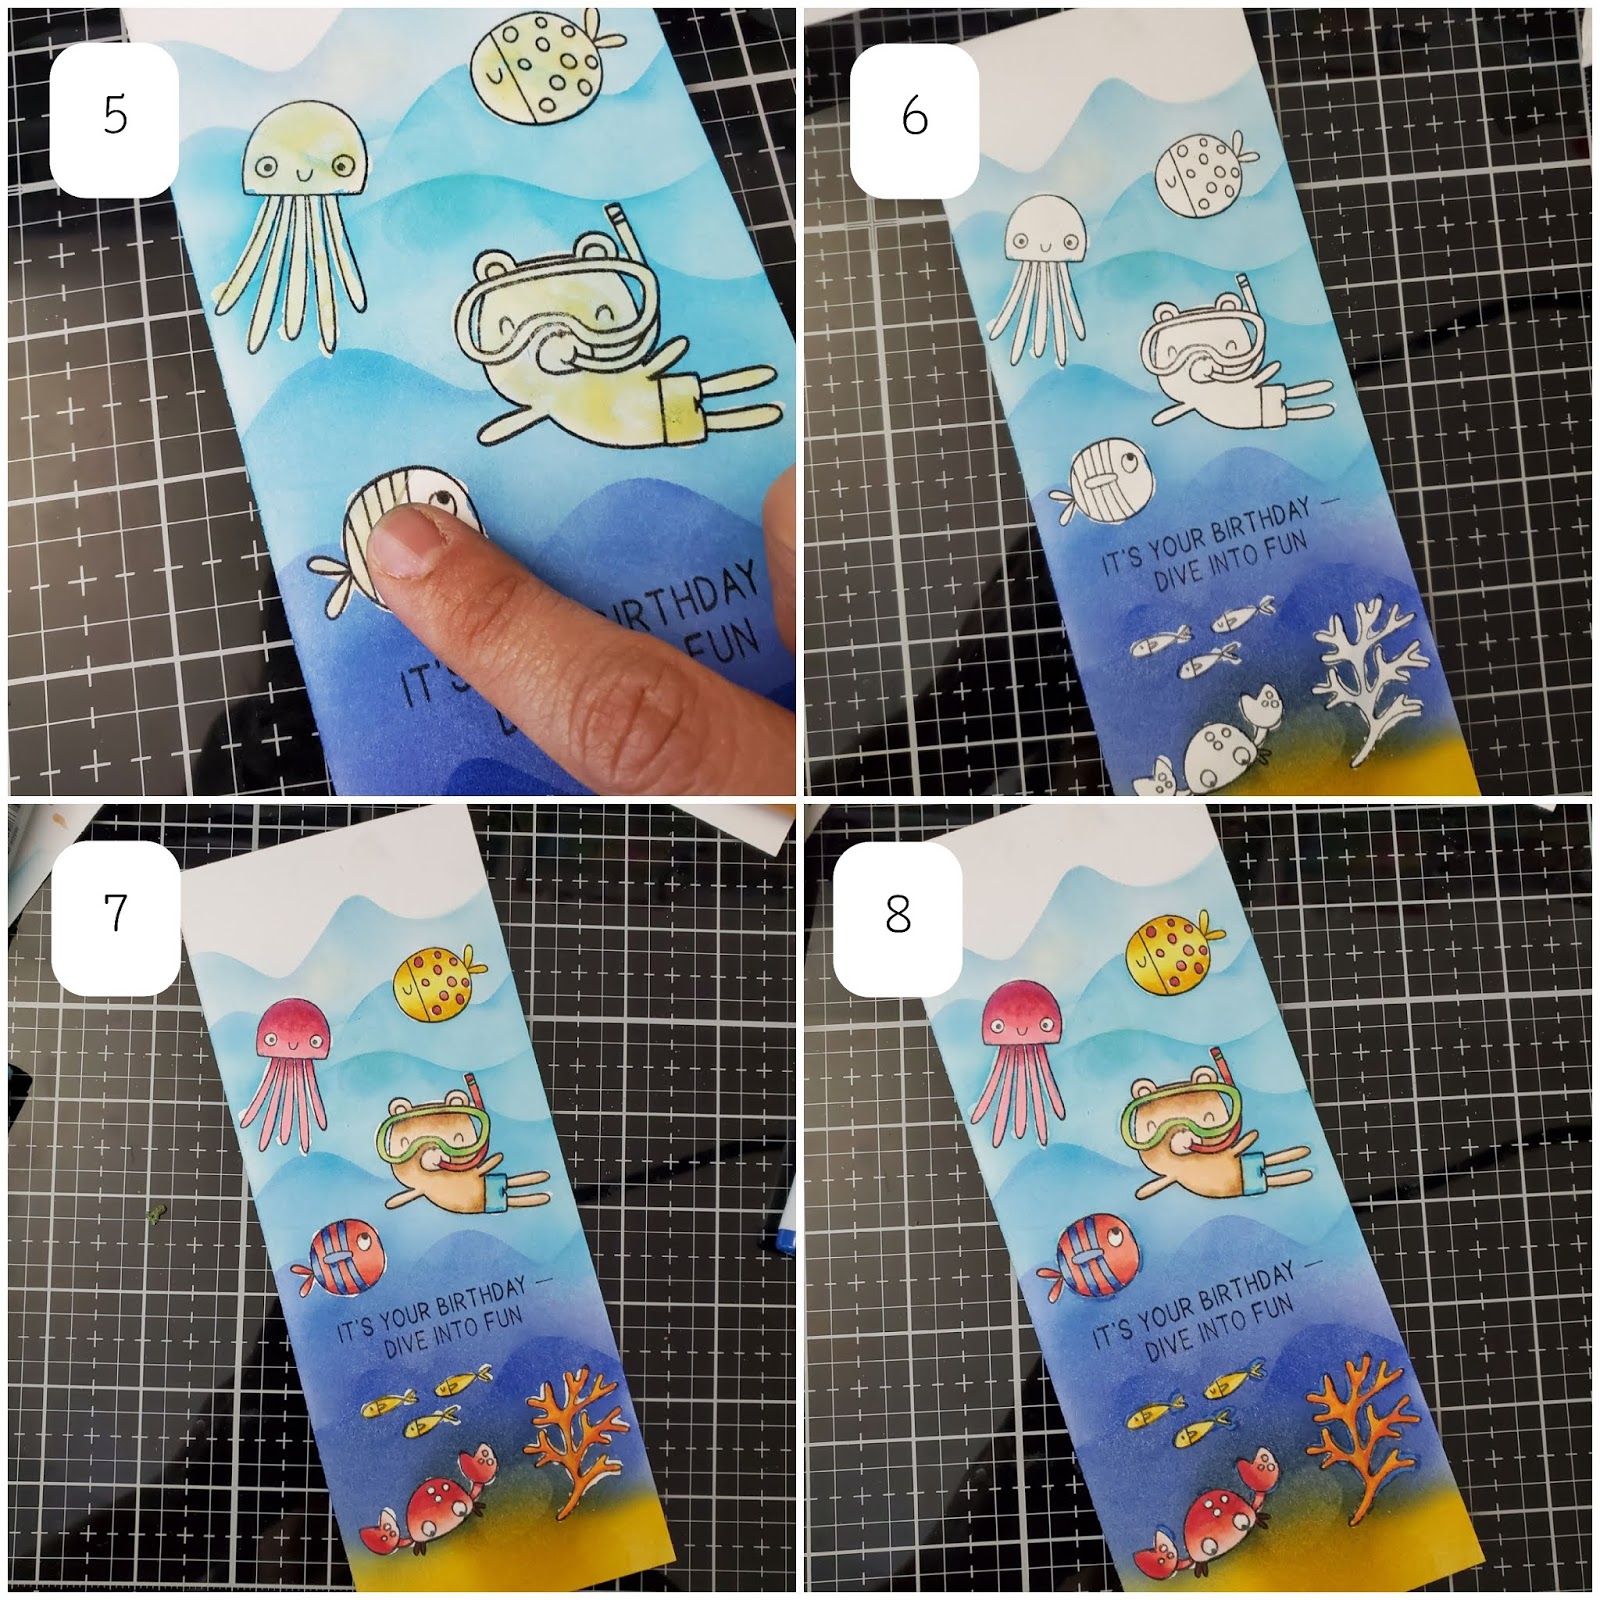
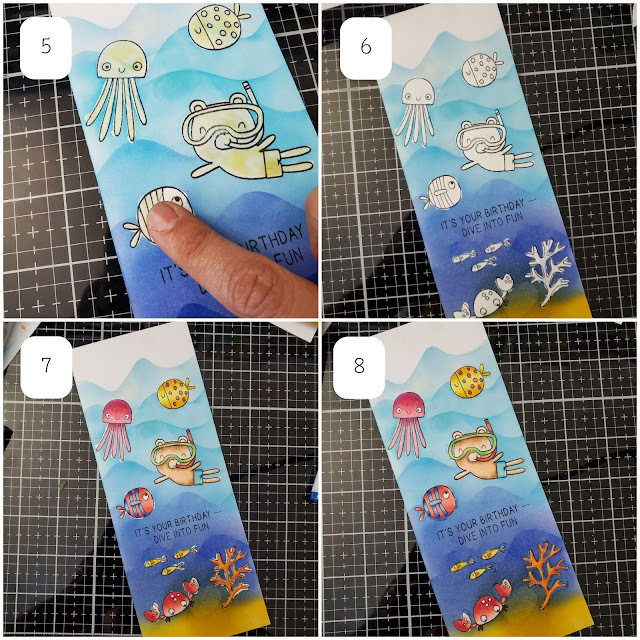
Step 5:
I then carefully peeled off the masking fluid layer from the stamped images by gently rubbing with my fingers. Be careful to use a clean finger (with no ink on it) to peel of the masking fluid otherwise you will land up with a inked image (don't ask me how I know!).
Step 6:
Image 6 shows the panel with all the masking fluid rubbed off. Don't worry if the black outlines look a little faded, we'll fix that in the end.
Step 7:
I then went ahead and colored the images with copic marker, water based markers like the Karin Markers will work just as well.
Step 8:
I filled in the white edges around the stamped images which did not get inked up because of the masking fluid. Following this, I placed the cardstock panel back into the Misti stamping tool and stamped the images again with black ink. This step ensures that the images have crisp black outlines. You have to be very careful in placing the finished panel in the exact position that you used in step 1.
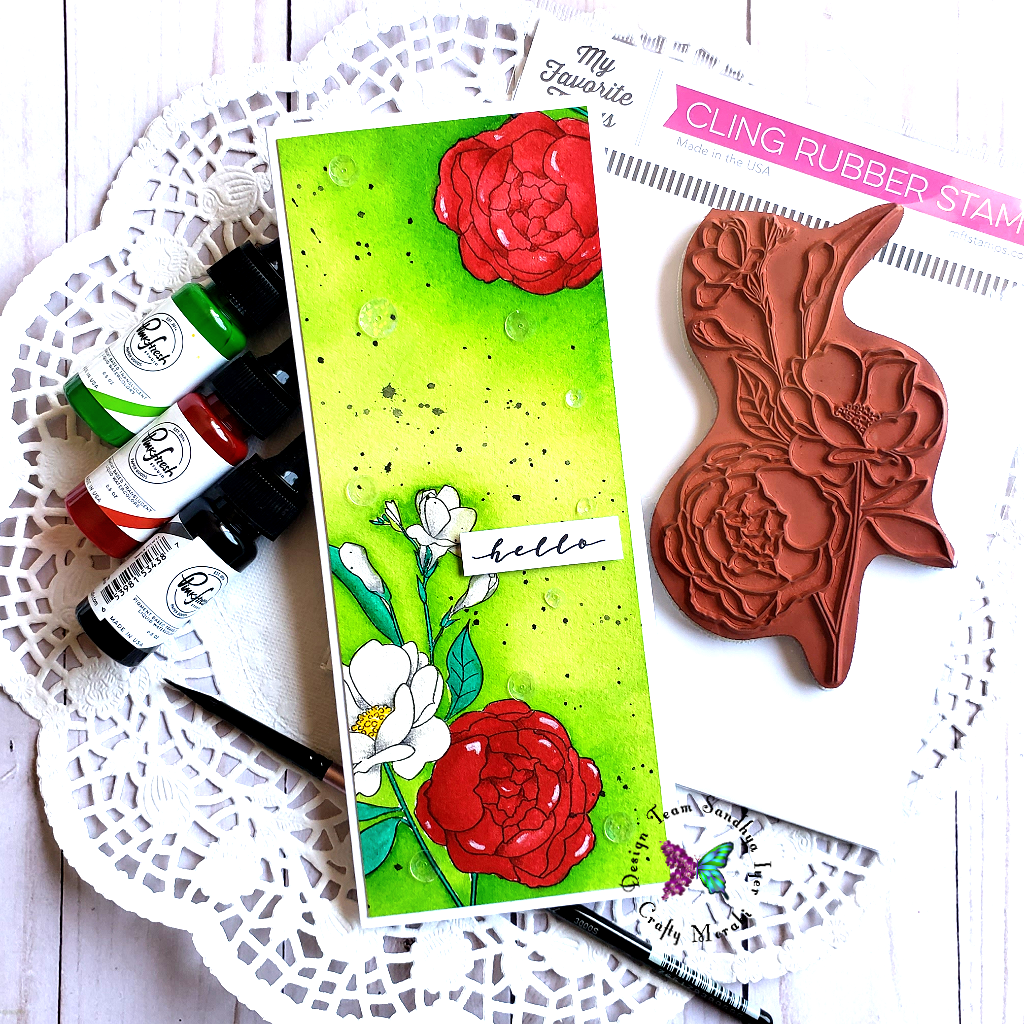
I used the sames steps as above to create my second card.
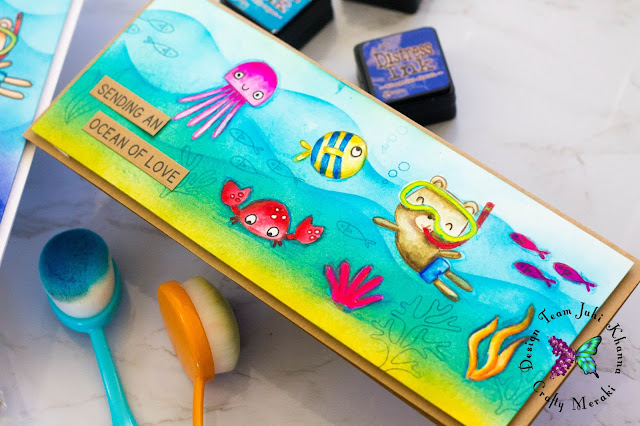
The only difference is that I stamped the i
 mages in a horizontal orientation with Ink On 3 fade out ink and coloring with water based markers.

The only difference is that I stamped the i

Thanks so much for stopping by today.
2 comments
Karthikha Uday
Wow wow wow!! I can’t take my eyes off these cards!! Sooooo adorable and super cool! Thanks for sharing the steps too, Juhi! <3
Natasha b
Wow!!!!!! I love the details!!!!!!!! Adorable scenes!!!!!!!!
Leave a comment
This site is protected by hCaptcha and the hCaptcha Privacy Policy and Terms of Service apply.