Happy New Year crafty friends!
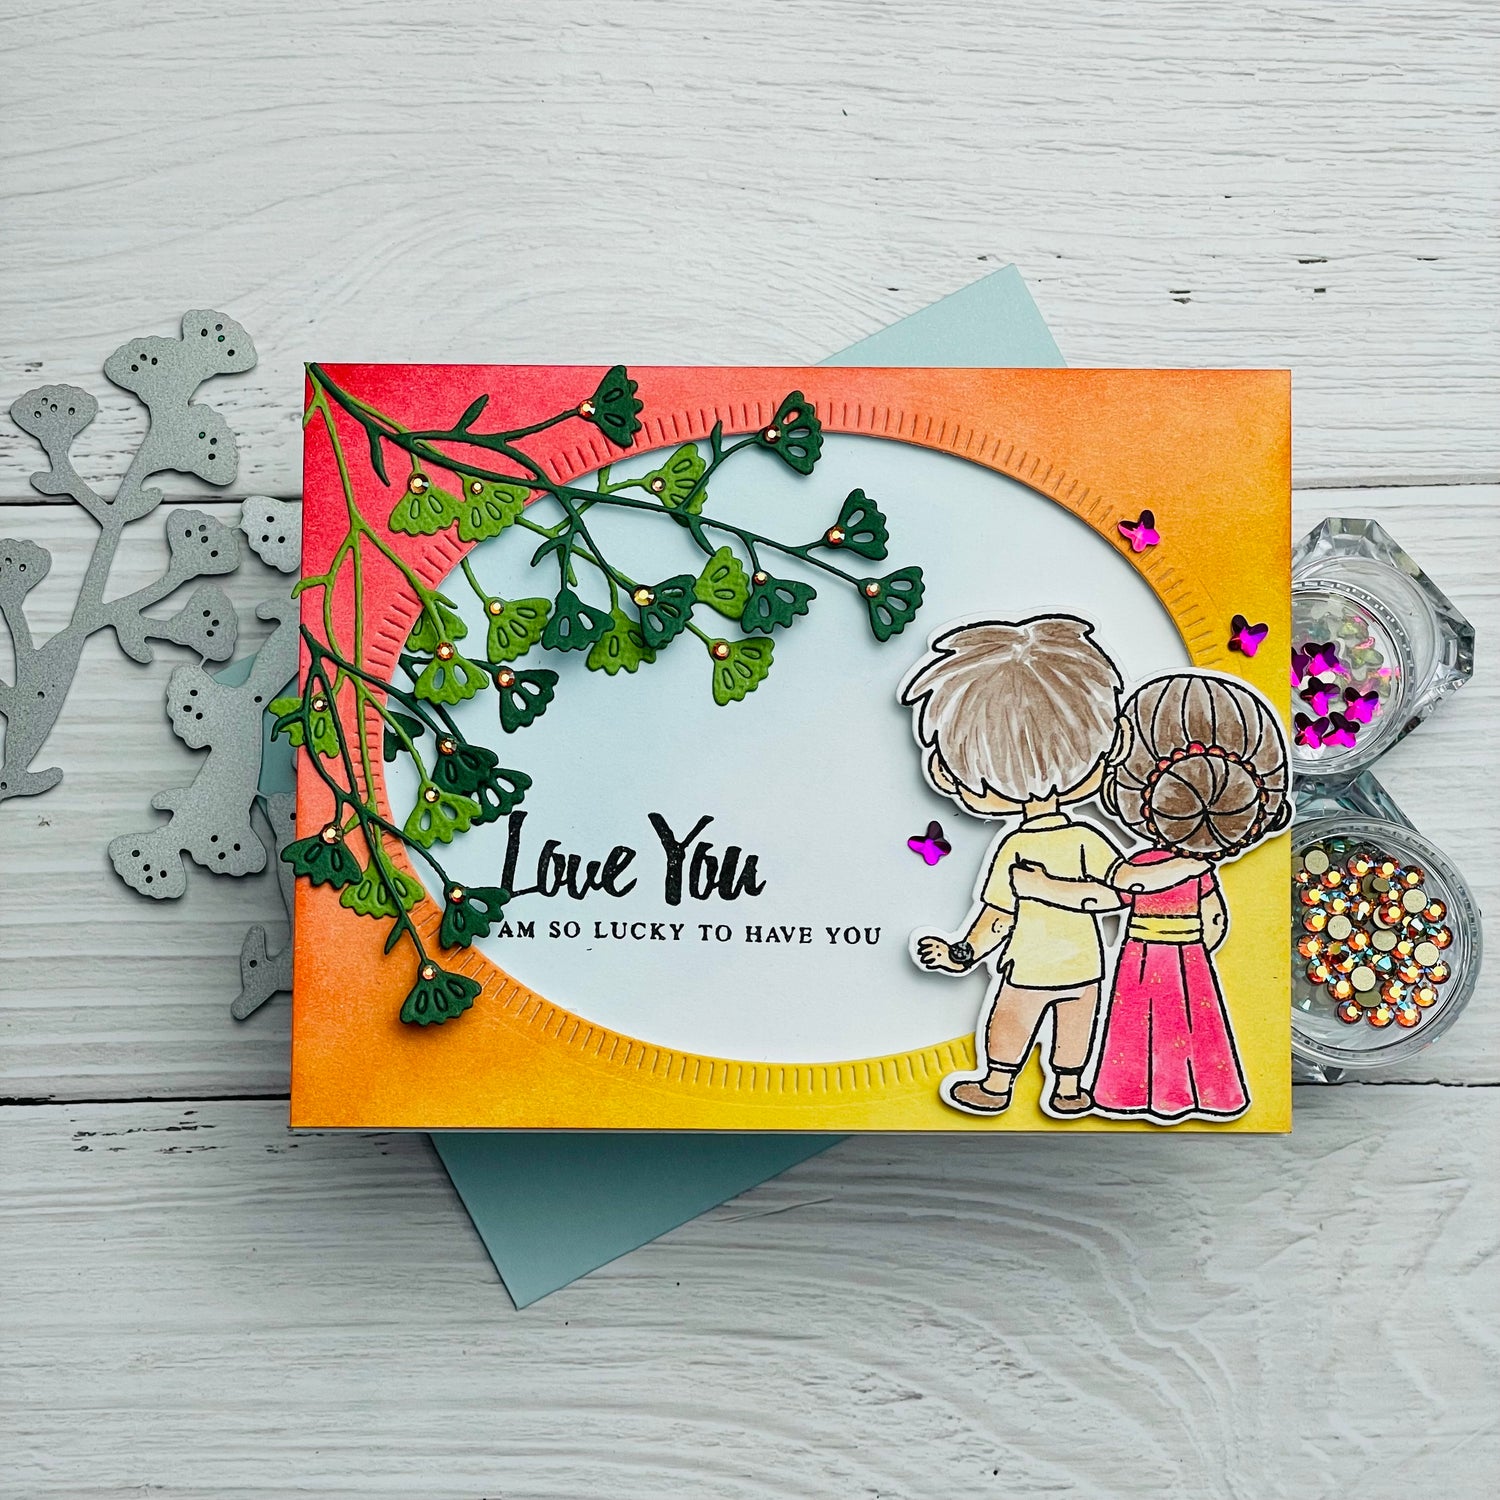
I am so glad to be back on the Crafty Meraki design team. In this first post I have a personal card to share with you. This week was my wedding anniversary and I wanted to create something a bit more special. On this card I am using CM - Happy Rakhi stamps, coordinating dies, flora dies, lots of bling and sparkles and lastly Pinkfresh Studios Braided Oval die. They are all in stock at the CM store.

First and foremost I ink blended a yellow, orange and red background on an A2 card stock using distress inks. Next, on a pre-cut A2 size (side-folding) card base I blended a very light layer of light blue distress ink and created a darker gradation starting at top left corner and becoming fainter towards the opposite corner (bottom right).
For the main image - this set is originally designed for a brother and sister celebration but I could see that by tweaking the image a little it could easily be a couple standing together. So I covered up the bottom part of the band (with a bit of washi tape) on the boy’s hand to make it look like it was a watch. Once the image was inked in Versafine black ink I removed the tape and stamped it on Bristol Smooth watercolor paper. Once the image was watercolored with Karin Markers I used coordinating dies to cut it out and of course snipped off the extra card stock just under the boy’s wrist.
Next, I cut out the flowing flowers with the April flora die in two shades of green card stock. While I had my die-cutting machine out I also used the largest oval die to cut out a frame from the color blended background.
Once all the cutting was done it was time for assembly using liquid glue and foam tape for dimension.

Some April flora die-cuts were adhered straight on to the card base on the top left corner using liquid glue, others were used to glue on top of the oval frame. Next before putting foam tape behind the frame, I stamped the sentiment using the oval as a guide to make sure it would be visible once everything was stuck down.
Single layer of foam tape was used all around the frame. For the couple I used single layer of foam tape where the part of the image was over the frame and doubled up where the image hangs over the inside of the frame. And finally I used some of my favorite sparkles and bling from Crafty Meraki to finish off this card.
It was a little bit of work layering up the foam tape but well worth it! I love how it turned out… I hope this post will inspire you to look at the stamps you already have in a different light and tweak it a little to make them your own!


Leave a comment
This site is protected by hCaptcha and the hCaptcha Privacy Policy and Terms of Service apply.