Hi crafty friends! This week is all about colouring here at Crafty Meraki and I Karin @creakarts am going to show you a simple colouring technique with Karin brushmarkers pro. Let’s go!
I’m going to use three different leaf stamps from the green gala stampset. I want to use embossing powder so I start by stamping them onto watercolour paper with versamark watermark ink. Then I’m throwing wow embossing powder in the colour capri over the stamped images and tap the excess off onto a piece of vellum. You can also use another piece of paper of course. I put the excess embossing powder back into the pot so I can use it again. Now it’s time to take the heat gun and heat up the embossing powder until it melts. I’m stamping all the leaves three times and repeat these steps.

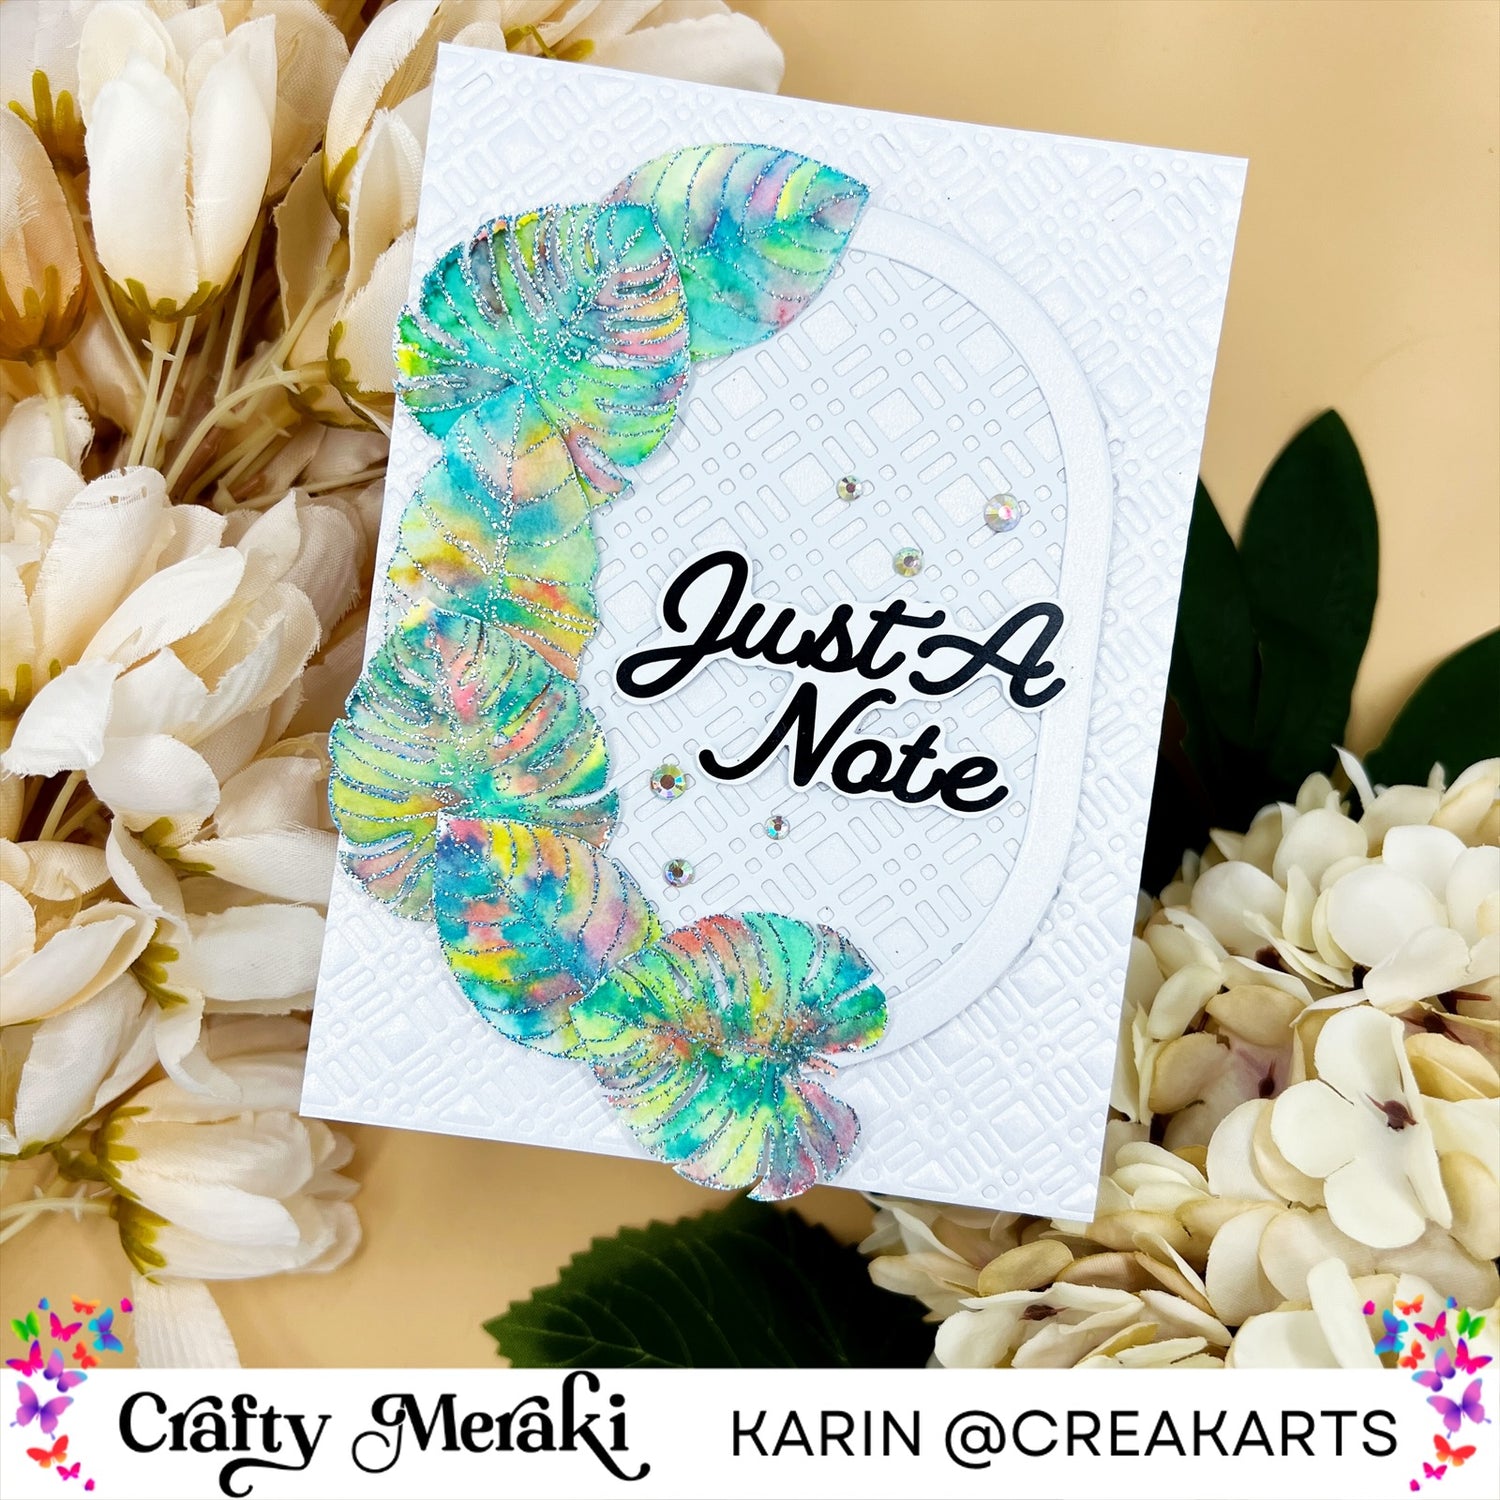
It’s colouring time! I’m using the following colours of Karin brushmarkers pro: sulphur yellow 269, turquoise 654, rose pink 168. I start by spraying water with a spray bottle, I’m using the one from Tim Holtz, onto the leaves. Not too much but just enough so I can go in with my brushmarkers and the ink will flow over the paper. I randomly place each colour multiple times onto the paper using just the brushmarker. I’m doing this with all three colours and then I go in with a damp watercolour brush to let the colours flow in eachother if needed. Let dry completely by air or using a heat gun on the lowest setting. When dry completely I’m going to cut all the leaves with a scissors. You could use the coordinating green gala die for this but i didn’t want to have an edge around the leaves.

For the background I’m using the crafty plaid background A2 die in two different ways. First I’m going to emboss with it. I chose a white cardstock that has subtle gold glitter in it. To emboss with a cutting die you’ll need a special rubber mat that prevents the die to cut into the paper. The sandwich that’s needed to get a good impression is different for every die cutting machine, so check this online or try it out until you’ve found the right sandwich.

For the next step I’m using the crafty plaid background die as it’s made for, cutting it out of white cardstock. After this I’m taking a standard oval shaped die to cut this shape out of the plaid background. I’m using the same oval size to cut a piece of white with subtle gold glitter cardstock, the same colour as the embossed background. Now I’m going to cut with this same oval size again but I’m also using a two times smaller oval and place it on the same piece of paper, white cardstock, so I can create a nice edge around the oval background. I’m putting all these pieces together with tacky glue.

I’m placing the colourful leaves onto the edge of the oval with tacky glue, I only place them on the left side of the oval and let them overlap eachother. The sides of the leaves aren’t glued so they can bend a bit what will give more interest to the card. I’m adding double sided foam tape on the back of the oval as you can see on the picture below. Placing it in the middle of the embossed background.

The sentiment I’m going to add is one from the EAP gilded greetings, just a note. Due to the fact that I don’t own the coordinating die I’m going to cut it out with a scissors. I’m placing it onto the oval with double sided foam tape.

The last step is adding a bit more sparkle, I’m going for the meraki sparkle magic crystal this time. Adding three on the right top of the sentiment and three on the left bottom of the sentiment. The twinkle tray and bling buddy make it very easy to add the right size embellishments.

Thanks for stopping by. Hope I could inspire you with this card. Have a lovely Tuesday! Hope to see you next week again.
~ Karin


Leave a comment
This site is protected by hCaptcha and the hCaptcha Privacy Policy and Terms of Service apply.