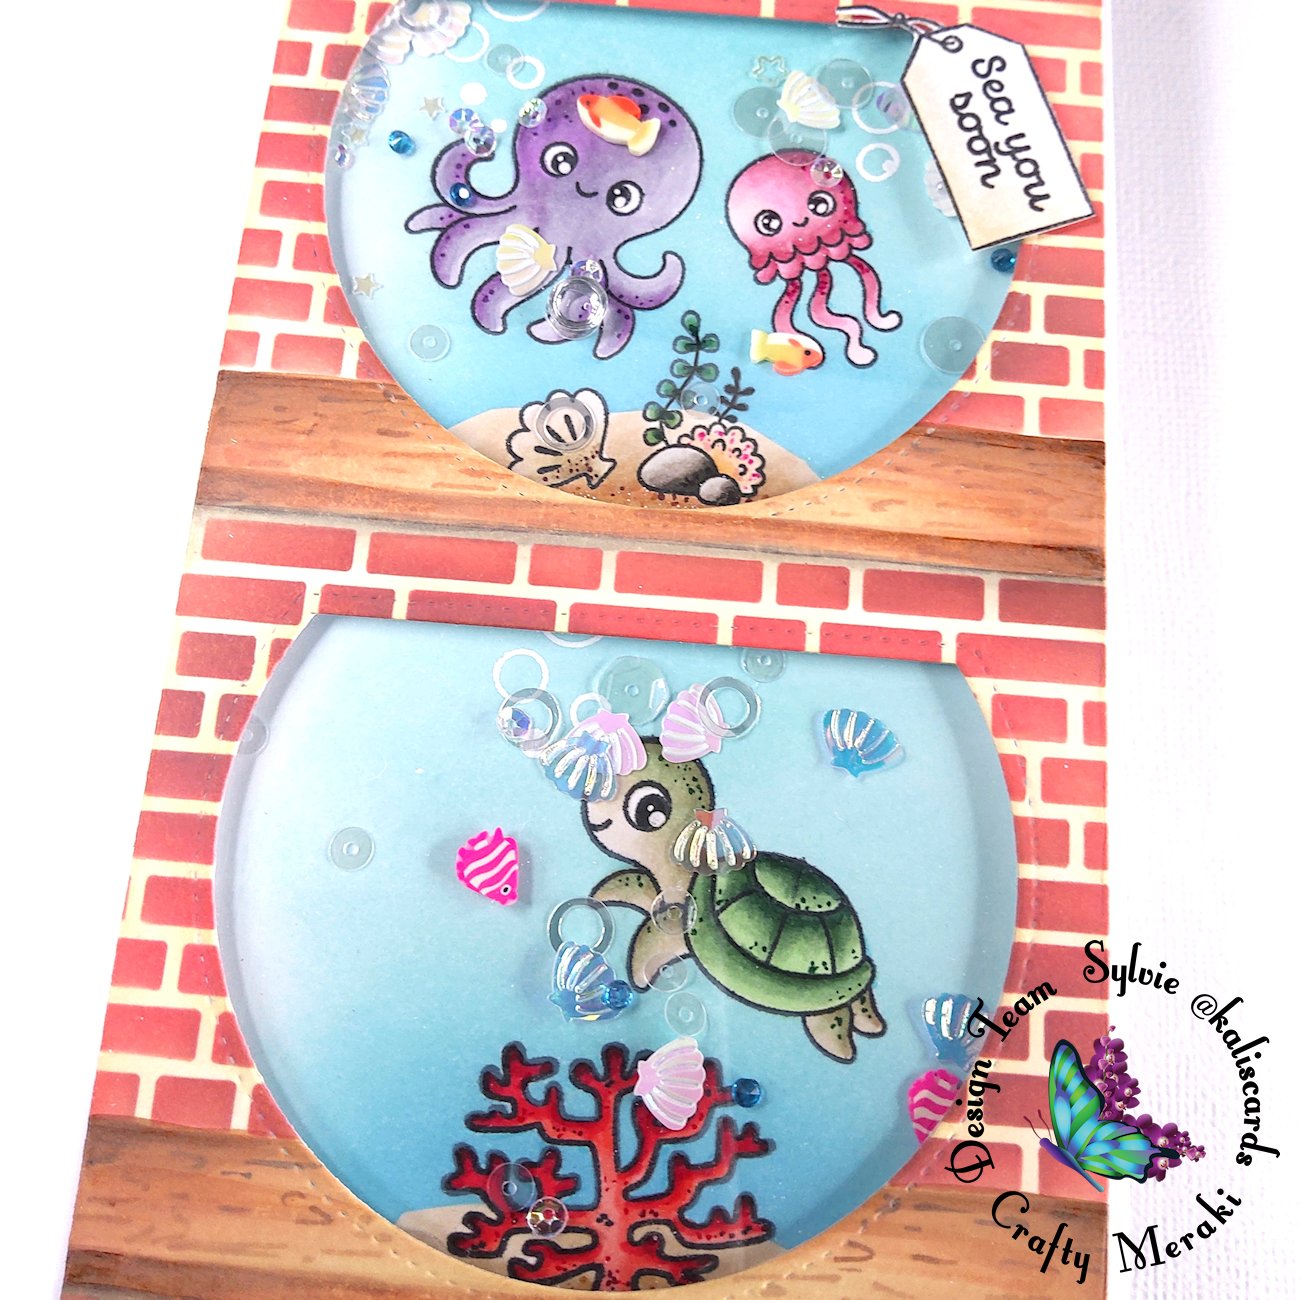
Today, I have a slimline shaker card featuring the new Crafty Meraki Turtle-y awesome stamp set.

To start, I die cut the View from my Window slimline die from white cardstock. Using it upside down from its original intent, to give the illusion of 3 fish bowls, I'm then creating a wall and shelves in the background. First, I'm placing masking tape above the first shelf line I want to create, and blend Distress oxide Antique linen and some Vintage photo and Ground espresso at the back (i.e. the top). I'm repeating this step for the three shelves.
Then masking the shelves, I'm blending Distress oxide Antique linen everywhere else. With the My Favorite stamps Brick stencil, I'm blending Distress oxide Fired brick everywhere and then some Vintage photo and Ground espresso in little touches here and there

To finish my front panel, I'm adding some wood accents, with my Copic markers, on the shelves and creating shadows on the sides and shelf borders. I'm also adding shadows below the shelves
For the back panel, I'm cutting a piece of cardstock the same size as the front panel and, using the opening of the front panel as a guide, I'm stamping the images from the Turtle-y awesome and Mertini on the rocks stamp sets, and masking them with masking paper. I'm also masking an area at the bottom of each fish bowl to create sand later on.
I'm then blending Distress oxide Salvaged patina on the entire panel and Salty ocean, at the bottom of each fish bowl. I'm unmasking the panel and coloring the images and sand with Copic markers.

On a piece of white cardstock, I'm stamping the label from the Celebrate you stamp set, as well as the Sea you soon sentiment from the Turtle-y awesome stamp set. I then fussy cut the image with a craft knife
To assemble the card, I'm starting by taping acetate at the back of my front panel, and then 3D foam around the fish bowls and edges of the panel. I'm pouring a few sequins in each fish bowl and then after removing the release paper, I'm placing the back panel on top, making sure both panels are correctly aligned. I'm then cutting the edges of the back panel, to make sure it's not visible from the front and gluing the shaker to my cardbase.
To finish, I'm taping the Sea you soon label on my card.
Thank you for stopping by. Hope you liked this tutorial and see you next week!


Leave a comment
This site is protected by hCaptcha and the hCaptcha Privacy Policy and Terms of Service apply.