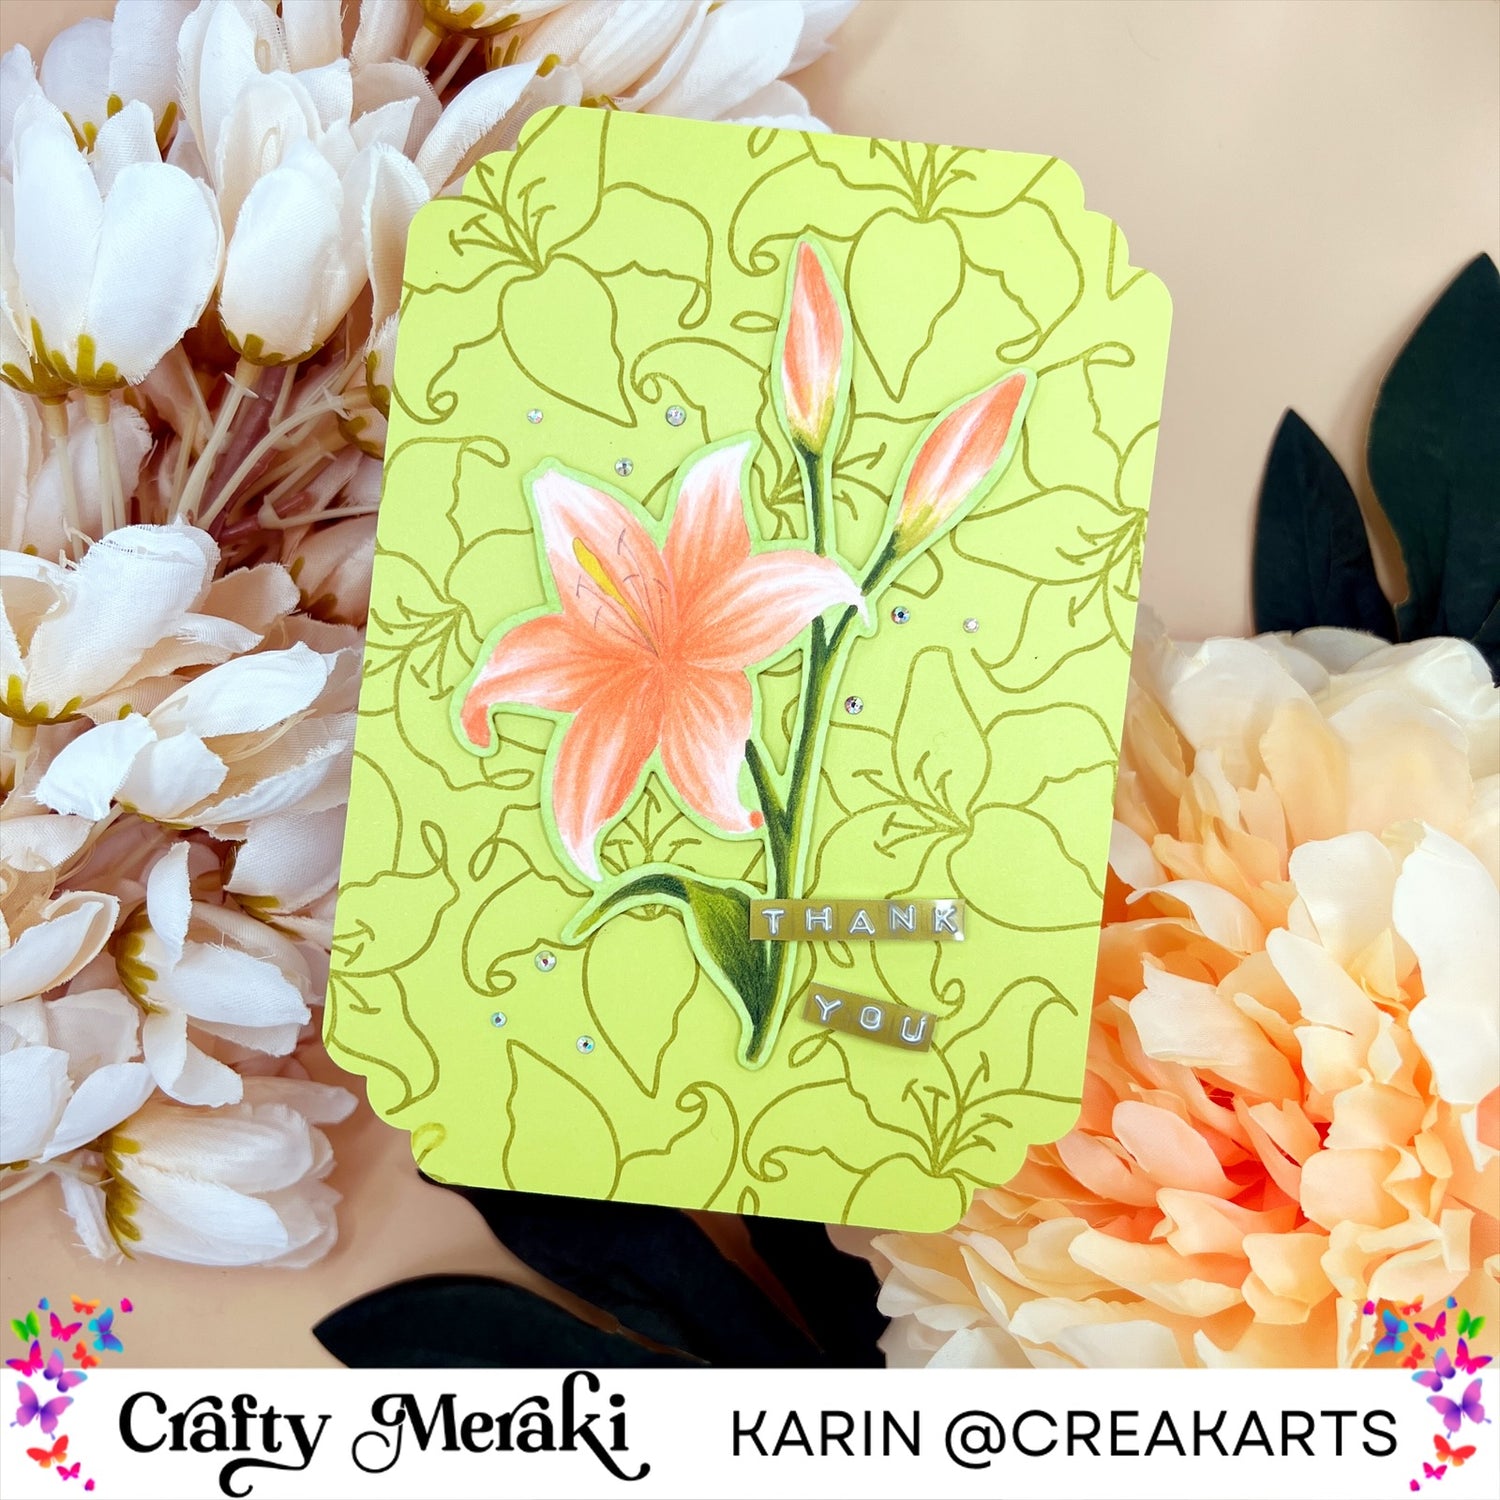
Hello crafty friends! Happy Tuesday! I’m (Karin @creakarts) here again with a new blog. This week is all about stamping techniques over here at the Crafty Meraki blog. I’m going to show you a no line colouring and how you can achieve an amazing background with one stamp.


First I start by picking out a background colour, green is one of my fav colours but always a hard colour to create with, at least it is for me. So I challenged myself to use it for this card. I’m using the single lily stamp from the luxe lilies stamp set. I’m placing it onto the green background in several ways and stamp it multiple times until the background is filled. You can use black ink for it but I wanted to create a more subtle background so I used a green hue for it from concord&9th in grasshopper.

I’m going to add one lily in the center of the background. I’m using the no-line colouring technique with alcohol markers for this part. First I stamp the lily with memento dye ink in the colour sand onto Ohuhu alcohol marker paper. I start by colouring the petals of the lily in the following colours from Ohuhu: YR090, YR070 and YR030. I start by using the darkest colour in flicking motions from the center of the flower. Then I’m going in with the middle colour and then the lightest colour. Then I’m going in with the darkest colour again to give more definition. I colour petal by petal. I do the exact same thing for the flower buds too. But now I’m placing the colours in a different way. You can see it on the pictures below. To add even more definition I’m going in with coloured pencils to add details to the petals. I used prismacolor pencils in the colours 918 and 939. Next I’m colouring the leaf and stem of the lily using GY42, GY8 and GY5. Starting with the darkest colour again and place it on the ‘shadow’ parts of the stem and on the leaf. Then I’m going in with the middle colour and the lightest at last. Then I’m going in again with the darkest colour to add more definition. For the leaf and stem I’m also using colouring pencils too to add more details. I used the colours 908, 911 and 989. The pistil of the lily is coloured yellow in Y2 and I traced the stamen with a normal grey pencil.

I’m going to cut this lily out with the coordinating luxe lilies die but before I’m going to do that I’m going to colour the edges around the lily with a green alcohol marker. I want to create a more soft and ton-sur-ton look so I don’t want to have a white edge around it. The colour I’m using is GY4.
After colouring the edges and cutting the lily it’s time to add double sided foam tape on the back of it, I’m using 1mm thick foam tape for it. Placing it in the middle of the background. I thought the card could use something extra so I used my corner cutter to cut the corners of the card in a different shape. This makes a great thank you card if you’d ask me so I added a ‘thank you’ sentiment in gold using my dymo label writer. A card is never finished without embelllishments so I added some meraki sparkle magic crystal to the card.

That was all for today! I hope I could inspire you with these stamping techniques! See you next Tuesday!
~ Karin


1 comment
MRS DEJANA IVICA
TANGIBLE INFORMATION ABOUT LOAN PLANNING… THIS HAPPY NEW YEAR..
This is not a normal post that you see every day on the internet where people give fake reviews and false information about excellent financial assistance. I am aware that many of you have been scammed and that fake agents have taken advantage of those seeking loans. I will not call these normal reviews, I will call this situation where I live a witness to how you can get your loan when you meet the company’s requirements. It really does not matter if you have a good credit rating or government approval, all you need is a proper ID card and a valid IBAN number to be able to apply for a loan with an interest rate of 3%. The minimum amount is 1000 euros and the maximum amount that can be borrowed is 100,000,000 euros. I give you a 100% guarantee that you can get your loan through this reliable and honest company, we operate 24 hours online and provide loans to all citizens of Europe and outside Europe. They sent me a document that was checked and tested before I got the loan, so I invite anyone who needs a loan to visit them or contact them via email: michaelgardloanoffice@gmail.com
WhatsApp for Europe: +38591560870
WhatsApp for USA: +1 (717) 826-3251
After you contact them, let them know that Mrs. Dejana Ivica from Zagreb gave you the information. Seeing is believing and you will thank me later when you get a loan from them. I made a promise that after I get a loan from them, I will post the good news to everyone online. If you have friends or relatives, including colleagues, you can tell them about this offer and that it is happening.
Leave a comment
This site is protected by hCaptcha and the hCaptcha Privacy Policy and Terms of Service apply.