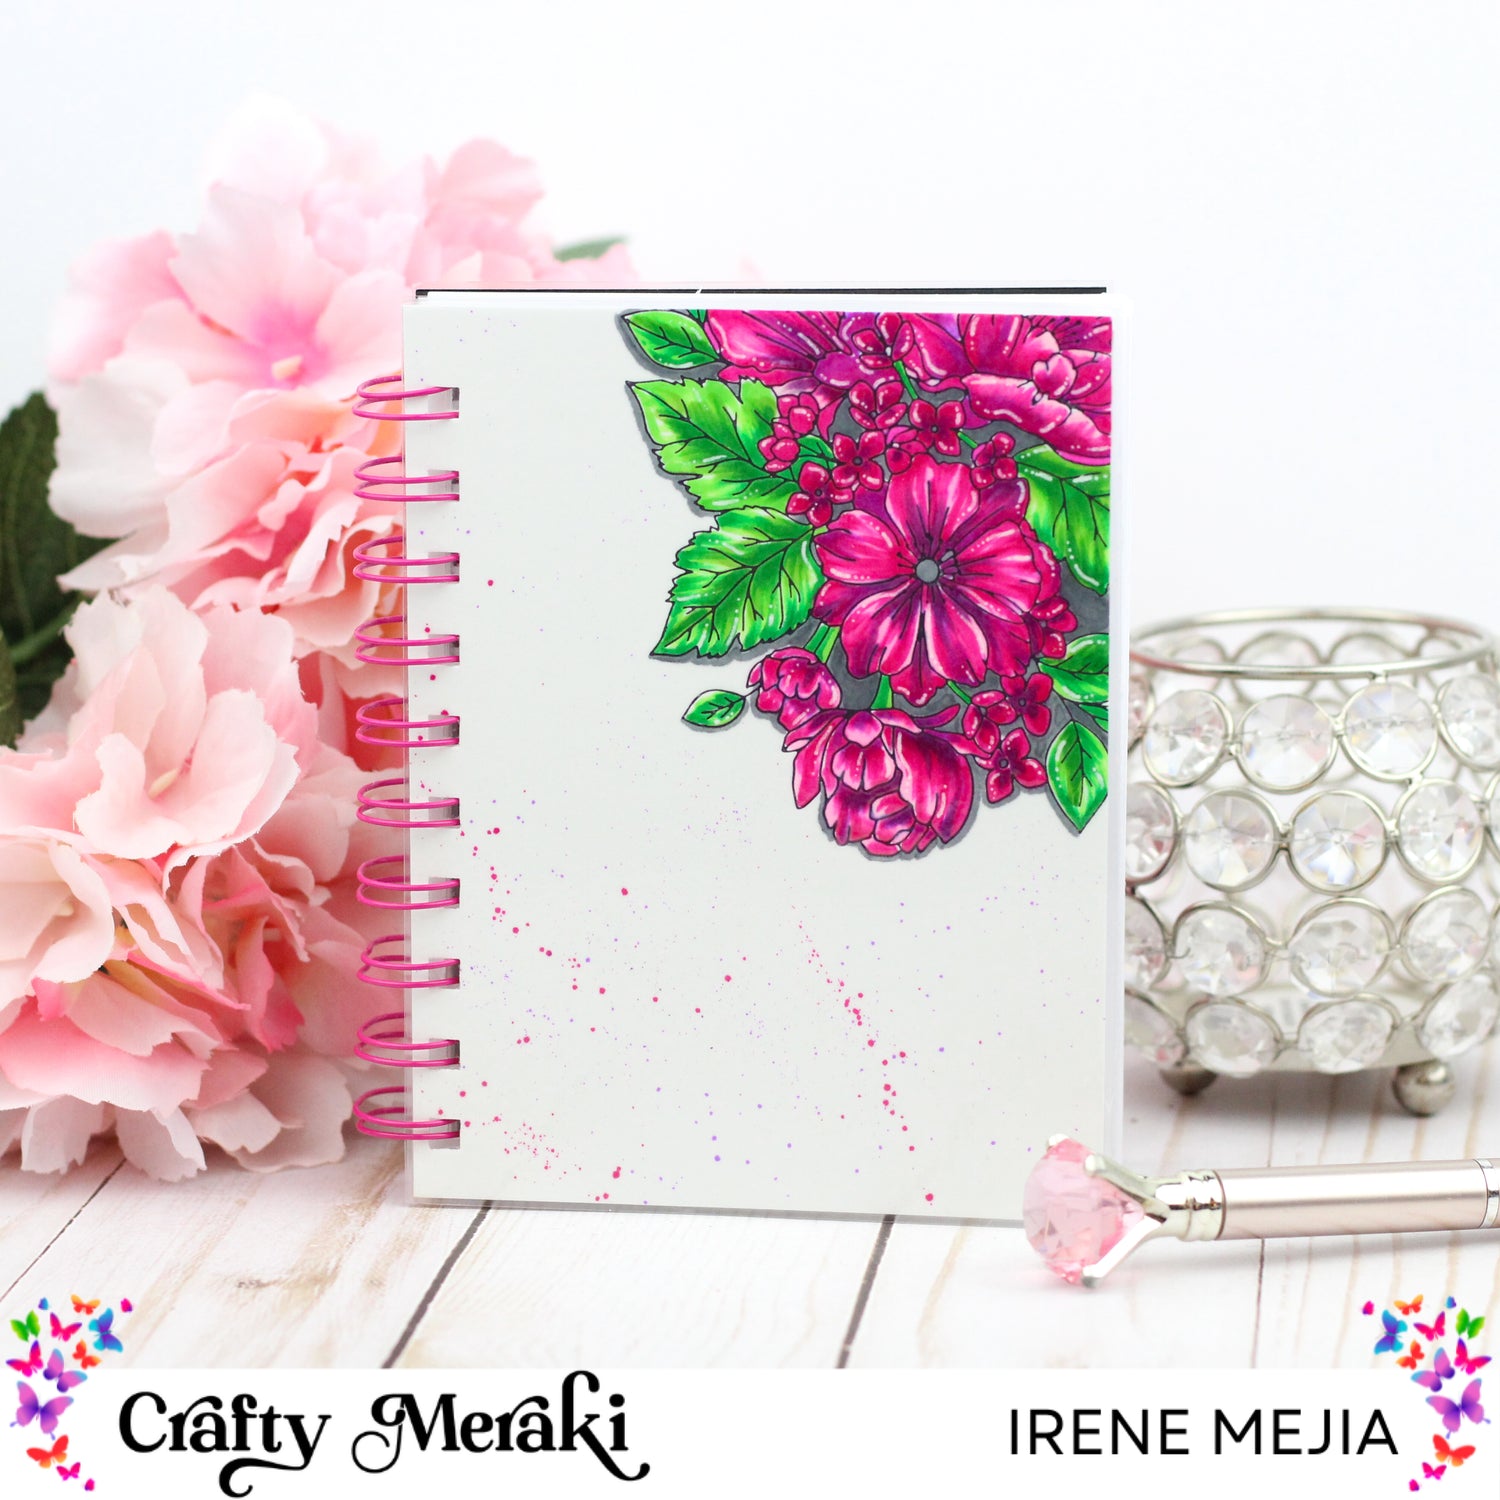
Happy Friday, friends! Irene here with a fun project. You can make this project into a card by adding your favorite sentiment. However, I made this into a mini-notebook to give as a gift.
I began with the NEW Little Things Press-tacular Plate. I placed it into the BetterPress System and pressed the image onto BetterPress A2-sized cardstock with black BetterPress ink. I let the ink dry before adding color.

I wanted the florals to be bright pink, so I used Copic markers to color them. I colored all of the flowers with RV00 as the base. Then, I added RV09 along the inside and outer edges with a flicking motion. I used RV06 and RV02 to blend. I added shadows with V04. I used the same technique and colors for all of the flowers. I added darker shadowing with N4.

For the leaves, I began with YG06 as the base. I added YG17 with flicking motions as the primary color and G09 as the shadow color. I added shadows between the flowers and to the lower right with N4. Next, I added ink spatters with RV06 and V04.
Next, to create the mini notebook, I laminated the panel and a black A2 panel with my Scotch thermal laminator. I cut 25 sheets of paper into 5.5x4.25 (A2-size) to make 100 sheets for the notebook.

Next, I punched the holes with the We R Memory Keepers Mini Cinch Machine. I punched the front and back cover and all the sheets by first placing them at the 4.5 mark. Then, I secured the sheets by locking them into the third space and punching the rest of the holes.


Once I punched all the filler sheets and covers, it was time to bind. I placed the book Binding Wire on the holder, added the front cover first, the back cover second, and then all the filler sheets I had cut. I made sure they were all hooked in, and then. I placed it under the press to close. I trimmed the excess wire and used pliers to bend the wires at the ends. My notebook is now complete! The best part is you can still see the texture from the press plate even after laminating it.
I hope this inspires you to create today! Have a great weekend!
I began with the NEW Little Things Press-tacular Plate. I placed it into the BetterPress System and pressed the image onto BetterPress A2-sized cardstock with black BetterPress ink. I let the ink dry before adding color.

I wanted the florals to be bright pink, so I used Copic markers to color them. I colored all of the flowers with RV00 as the base. Then, I added RV09 along the inside and outer edges with a flicking motion. I used RV06 and RV02 to blend. I added shadows with V04. I used the same technique and colors for all of the flowers. I added darker shadowing with N4.

For the leaves, I began with YG06 as the base. I added YG17 with flicking motions as the primary color and G09 as the shadow color. I added shadows between the flowers and to the lower right with N4. Next, I added ink spatters with RV06 and V04.
Next, to create the mini notebook, I laminated the panel and a black A2 panel with my Scotch thermal laminator. I cut 25 sheets of paper into 5.5x4.25 (A2-size) to make 100 sheets for the notebook.

Next, I punched the holes with the We R Memory Keepers Mini Cinch Machine. I punched the front and back cover and all the sheets by first placing them at the 4.5 mark. Then, I secured the sheets by locking them into the third space and punching the rest of the holes.


Once I punched all the filler sheets and covers, it was time to bind. I placed the book Binding Wire on the holder, added the front cover first, the back cover second, and then all the filler sheets I had cut. I made sure they were all hooked in, and then. I placed it under the press to close. I trimmed the excess wire and used pliers to bend the wires at the ends. My notebook is now complete! The best part is you can still see the texture from the press plate even after laminating it.
I hope this inspires you to create today! Have a great weekend!


Leave a comment
This site is protected by hCaptcha and the hCaptcha Privacy Policy and Terms of Service apply.