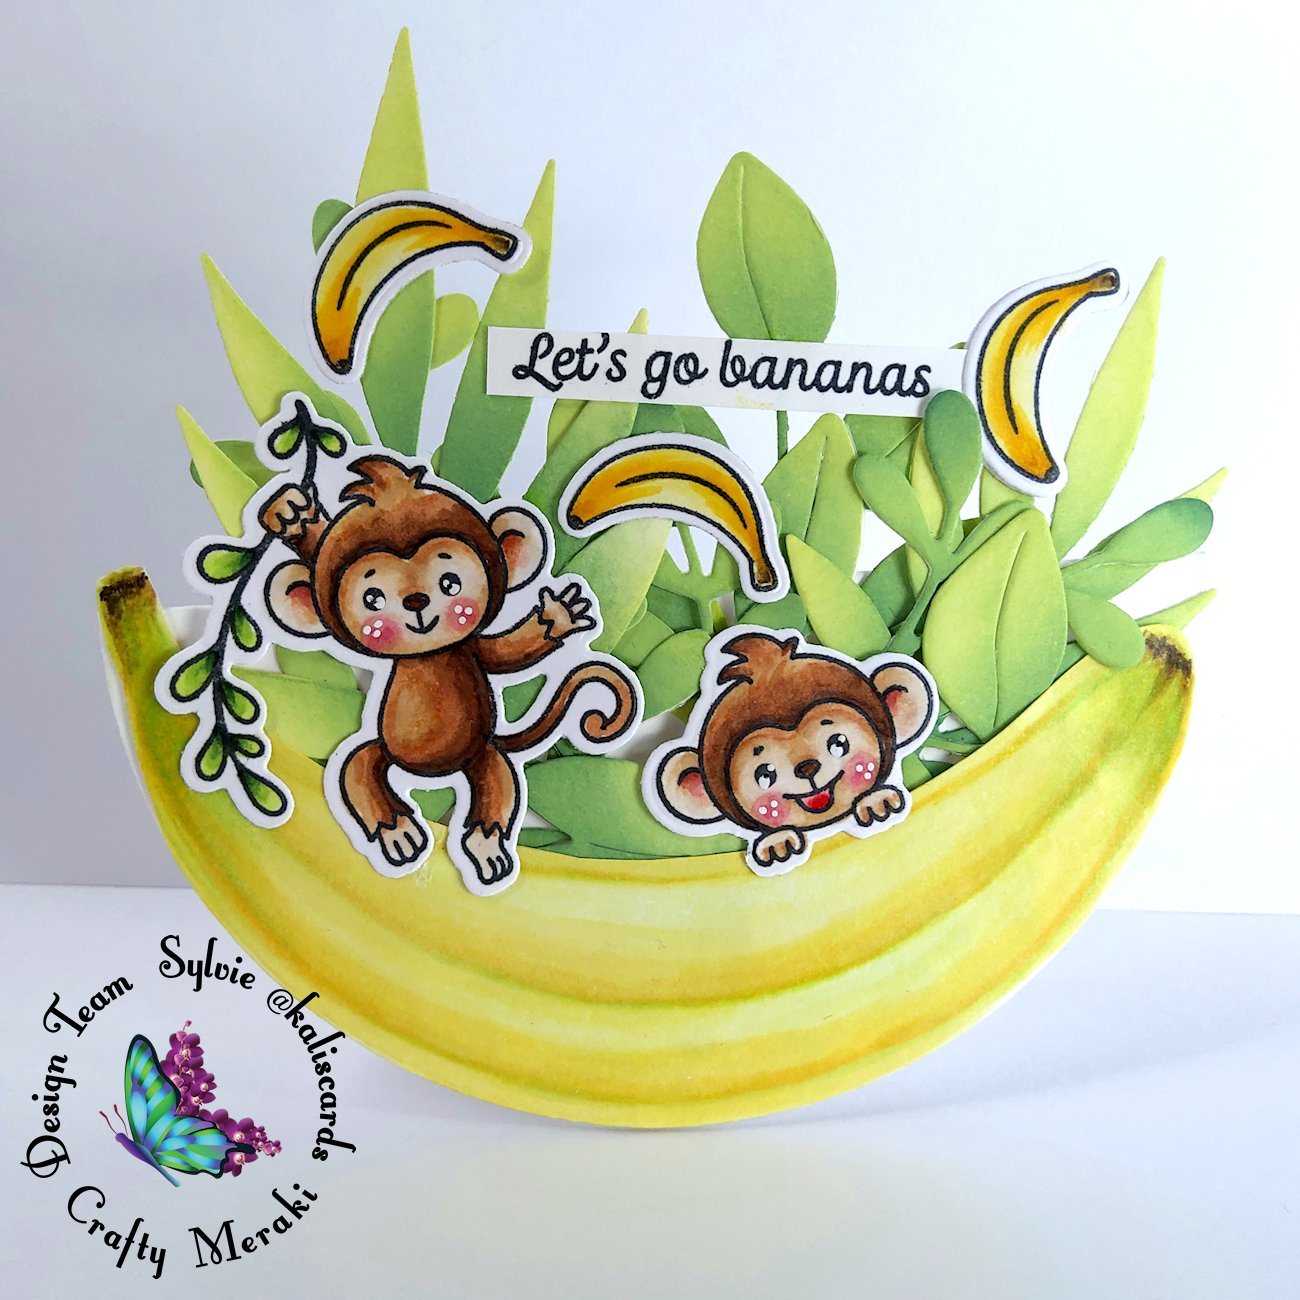
Today, I have a fun rocking card with the new True chimpion stamp set and a cool tutorial on how to create this banana yourself!

To create the banana and rocking cardbase, I die cut two pieces of white cardstock with a circle die. The size depends on the final cardsize that you want, so there is no particular limitation here, but mine is 3 3/4. Any circle die without stitch will work great

Using the circle die as a guide, I'm drawing a line at the bottom of the circle to represent the top of the banana

Next, I'm sketching the banana ends

Time to cut along the lines and erase the pencil marks

With my Copic markers YG01 and YG00, I'm drawning sections to the banana and coloring the ends

Then, within each section, I'm blending, from bottom to top Y15, Y13, Y11 and Y000

Adding more touches of greens to reinforce the sections and ends with markers YG00 and YG01

To finish, I'm blending E89, E87, E48 and E31 on both ends. How easy is that?!

I then die cut the leaves from white cardstock with the Fern leaf die, Laurel leaf die and Olive leaf die. And blended Distress oxide Twisted citron and Rustic wilderness
Next, I stamped the images from the True chimpion stamp set, colored them with Copic markers and die cut them with the coordinating dies.
I also stamped the sentiment on white cardstock and cut it into a strip with my craft knife.
Time to assemble the card. I scored a line in the middle of the spare circle die cut. At the back of the banana, I glued and taped the leaves and then taped them on the bottom part of my scored circle die cut
I then glued the images and sentiment
This is a super fun and easy card to make, so I hope you will give it a try.
Thank you for reading me and see you next week! Have wonderful crafty day and week!!


Leave a comment
This site is protected by hCaptcha and the hCaptcha Privacy Policy and Terms of Service apply.