Hello there and happy Friday!!!
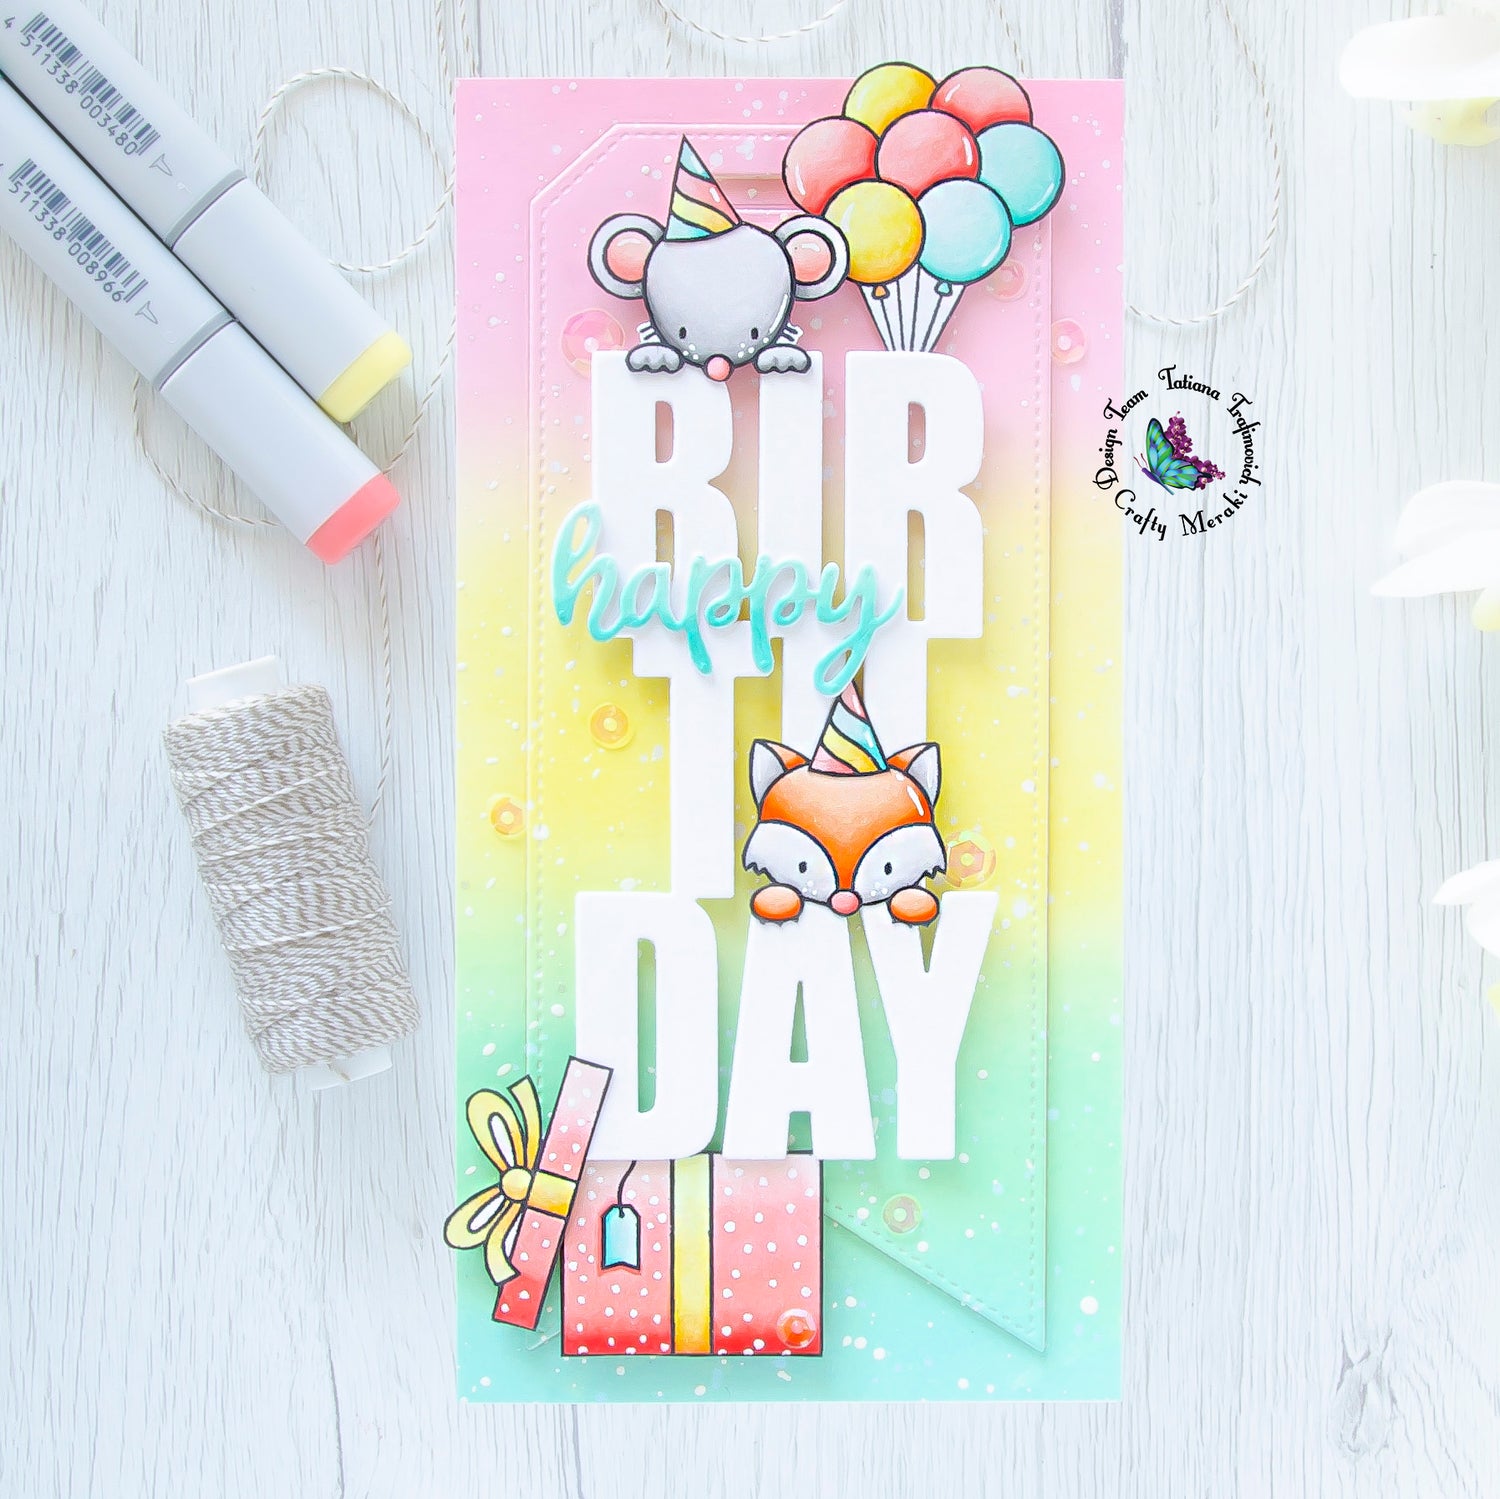
Design Team member Tatiana is here! Thanks so much for joining me! I’m super excited to be featured on Crafty Meraki blog! Today I came up with a fun and cute birthday card mixing and matching a couple of my favorite products from different brands!

Working on this project I decided to try a bright, cheerful and colorful background inked with Distress inks. Then I arranged a big white die cut word birthday from Crafty Meraki Birthday Slimline Tag Die as a central focus point and surrounded it with fun and cute stamps from Heffy Doodle Popping By Stamp Set. A small slimline card base was slightly extended to fit better all the illustrations.

Key Ingredients:
Step By Step Instructions:
- Stamp on Copic X-Press paper all the illustrations you need from Popping By Stamp Set with Memento Tuxedo Black ink. I used MISTI stamping positioning tool for stamping.
- Fussy cut all the stamps with the sharp small scissors right against the stamp lines.
- Color all the elements with copic markers. I used:
- red R0000-R00-R21-R22-R24
- orange YR000-YR61-YR65-YR68
- yellow Y11-YR31-YR65
- teal BG10-BG11-BG13
- grey W00-W1-W3
- Paint the stamp edges with a black brush tip marker to hide any imperfection due to the fussy cutting.
- Trim and score a card base slightly taller than a small slimline one (7″ x 3 1/2″) from Neenah Solar White paper.
- Trim another 7″ x 3 1/2″ rectangle from a Bristol paper to use as a background.
- Ink it with (starting from the top):
- Worn Lipstick Oxide ink
- Spun Sugar Distress Oxide ink
- Squeezed Lemonade Distress Oxide ink
- Cracked Pistachio Distress Oxide ink
- Salvaged Patina Distress Oxide ink
- Splatter some tiny water droplets, a clear shimmer spray and a white gouache all across to add more interest to the pattern. Let the paper air dry or heat set it with a heat gun.
- Die cut the fish-tail banner, using Birthday Slimline Tag Die, in the center of the inked background.
- Die cut "Happy Birthday" words from the same Birthday Slimline Tag Die three times. Stack all the layers together with Distress Collage Medium Matte.
- Add color to the die cut word "Happy" with copic markers.
- Arrange all the elements on the card front and glue them in place by popping some on a foam tape for a fun dimensional look.
- Finish with a couple of clear iridescent sequins, a generous coat of a clear glitter pen and a couple of highlights added with a white gel pen.

That's all for today!!! As always thanks so much for stopping by and have a great day!!!
Hugs,
Tatiana


Leave a comment
This site is protected by hCaptcha and the hCaptcha Privacy Policy and Terms of Service apply.