
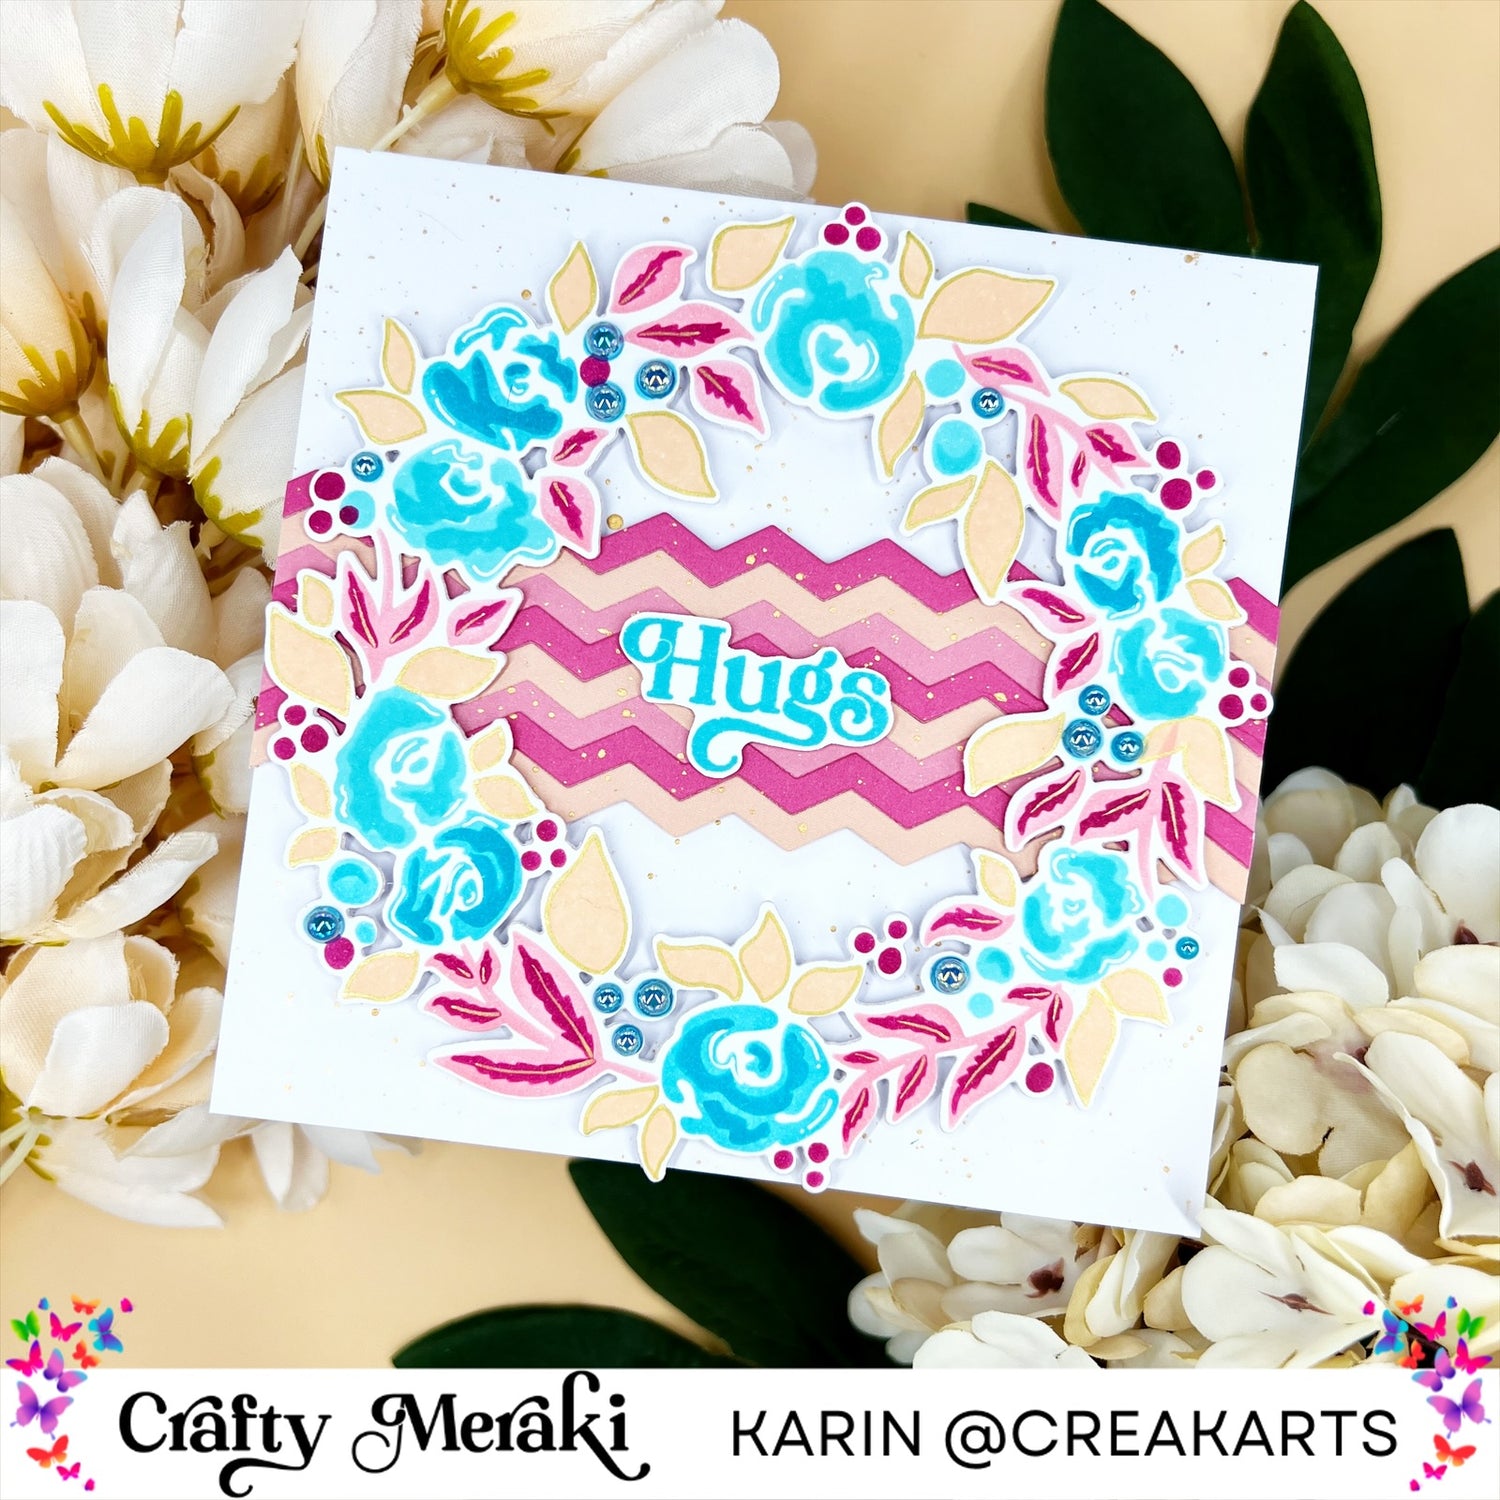
Hello crafty friends! It’s me Karin again. Today I’m going to show you how I made this lovely card (can I say that about my own card? lol)
I never used this gorgeous blooming halo die and stencil in one piece on a card so that was about time. I started with the stencils and some great ink colours.
For the flowers and dots I used pinkfresh studio waterfall, turquoise and paradise.
For the first leaves and dots I used concord&9th watermelon and wildberry.
For the second leaves I used concours&9th creamsicle.

I want to make 2 different colours of flowers but in the same hues so I put a piece of tape on some of the flowers to make it easier, as you can see on the pictures above. For the first layer of the first flowers I’m using the colour waterfall. For the first layer of the other flowers I’m using the colour turquoise. The second layer of the first flowers is inked with turquoise and the second layer of the other flowers is inked with the colour paradise.
The first leaves are coloured with watermelon and the inner part is coloured with wildberry. I coloured the second leaves with a layer of creamsicle.
 After colouring everything I’m running it through my die cutting machine with the coordinating blooming halo die. To give the wreath more sturdiness I’m cutting the blooming halo a second time but now just out of a white piece of cardstock. I put them on top of eachother with some tacky glue.
To add more dimension to the flowers I’m adding some white highlights with a Gellyroll pen. I’m tracing the creamsicle leaves with a gold gelpen and with the same gold gelpen I add details to the other leaves. And I’m adding even more dimension with Meraki cerulean opal embellishments on some of the inked dots. I always use the Meraki bling buddy embellishment tool and the twinkle tray.
For the next step I searched for similar colours of paper in my stash as the inks I used. I only want to use the pinkish hues so I picked three of them that are pretty similar. One colour will be the base and I’m going to cut with the other two colours with the zig zag zoom die, using the middle size. Once cut I’m going to place them on the piece of coloured paper against eachother. Of course the base colour needs to be seen too so keep the same size as the zig zag pieces free in between. I’m doing this because it adds more dimension than just glueing three zig zag zoom pieces together. I’m using each colour twice and cut the excess away with scissors. I put this piece in the middle of the card and wreath, horizontally and raised from the card base using double sided foam tape in 1mm height. 
Now it’s time to add some gold splatter. I’m using old golden facepaint for this, but you can use watercolour or acrylic ink for this too. I’m adding some water to the ink and go in with a brush and slightly tap the brush onto my finger to release the ink and make a good splatter. Add as much as you want. Let it dry completely.
Now it’s time to add some gold splatter. I’m using old golden facepaint for this, but you can use watercolour or acrylic ink for this too. I’m adding some water to the ink and go in with a brush and slightly tap the brush onto my finger to release the ink and make a good splatter. Add as much as you want. Let it dry completely.

In the meantime I pick a sentiment from the gilded expressions stampset. I think ‘hugs’ suits this card so I’m going to stamp it with the pinkfresh ink colour turquoise that I also used for the flowers. I cut the sentiment with scissors but you can also use the coördinating die. 
Now the gold splatter is dry it’s time to add the blooming halo wreath. I’m going to use 1mm thick double sided foam tape on the parts where the raised zig zag zoom is and 2mm thick double sided foam tape on the parts of the card base. I turnover the halo die and place it on the card to see where it’s going to be and then I add some lines on the parts where the edges of the zig zag zoom piece is placed. Now I know where to put 1mm thick and 2mm thick double sided foam tape. After placing the blooming halo wreath onto the card I put 1mm thick foam tape on the back of the stamped sentiment and place in the middle of the card on top of the zig zag zoom piece. And I’m done!

I hope I could inspire you with this lovely card! There’s going to be a new blog of me next Tuesday, see you then ☺️
Now the gold splatter is dry it’s time to add the blooming halo wreath. I’m going to use 1mm thick double sided foam tape on the parts where the raised zig zag zoom is and 2mm thick double sided foam tape on the parts of the card base. I turnover the halo die and place it on the card to see where it’s going to be and then I add some lines on the parts where the edges of the zig zag zoom piece is placed. Now I know where to put 1mm thick and 2mm thick double sided foam tape. After placing the blooming halo wreath onto the card I put 1mm thick foam tape on the back of the stamped sentiment and place in the middle of the card on top of the zig zag zoom piece. And I’m done!
I hope I could inspire you with this lovely card! There’s going to be a new blog of me next Tuesday, see you then ☺️
~ Karin
5 comments
Barry Silbert
When people hear about crypto scams, their typical reaction is disbelief, as if it only happens to careless or reckless individuals. Before I share my experience, if you’re in need of a reliable crypto asset and fund recovery service, their contact information is listed below.
E-Mail: Morphohack@cyberservices .com
My family fell victim to a crypto investment scam that wiped out nearly everything we had worked so hard to build. We lost $407,000 worth of USDT and Bitcoin earlier this year, funds that represented years of savings, hard work, and dreams for the future.
It all began with what appeared to be a legitimate investment opportunity. We were contacted, or more accurately, targeted by individuals claiming to represent a well-established crypto trading platform. They were smooth, articulate, and came armed with all the hallmarks of a trustworthy financial institution. This led us to believe they were legitimate, and we began investing with them. Unfortunately, we soon discovered they were fraudsters. By the time we realized the truth, our investment had vanished. All communication ceased, and there was no way to reach them.
The story didn’t end there. While the emotional toll was immense, we were desperate for answers and reached out to everyone we knew who might be able to help. A family friend introduced us to a group called Morphohack, a team specializing in digital asset and cryptocurrency recovery. Their contact information is provided above.
Morphohack was professional, knowledgeable, and incredibly helpful throughout the entire process. After conducting their investigation, they successfully recovered our funds within a few days. Thanks to their meticulous documentation and coordination with the relevant authorities, we were able to reclaim the full $407,000.
Morphohack accomplished what we thought was impossible, and we are deeply grateful for their outstanding work and support
Derick Powell
I highly recommend the services of the Morphohack Recovery Team for recovering lost or stolen crypto and digital assets. You can contact them via (Morphohack@cyberservices. com).
This team of professional blockchain and cybersecurity experts did an outstanding job helping me recover my crypto assets. I was hacked, and the attackers stole all my Bitcoin and ETH tokens, amounting to a total of $317,000. I believed it was gone for good until a friend, who had previously used Morphohack’s services to recover his own wallet, recommended them to me.
Within 72 hours of contacting them, the Morphohack team successfully recovered and secured my assets. I had my doubts, but they completely exceeded my expectations. If you’re in need of crypto asset recovery, I strongly suggest reaching out to Morphohack. They truly know what they’re doing.
Billy Harlan
My name is Billy Harlan from Texas, USA. I was targeted by a group of individuals who ended up stealing a significant amount of money from me through crypto and Bitcoin.
It all began about two months ago when I received an email promising high returns if I invested in crypto and forex. They presented detailed earnings reports and trading charts that looked very convincing. Looking back, I can admit it was easy to believe.
At the time, I had no idea I was being set up. I started by investing just $5,000 and my within two weeks, I had invested $218,000. However, they claimed my investment had grown to $703,000. To this day, I’m still shocked at how they were able to convince me to invest that much.
Once I realized it was a scam, I contacted the authorities but unfortunately, there was nothing they could do to recover the funds. Not willing to give up, I reached out to a few friends. One of them recommended Morphohack, a private investigator and fund recovery team.
Their team was incredibly helpful and professional. Morphohack worked hard to help me recover my funds, and I’m very grateful for their support. I’m sharing this in case anyone else finds themselves in a similar situation, there are people out there who can help and you can reach them by email: Morphohack@cyberservices(.)com
Dave allen
My wife and I want to show profound gratitude and appreciation, ever since the pandemic things have always been very difficult for me and my family, I lost my job during the Covid19 stay at home pandemic and it was very difficult for me to secure a new job that was how life became terrible for me, But thank God for bringing this man into my life, Mr Bernie Doran. I read so many good reviews online on how he has been helping a lot of people both small business owners to gain financial income so I contacted him on WhatsApp and that was the day my life change began, I started with the lowest investment plan which was $1,500 and within a week I earned a profit of $18,500 on his trade management system, since then I have been making huge profits with the help of MR BERNIE DORAN, Now I can do basically anything I want for myself and my family, I just can’t thank you enough sir, may God continue to reward you. I highly recommend to everyone that needs financial aid, contact him on:
WhatsApp : +1(424) 285-0682 or his
G-mail : BERNIEDORANSIGNALS@GMAIL.COM
Leave a comment
This site is protected by hCaptcha and the hCaptcha Privacy Policy and Terms of Service apply.