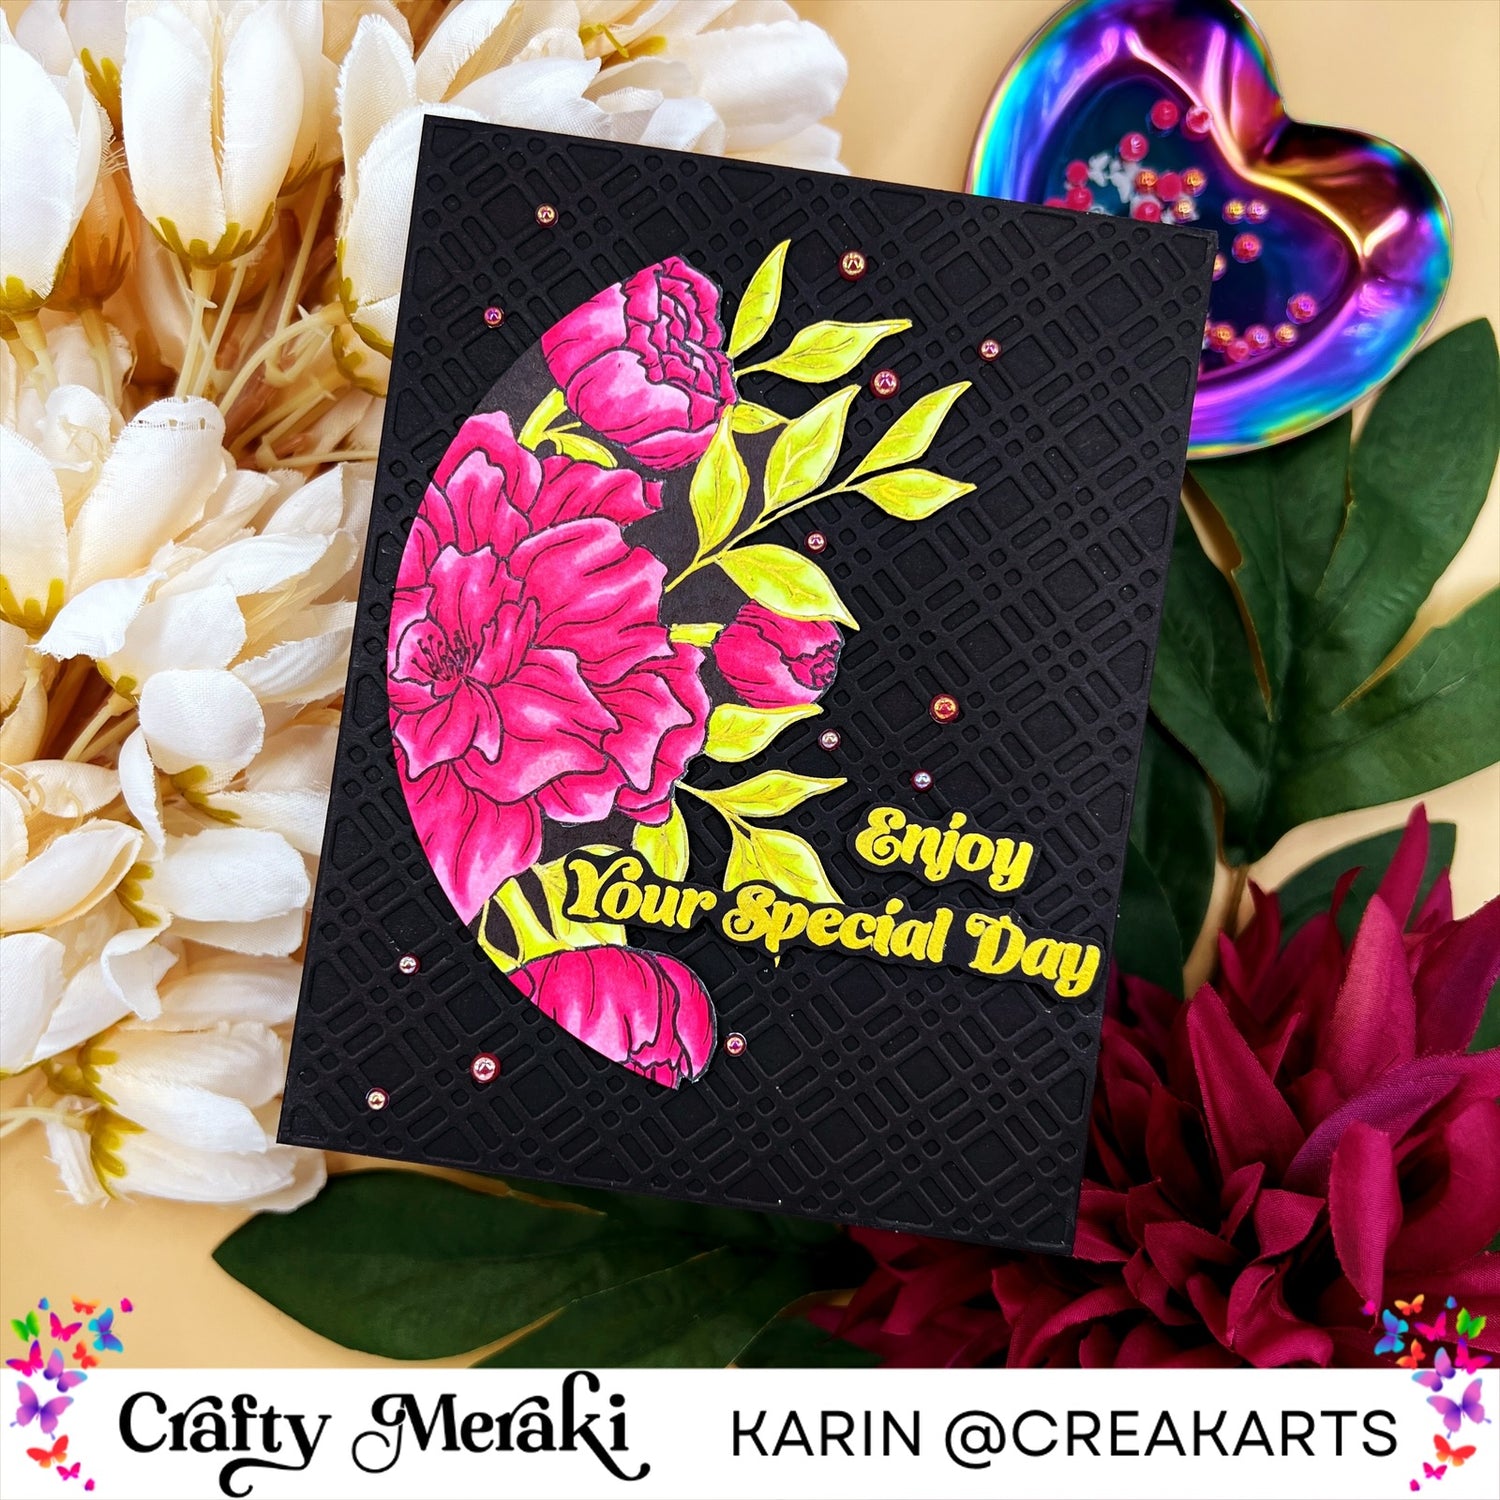
Hi crafty friends! Hope you’re having a great week so far. Today I’m showing you how you can make a black background work in an elegant way.
I start by cutting out a circle of 12cm out of a piece of alcohol marker paper, I use the paper from Ohuhu. I’m using the birthday bouquet stamp and stamp it partially on the circle as you can see on the picture below.

Now it’s time to colour the beautiful flowers and leaves. For the flowers I use Ohuhu markers in RV350 crimson, RV330 strawberry pink, R9 pastel rose. And for the leaves I use G080 limeade, G050 celadon green, G030 crescent yellow. I start by using the darkest colour first and colour the places on the leaves that will have shadow with it. Now I’m going in with the middle colour and blend it on top of the darkest colour and around the edges of the darkest colour. I’m blending the lightest colour over the middle colour and fill in all the white space. I’m going in with all the colours again but now I only blend the edges with each other. I’m colouring the gaps between the flowers and leaves black. The stems of the leaves aren’t visible due to the black ink so I traced them with a gold gel pen. I’m cutting the whole piece out around the edges.


The next step is making a background. I’m using the crafty plaid background A2 die and cutting it out of black cardstock. Tip: if a die doesn’t cut well through the paper turn it around and run it through your machine paper side up. I’m glueing this piece onto a black card base in the same size.

Next step is the sentiment. I’m using sentiments from the birthday bouquet stampset: enjoy and your special day. I’m stamping them onto black cardstock with white ink and when the ink is dry I’m colouring the letters in with a gold gel pen. I’m cutting the sentiments with a scissor.

The coloured piece is placed onto the card with double sided foam tape, I’m using a 1mm thick tape. The sentiments are also added with the same foam tape but the ‘your special day’ piece is partially glued onto the coloured floral piece.

Last step is adding some embellishments. I’m using meraki rosy opal gems in different sizes on the card. Places where I think it needed some sparkle.

That’s all for today! Thanks for stopping by. Hope I could inspire you with this card. Have a lovely Tuesday! Hope to see you next week again.
~ Karin


1 comment
Yvette Williams
Very nice card. The instructions are precise & clear.
Leave a comment
This site is protected by hCaptcha and the hCaptcha Privacy Policy and Terms of Service apply.