Hello everyone !
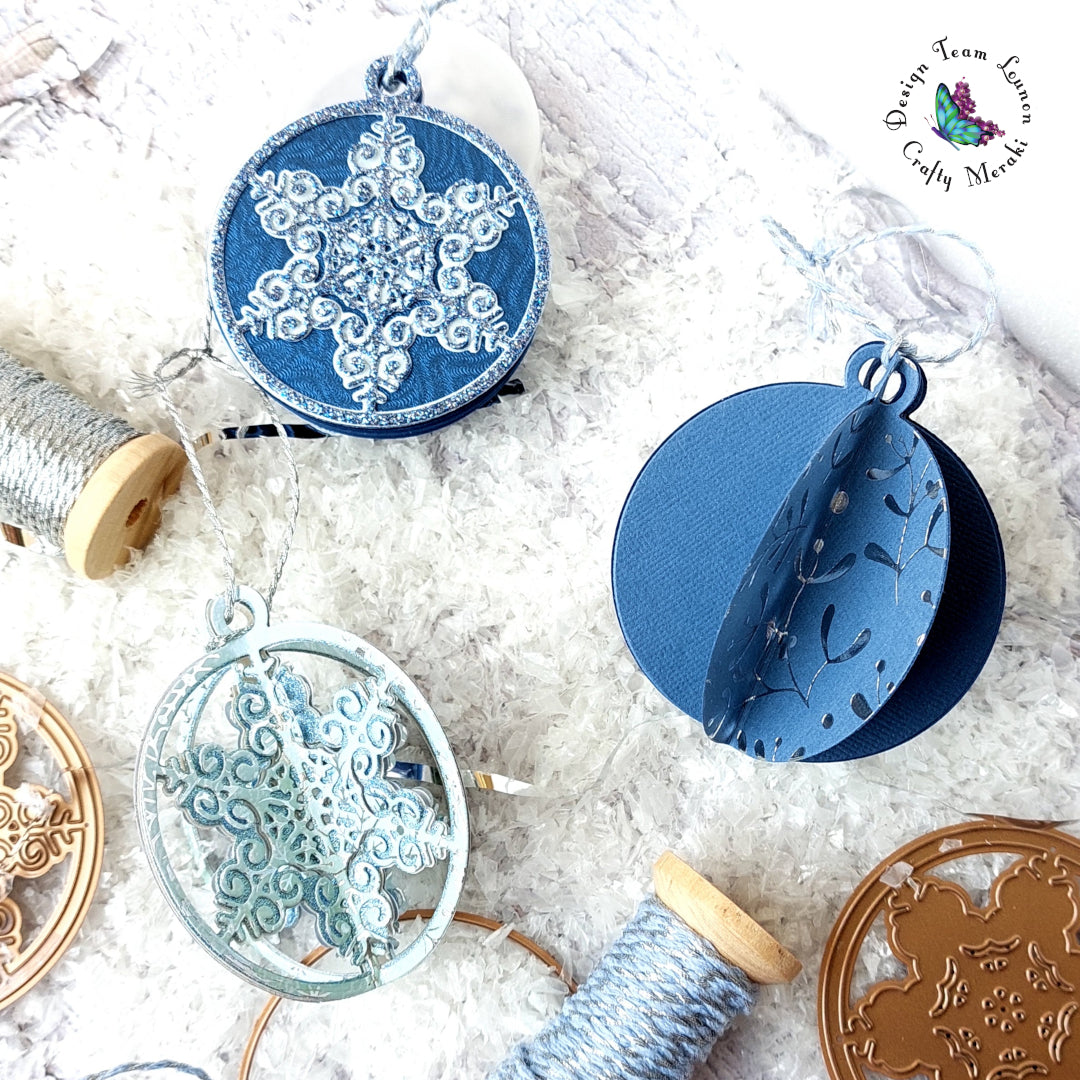
Lounon here ! Want to make your own ornaments this year for the holidays ? Maybe you want to try new crafty activities with your family ? Today, I will show you how to make three different bauble ornaments with the beautiful new Crafty Meraki Tinsel Ornament Layering die set.
The first one is really simple !


I foiled a light and a dark blue panels with my Crafty Meraki Under the Mistletoe foil plate. After that I used the plain die from the set to die cut 8 baubles (4 with the foiled patterns and 4 plain).
I folded them in half and glued them together. I attached a twine at the top of my bauble.

For the second bauble, I used the two other layer dies of the set. I die cut them 4 times each.
On top of the picture you can see the layers 1 and 2. I matted and layered them and glued them together (bottom left). I folded them in two. I did that 4 times and glued them together.
On the bottom right of the picture, you can see half the bauble made with two folded snowflakes.

Once I glued all my parts I added a twine on the top of the bauble.

For the last bauble I used all the layering dies. I cut the 3 layers and matted and layered them. I did that twice (once for each side of the bauble).


For the second bauble, I used the two other layer dies of the set. I die cut them 4 times each.
On top of the picture you can see the layers 1 and 2. I matted and layered them and glued them together (bottom left). I folded them in two. I did that 4 times and glued them together.
On the bottom right of the picture, you can see half the bauble made with two folded snowflakes.

Once I glued all my parts I added a twine on the top of the bauble.

For the last bauble I used all the layering dies. I cut the 3 layers and matted and layered them. I did that twice (once for each side of the bauble).

After that, I used the plain die to cut 3 dark blue baubles (you can see two of them on the picture). I also cut strips of paper and folded them each 0.5".
I cut it into 16 little "springs". I glued 4 springs by layer.
So here is how you glue your parts together : on the reverse of your first layered bauble you glued 4 springs, then one of the plain blue bauble, then 4 springs, then another plain bauble, then 4 springs, the third plain bauble then 4 springs again with the reverse of your second layered bauble.

Et voilà !

May the craft be with you !

Et voilà !

May the craft be with you !


Leave a comment
This site is protected by hCaptcha and the hCaptcha Privacy Policy and Terms of Service apply.