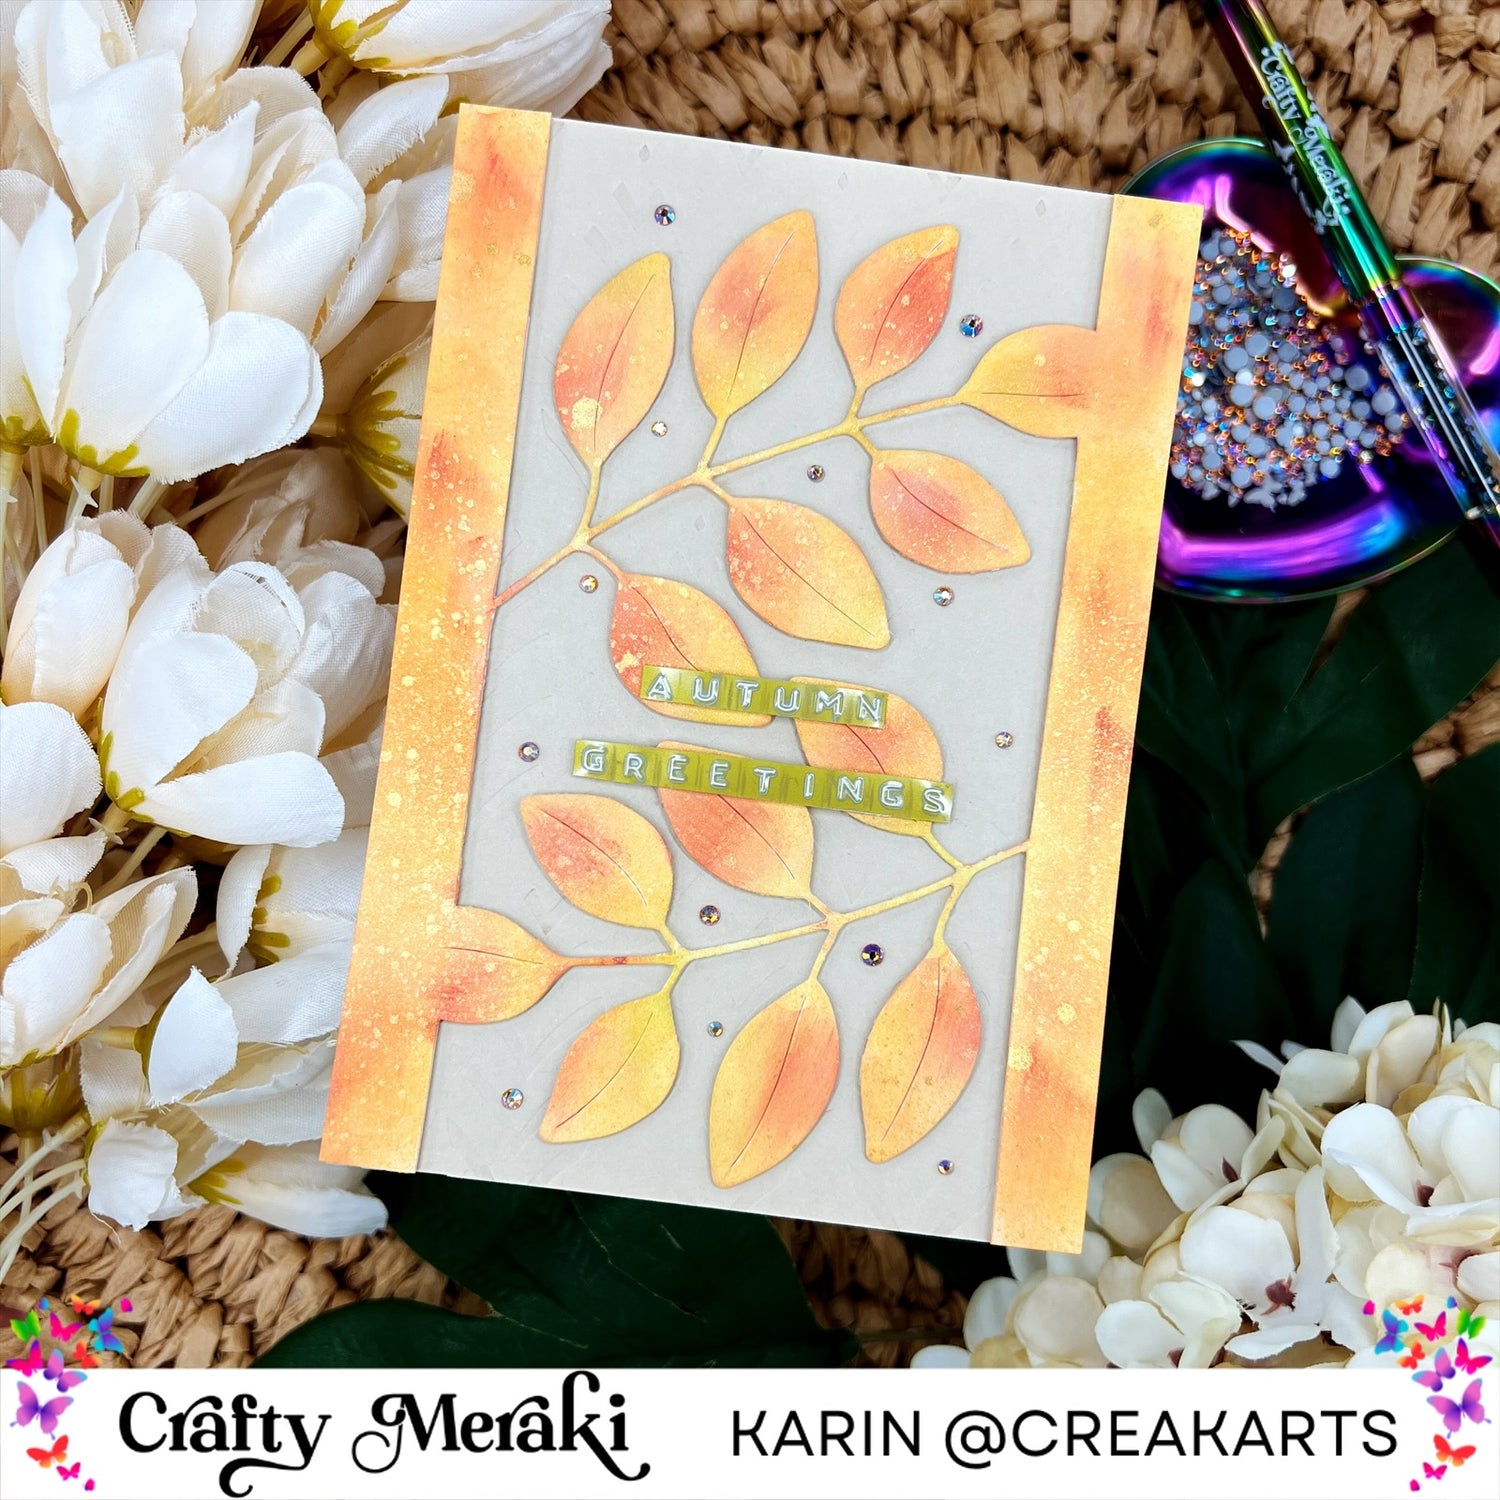
Hello crafty friends! Happy Tuesday! I’m (Karin @creakarts) here again with a new blog. This weeks theme is all about cutting die techniques. I’m going to show you how you can partial die cut.


I start by cutting a white piece of cardstock in the same size as the card base I want to use. For this card it’s 10,5x15cm. I also cut a sand coloured piece of cardstock in this size, this will be used as the background.
I’m using the biggest laurel leaf para-die from the set for this card. I’m laying it on the top half of the white cardstock in horizontal direction. I tape it down on the cardstock to be sure it’ll not move when I run it trough my die cutting machine. Now I take a die cutting plate from my mini die cutting machine en place it in the middle on top of the leaf die. I’m also tape the plate down onto the cardstock so it’ll stay where it is. Then I run it through my die cutting machine. Take everything off and place the leaf die in opposite direction, horizontally on the bottom part of the cardstock. I do the exact same thing now as before. Placing the mini plate in the middle secure everything with tape and run it through my machine.

As you can see the middle side parts need to be cut off. So I take my paper cutting knife a magnetic mat and a magnetic ruler to cut all the straight lines. Be careful with the stems of the leaf dies, they’re very small en fragile. Now the partial die cut piece is done I start with colouring it. I’m using my ink dabbers to create a lovely mixed coloured look. I’m using distress oxides in the following colours: carved pumpkin, scattered straw, rusty hinge. I’m starting with the lightest colour, scattered straw, and dab the whole piece with it. Then I’m going in with carved pumpkin and dab it randomly on the paper, then I’m going in with rusty hinge and do the same thing. To add a bit more interest to the leaves I’m going to use two more colours from concord&9th, stardust and cayenne. For these two colours I’m using a mini ink blending tool and just add the colours randomly. I like shimmer so I’m going to spray the whole piece with distress spritz fossiled amber.

Now the top is finished it’s time for the background. I’m using this sand colour heavy cardstock so I can press the Sahara symphony Meraki shimmer plate print into it. I’m using my betterpress to get the print into the cardstock. If you don’t have a betterpress you can also place it between the plates of your die cutting machine and run it through the machine. 


I’m adding 1mm thick double sided foam tape onto the back of the partial die cut piece and place it on top of the sand colour background.

There’s already a lot of shimmer going on but I want some more so I’m adding some sparkle twilight treasure illusion embellishments. I only wanted to add a small sentiment to this card because I didn’t want to cover it. So i used my dymo label writer and gold label to add the sentiment: “autumn greetings”. I think this is a perfect fall card.

I hope this card inspired you. See you next Tuesday!
~ Karin


Leave a comment
This site is protected by hCaptcha and the hCaptcha Privacy Policy and Terms of Service apply.